
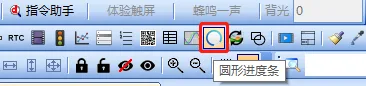
What is a circular progress bar control?
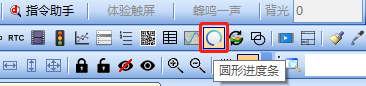
As users' expectations for human-computer interaction experiences continue to rise, the application scenarios for serial port displays are becoming increasingly widespread. Currently, conventional rectangular progress bars are no longer suitable for some special application scenarios. Therefore, our company has newly launched a circular progress bar control in software. It allows for the setting of cool images as backgrounds to enhance the display effect, and through the free selection of starting and ending angles, the parameter values can be visually displayed.
This routine introduces the application of the circular progress bar control, implementing the sliding circular progress bar control to change the temperature value.
Scope of application: F-type and basic types are not supported.
Routine download link: "Application of Circular Progress Bar Control"] (click to jump)
15.1 Description of circular progress bar control properties.
The property window of the circular progress bar control is shown below.
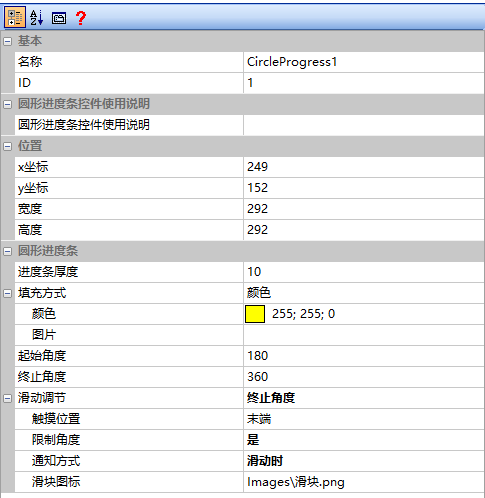
Progress bar width
Sets the thickness of the progress bar.
Filling method
The style of the progress bar can be selected from color or image, as shown below
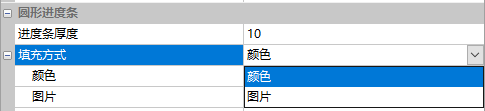
- [Color]: Pure color display.
- [Image]: When using images, you can design the style of the progress bar by yourself
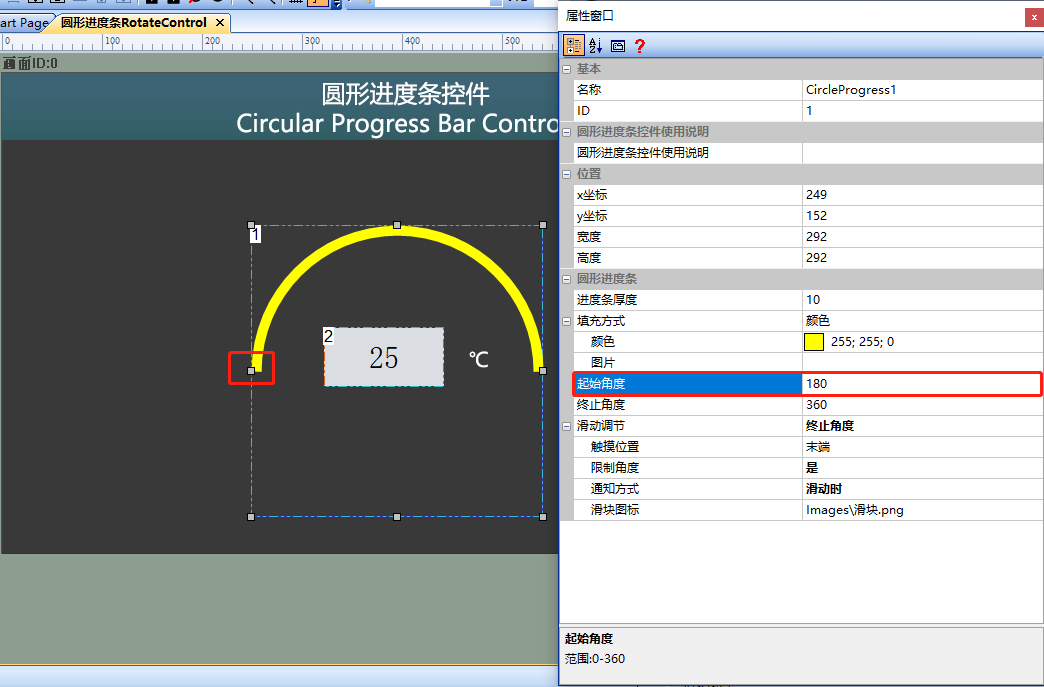
Starting angle
The starting position of the progress bar (for circular progress bars, the value is an angle, with a maximum angle of 359, and 360 degrees is considered as 0 degrees), as shown below
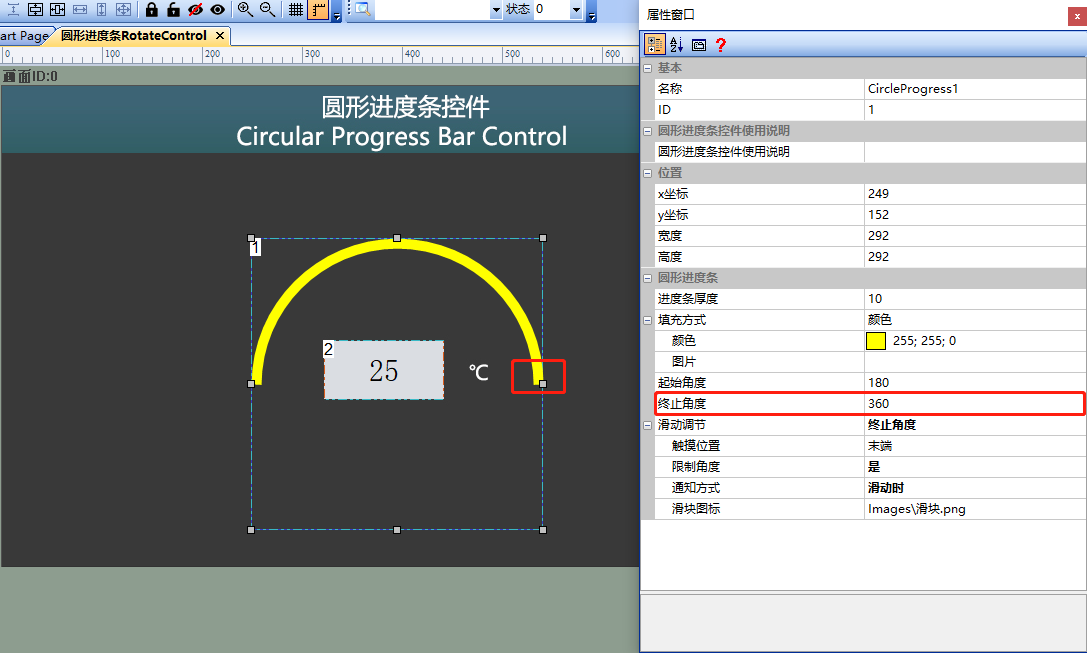
Ending angle
The ending position of the circular progress bar, as shown below
Sliding adjustment
There are four types of adjustment methods for the circular progress bar control: disabled, starting angle, ending angle, or both angles, as shown below
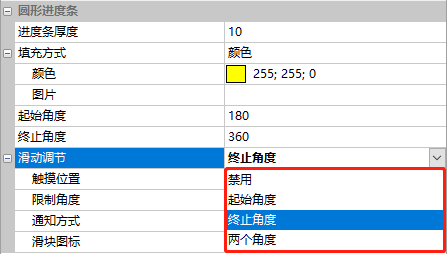
- [Prohibition]: Do not adjust by touch
- [Termination angle]: Drag the progress bar to the termination position
- [Starting angle]: Touch the starting position of the progress bar and drag it
- [Two perspectives]: The progress bar can be dragged by touching either end
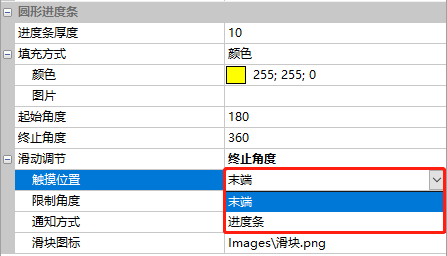
Touch Position
The touch position of the circular progress bar control, which can be selected as either the end or the progress bar, as shown below
[End]: Only by clicking or sliding the end of the circular progress bar can the value be changed
[Progress Bar]: Click or slide the progress bar to change the value
Limit Angle
The limit angle of the circular progress bar control, which can be selected as Yes or No, as shown below
[Yes]: The drag range can only be between the starting angle and the ending angle;
[No]: There is no restriction on angle, and you can slide freely.
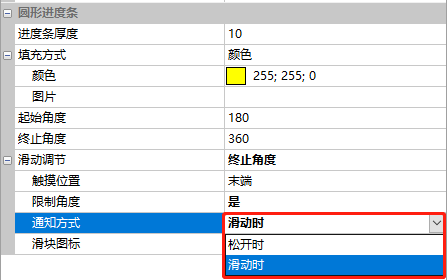
Notification Method
The notification method of the circular progress bar control can be selected as either upon release or during sliding, as shown below
Upon Release: The instruction is not issued while dragging the progress bar, but only when it is released;
When sliding: Issue commands while dragging the progress bar.
Slider icon
You can add a slider style. It is recommended to use a fully transparent png format.
15.2 Circular progress bar control
The screen for the "Circular Progress Bar Control" introduces the application of the circular progress bar control in serial port displays.
Screen configuration
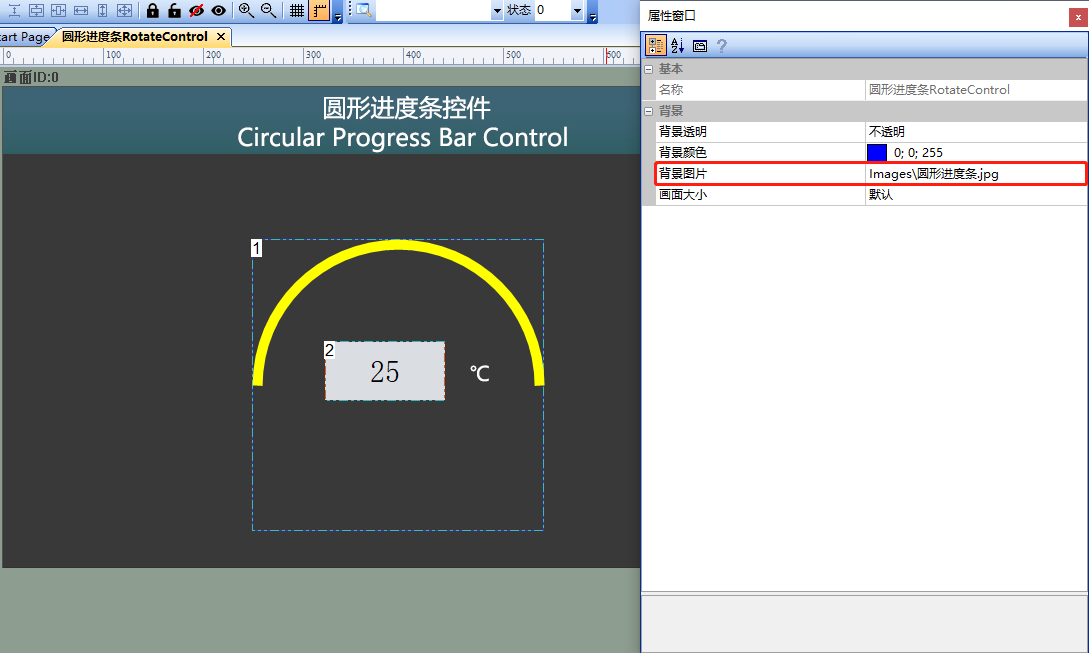
On the "Circular Progress Bar Control" screen, import the corresponding artwork image for the "Background Image" and add one circular progress bar control (Control ID: 1) and one text control (Control ID: 2) as shown below
Property configuration
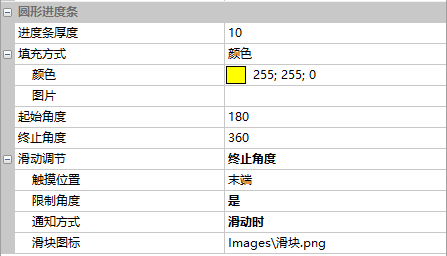
In the property window of the circular progress bar control, set the "Progress Bar Thickness" to "10", "Fill Method" to "Color", "Color" to "Yellow", "Starting Angle" to "180", "Ending Angle" to "360", "Slide Adjustment" to "Ending Angle", "Touch Position" to "End", "Limit Angle" to "Yes", "Notification Method" to "When sliding", and "Slider Icon" to the path of the icon. The property configuration is shown below.
LUA script
Open the LUA editor
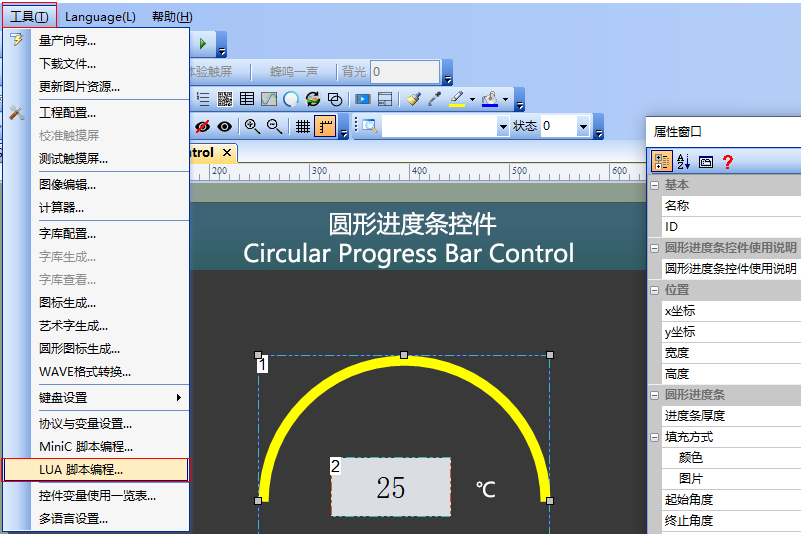
The upper computer VisualTFT has integrated a LUA development and compilation environment. Click the "Tools" menu bar and select "LUA Editor", as shown below
API Function Description
Dacai Technology provides a rich set of API interface functions for LUA scripts. Specific functions can be found in the document "IoT-Type LUA Script API". The relevant interface functions involved in this tutorial document
- include the function set_value(screen, control, value)
Note: Specify the value of a control in a certain screen:
Parameters: screen - target screen ID
control - target control ID
value - target control value
- Function on_control_notify(screen, control, value)
Note: This callback function is executed when a button control is clicked, a text control is modified, or a slider is adjusted
Parameters: screen - target screen ID
control - target control ID
value - target control value
Scripting
Using LUA script, associate the value of the circular progress bar with the text control. When sliding the circular progress bar control, the system will call the callback function on_control_notify and pass the value of the circular progress bar control into the function to associate it with the value of the text control. The program is shown below
--用户通过触摸修改控件后,执行此回调函数。
--点击按钮控件,修改文本控件、修改滑动条都会触发此事件。
function on_control_notify(screen,control,value)
  local Temperature = 0
  if screen == 0 and control == 1
  then
    Temperature = value & 0xFFFF
    Temperature = (Temperature - 180)/5
    set_value (0,2,Temperature)
  end
end
If the LUA script sets the value of the circular progress bar, simply call the set_value() function. Assuming the starting angle is 180 and the ending angle is 270, it would be: set_value (0,1,(180 << 16)|270)
External MCU control
If you do not want to use LUA script to achieve the effect of the above routine, you can control the circular progress bar control through the user's microcontroller. For details, refer to the function declarations in the him.dever.h file and the definitions in the him.dever.c file in the development package Keil program.
Slide the end of the circular progress bar control, and issue a command through the serial port screen. After the MCU parses the command, it will call the NotifyAngleProgress function and pass the parsed circular progress bar value into the function, where the value of the text control is set. The program is shown below
Note: The control value is 4 bytes, where the first two bytes are the "starting angle" and the last two bytes are the "ending angle". If you set the starting angle of the circular progress bar to 180 degrees and the ending angle to 270 degrees, the command would be as follows: EE B1 10 00 00 00 01 00 B4 01 0E FF FC FF FF
| Frame header | Configuration command | Set control | Screen ID | Control ID | Starting angle__H | Starting angle_L | Ending angle_H | Ending angle_L | Frame end |
|---|---|---|---|---|---|---|---|---|---|
| EE | B1 | 10 | 00 00 | 00 01 | 00 | B4 | 01 | 0E | FF FC FF FF |
/**********************************************************************
** Function name   :  NotifyAngleProgress
** Descriptions    :  圆形进度条控件通知
** input parameters:  screen_id:  画面ID
**                    control_id:  控件ID
**                    value: 圆形进度条的控件值
** output parameters: 无
** Returned value   : 无
*********************************************************************/
void NotifyAngleProgress(uint16 screen_id, uint16 control_id, uint32 value)

{
    ……
    float TextVlaue = 0;
    if(screen_id == 0 && control_id == 1 ){
        TextVlaue = value & 0xFFFF;
        TextVlaue = (TextVlaue – 180)/5;
        SetTextInt32(0, 2, TextVlaue, 1, 1);
     }
    ……
}
If MCU control of the circular progress bar control is required, the code is as follows;
/**********************************************************************
** Function name:    void Set_AngleProgress(uint16 screen_id,
**                                          uint16 control_id,
**                                          uint16 start,
**                                          uint16 end)
** Descriptions    : 设置圆形进度条
** input parameters:  screen_id:  画面ID
**                    control_id: 控件ID
**                    start     : 起始角度
**                    end       : 终止角度
** output parameters  : 无
** Returned value     : 无
*********************************************************************/
{
    ……
    Set_AngleProgress(0,1,180,360);//设置画面0、控件1圆形进度条的起始角度为180、终止角度为360
    ……
}
Run preview
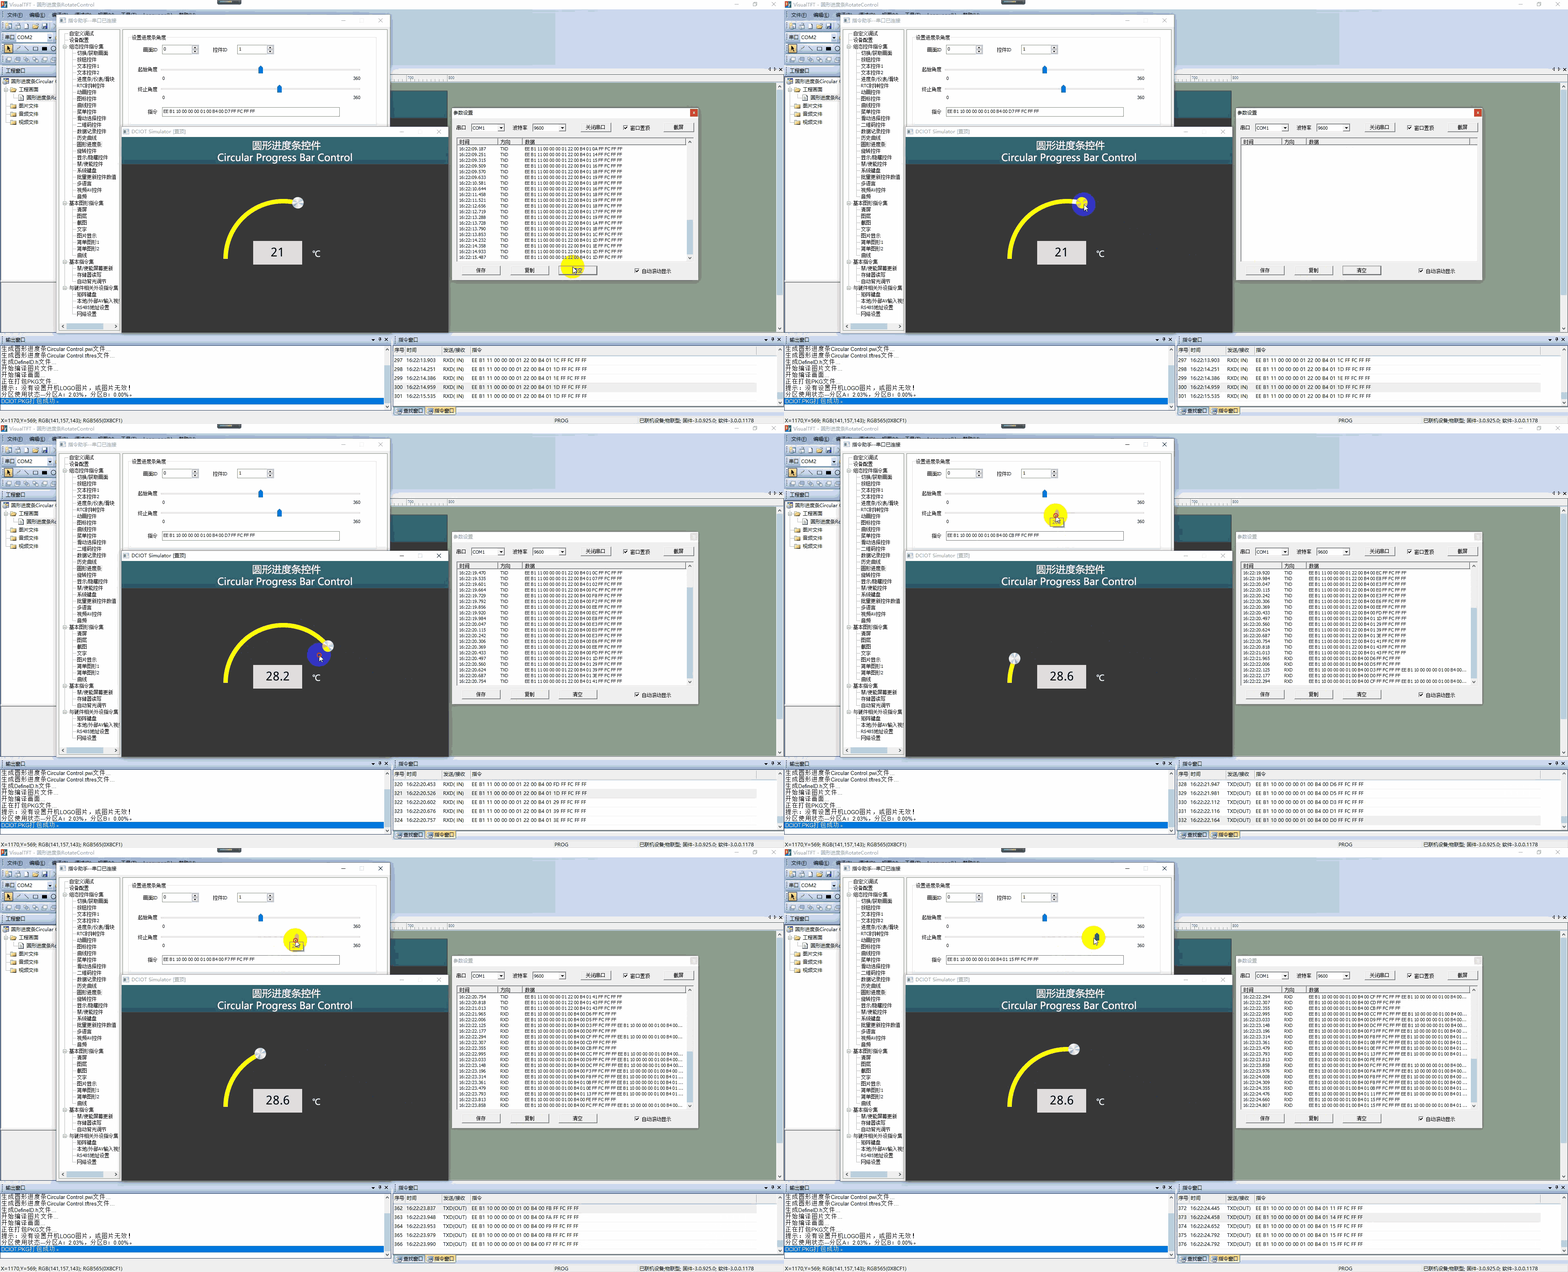
Run the virtual screen, drag the end (slider icon) of the circular progress bar control (control ID: 1) in the screen, and the screen will issue a command. At the same time, the numerical display of the associated text control (control ID: 2) will be updated synchronously. The VisualTFT software and the virtual screen are connected using a "virtual serial port pair". Open the [Command Assistant], select [Circular Progress Bar] on the left navigation bar, and set the command parameters in the "Set Progress Bar Angle" area. As in the example routine, control the circular progress bar control (control ID: 1) and text control (control ID: 2) in the screen, fill in the corresponding parameters, and click "Send". Then, the corresponding control on the virtual screen displays the corresponding status, and the operational effect is as follows


Leave a Reply