
The gallery is the central repository for all control images in VisualHMI. Items such as bit status lights, multi-state indicator lights, animated controls, and buttons, which require icon replacement, are all managed within the gallery. This article clarifies the concept of gallery management and "multi-frame icons" - multi-frame is one of the biggest differences between HMI and ordinary configuration software.
1. What is a gallery?
The images used by all VisualHMI controls are managed in the menu [Project] → [Image Library], and are categorized into two types:
- Project Gallery: user-defined images that are saved with the project
- System Gallery: system-provided images of commonly used buttons, switches, progress bars, keyboards, etc.
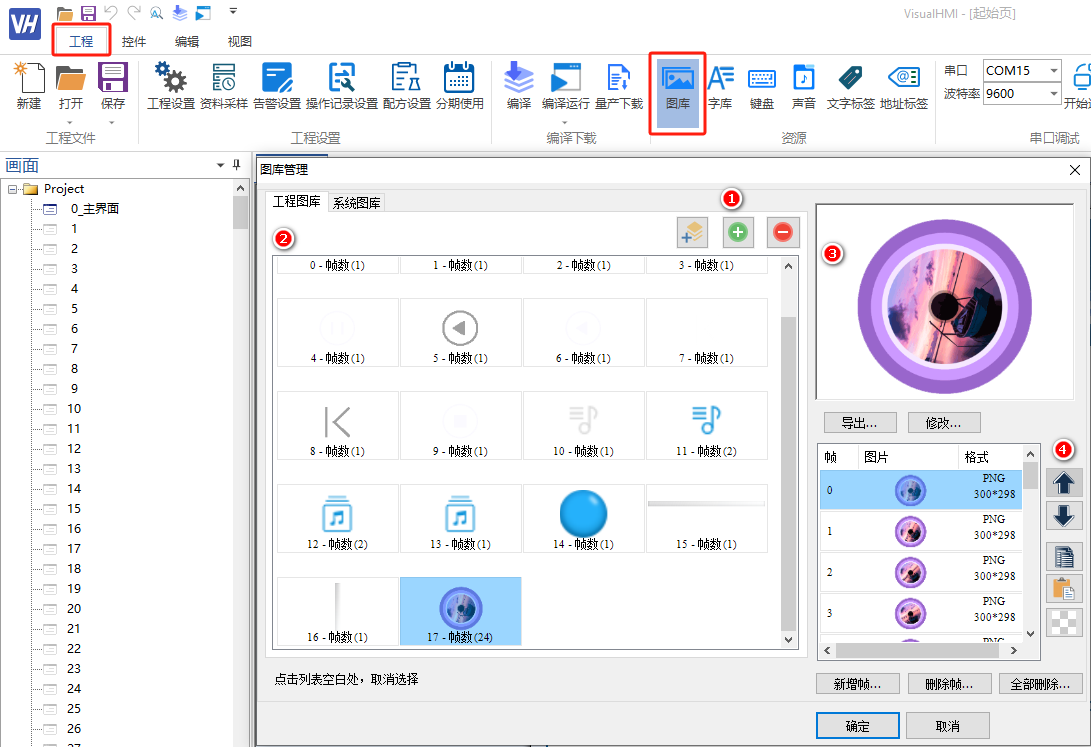
The gallery supportsfour formats: bmp, svg, png, jpg.The gallery interface is divided into four areas:
The gallery interface is divided into four areas:
- Area 1: Add, delete icon indexes
- Area 2: Icon Index List (each index can contain multiple frames)
- Area 3: Preview each frame of the selected index
- Area 4: Edit Frames - Insert, Delete, Export, Modify (Replace), Copy, Move
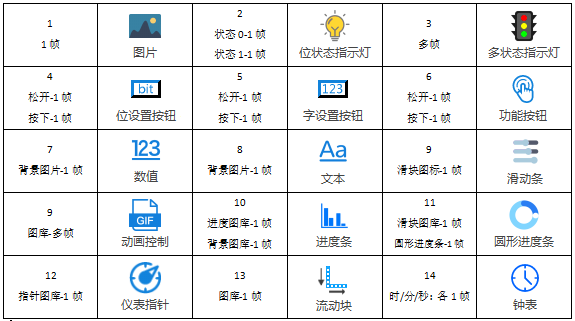
Currently, a total of 15 controls for adding image libraries are supported. Specific image properties can be viewed in the control property bar.
2. Key Concepts: Icon Index and Frame
An icon indexis a "container for icons", where one index can containmultiple framesof images. Multiple-frame icons are commonly used for:
- Multi-state indicator lights: displaying different frames for different states (e.g., running = green, stopped = gray, fault = red)
- Animation controls: Play frames in sequence to create an animation
Display format such as "1-frame number (8)": 1 is the index number, and 8 is 8 frames under that index.
3. Create icons
3.1 Add multi-frame icons
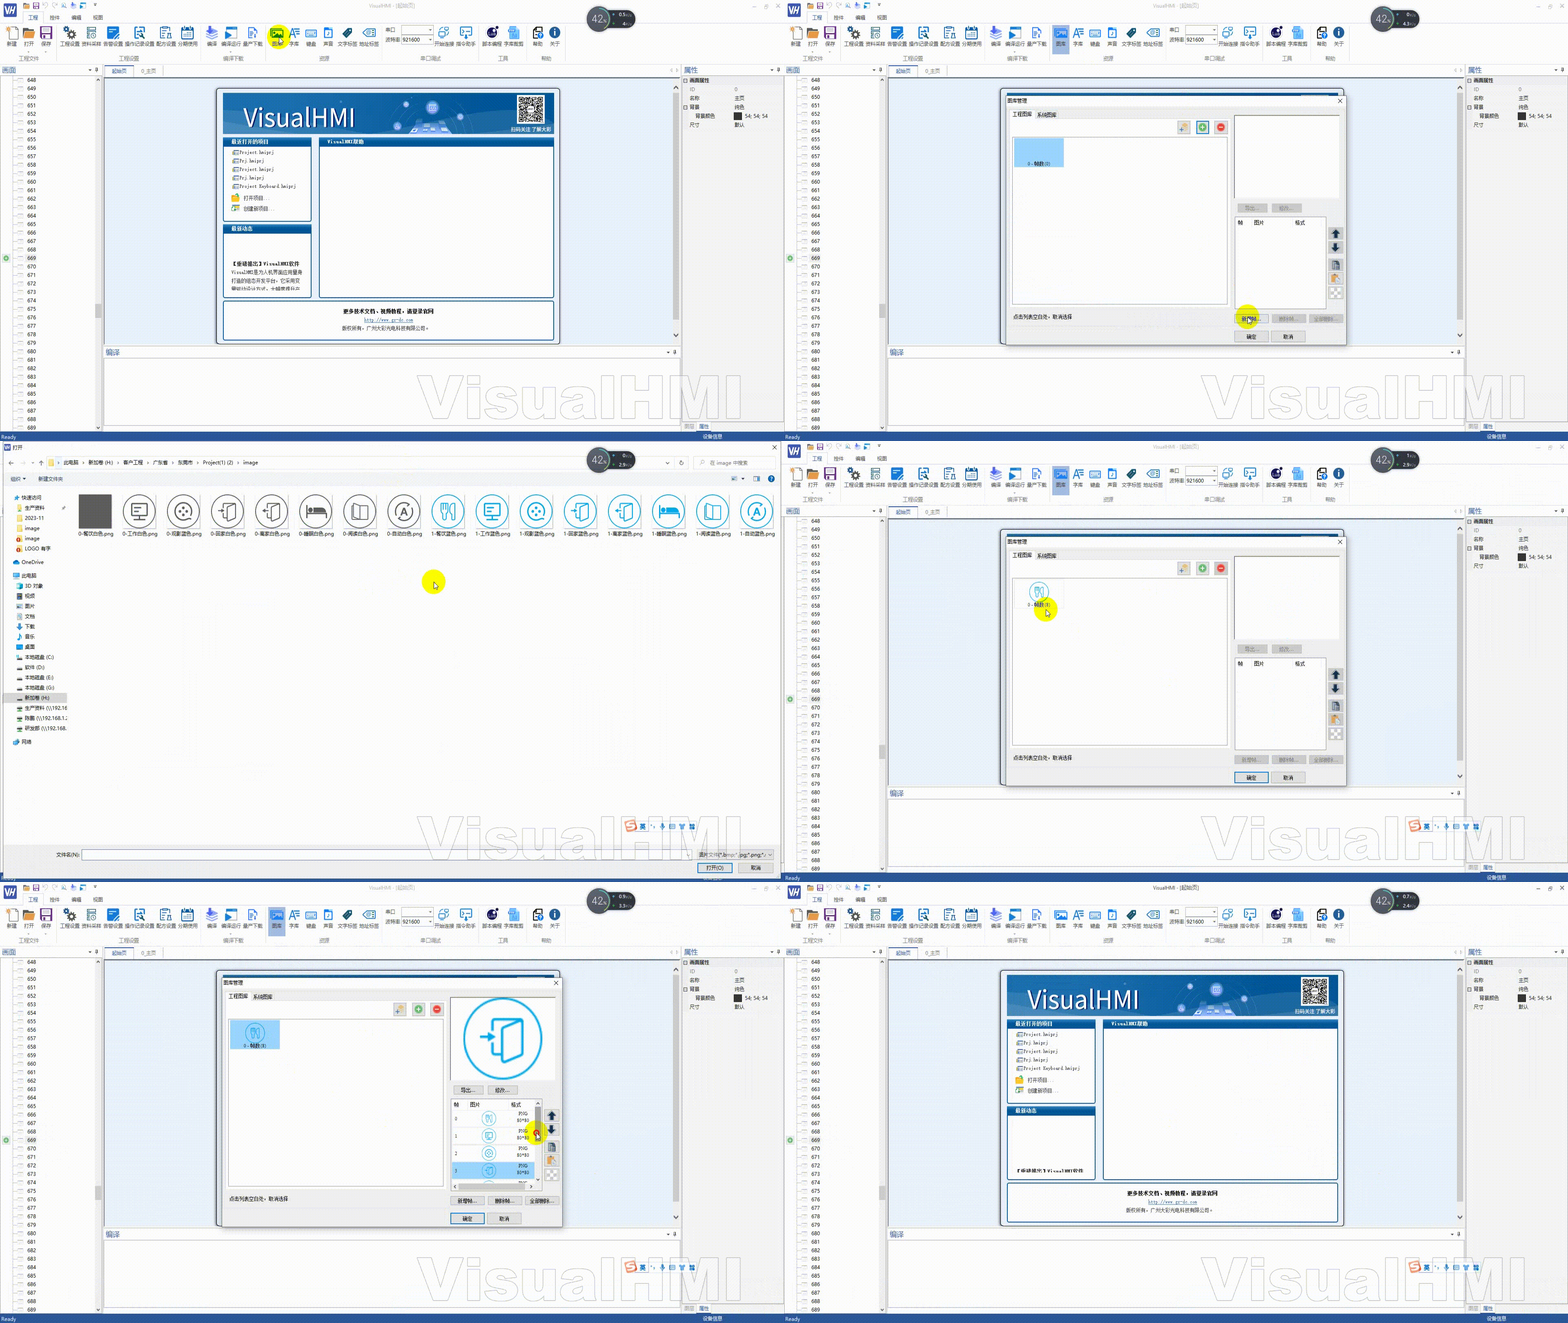
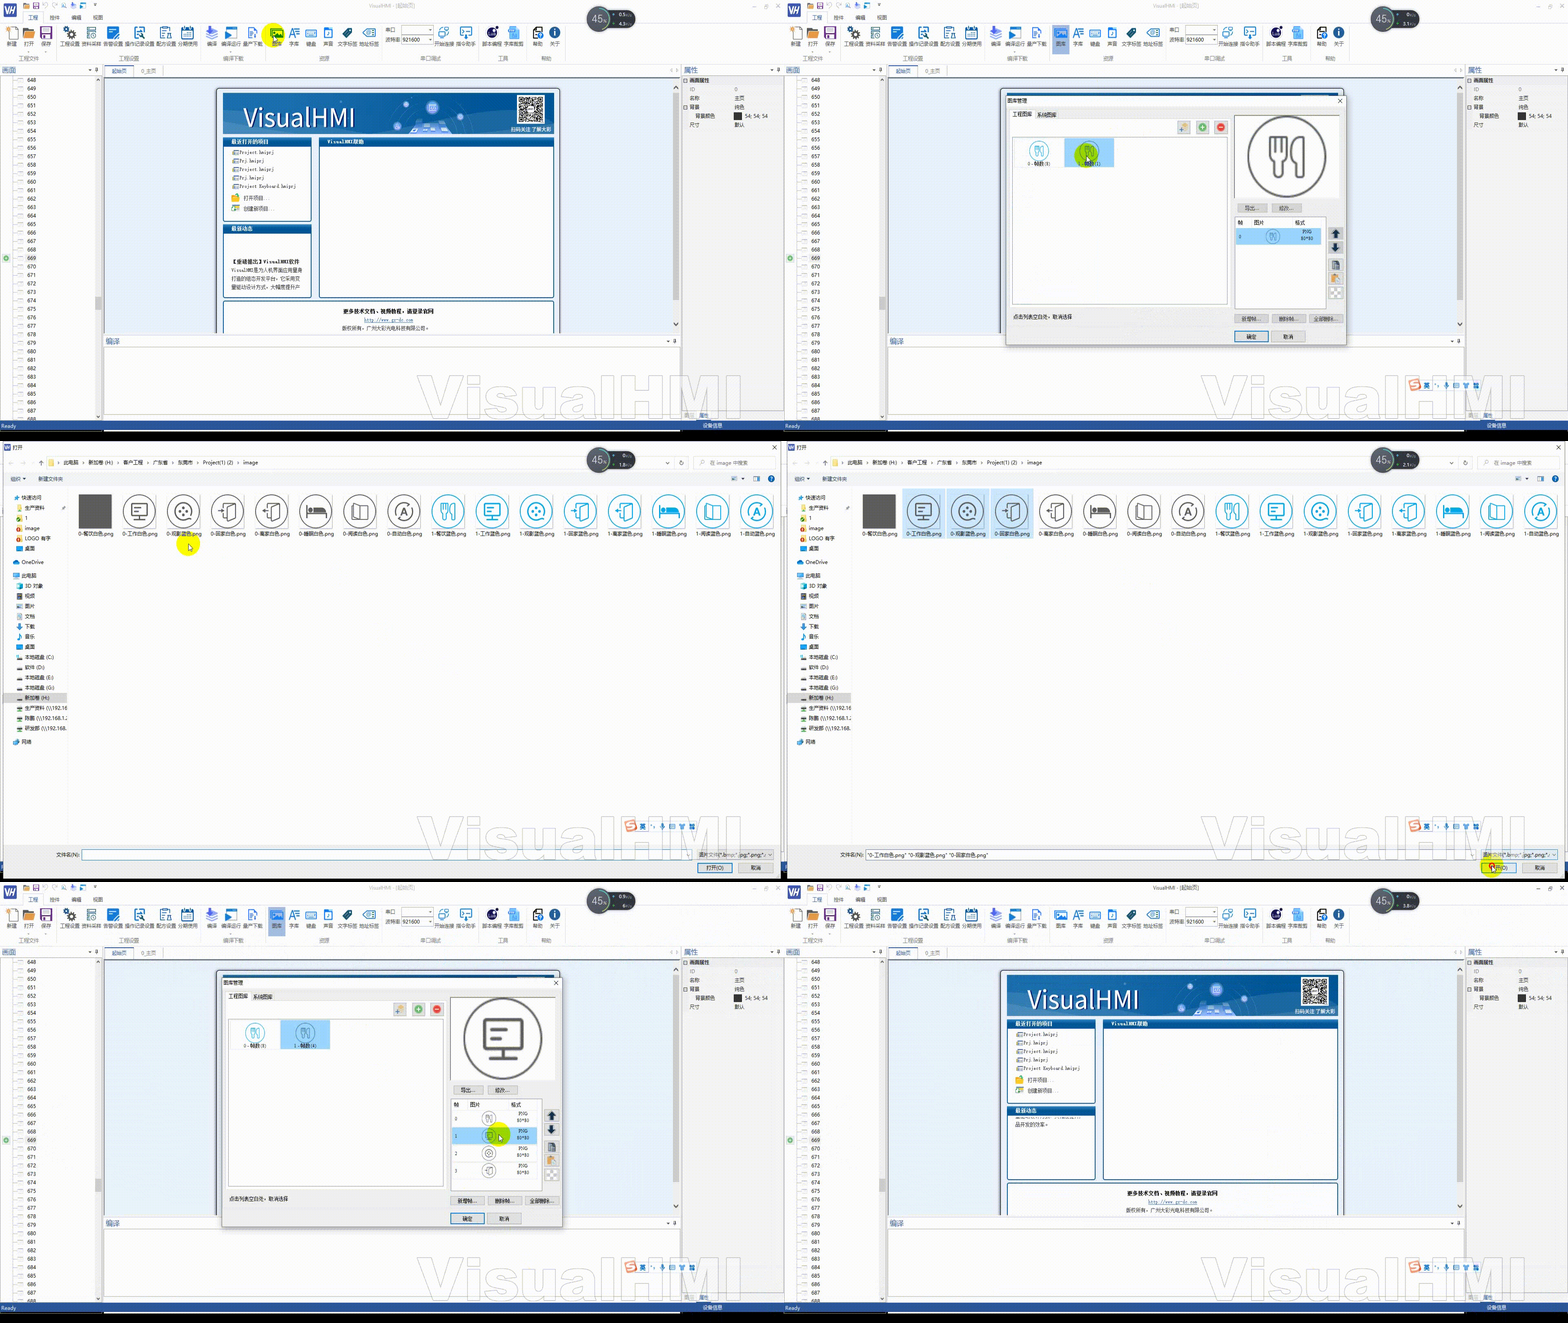
Click [+] to generate an icon index of "0-frame number (0)" → Click [Add Frame] → Select image files. If 8 images are added, index 0 will have 8 frames.
3.2 Batch addition (single-frame icons)
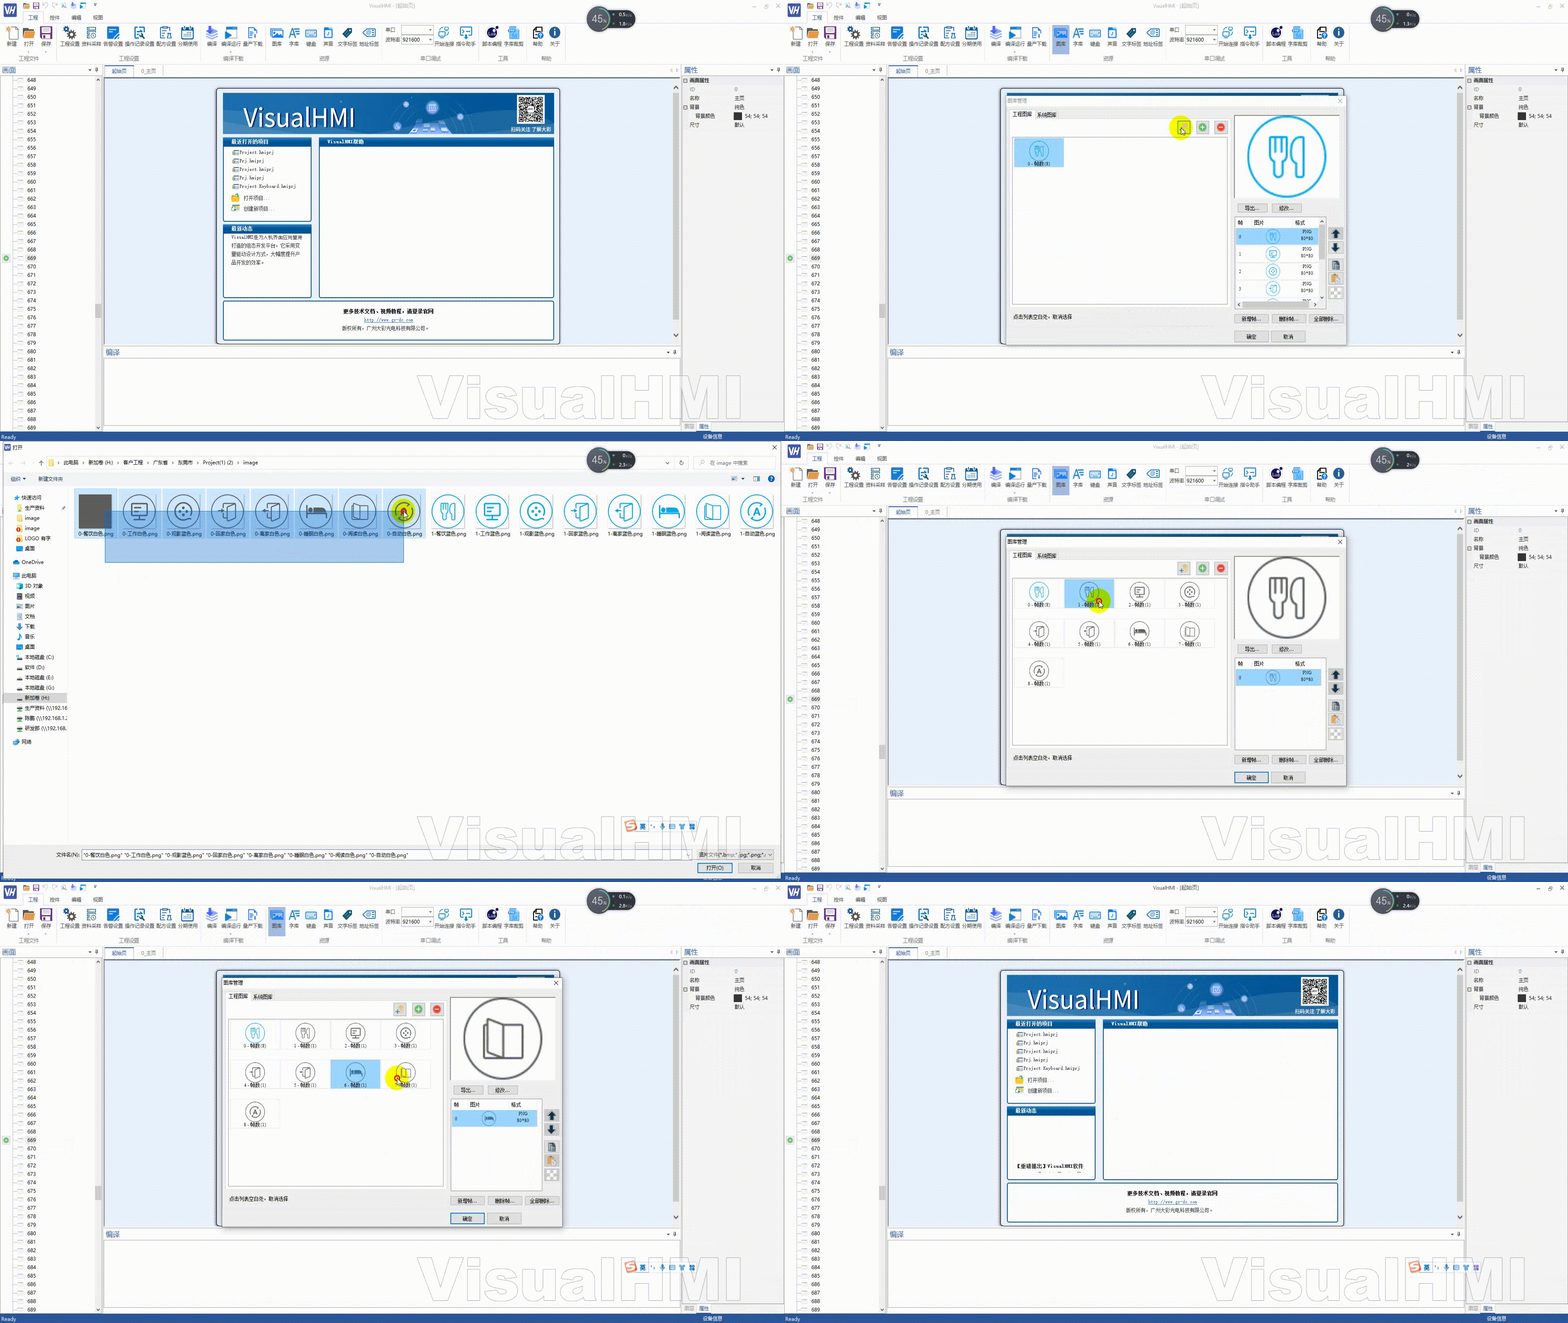
Click [Batch Add] → Select multiple UI image files → Generate an independent index (1~8) for each file. Suitable for importing a batch of button icons at once.
4. Frame editing operations
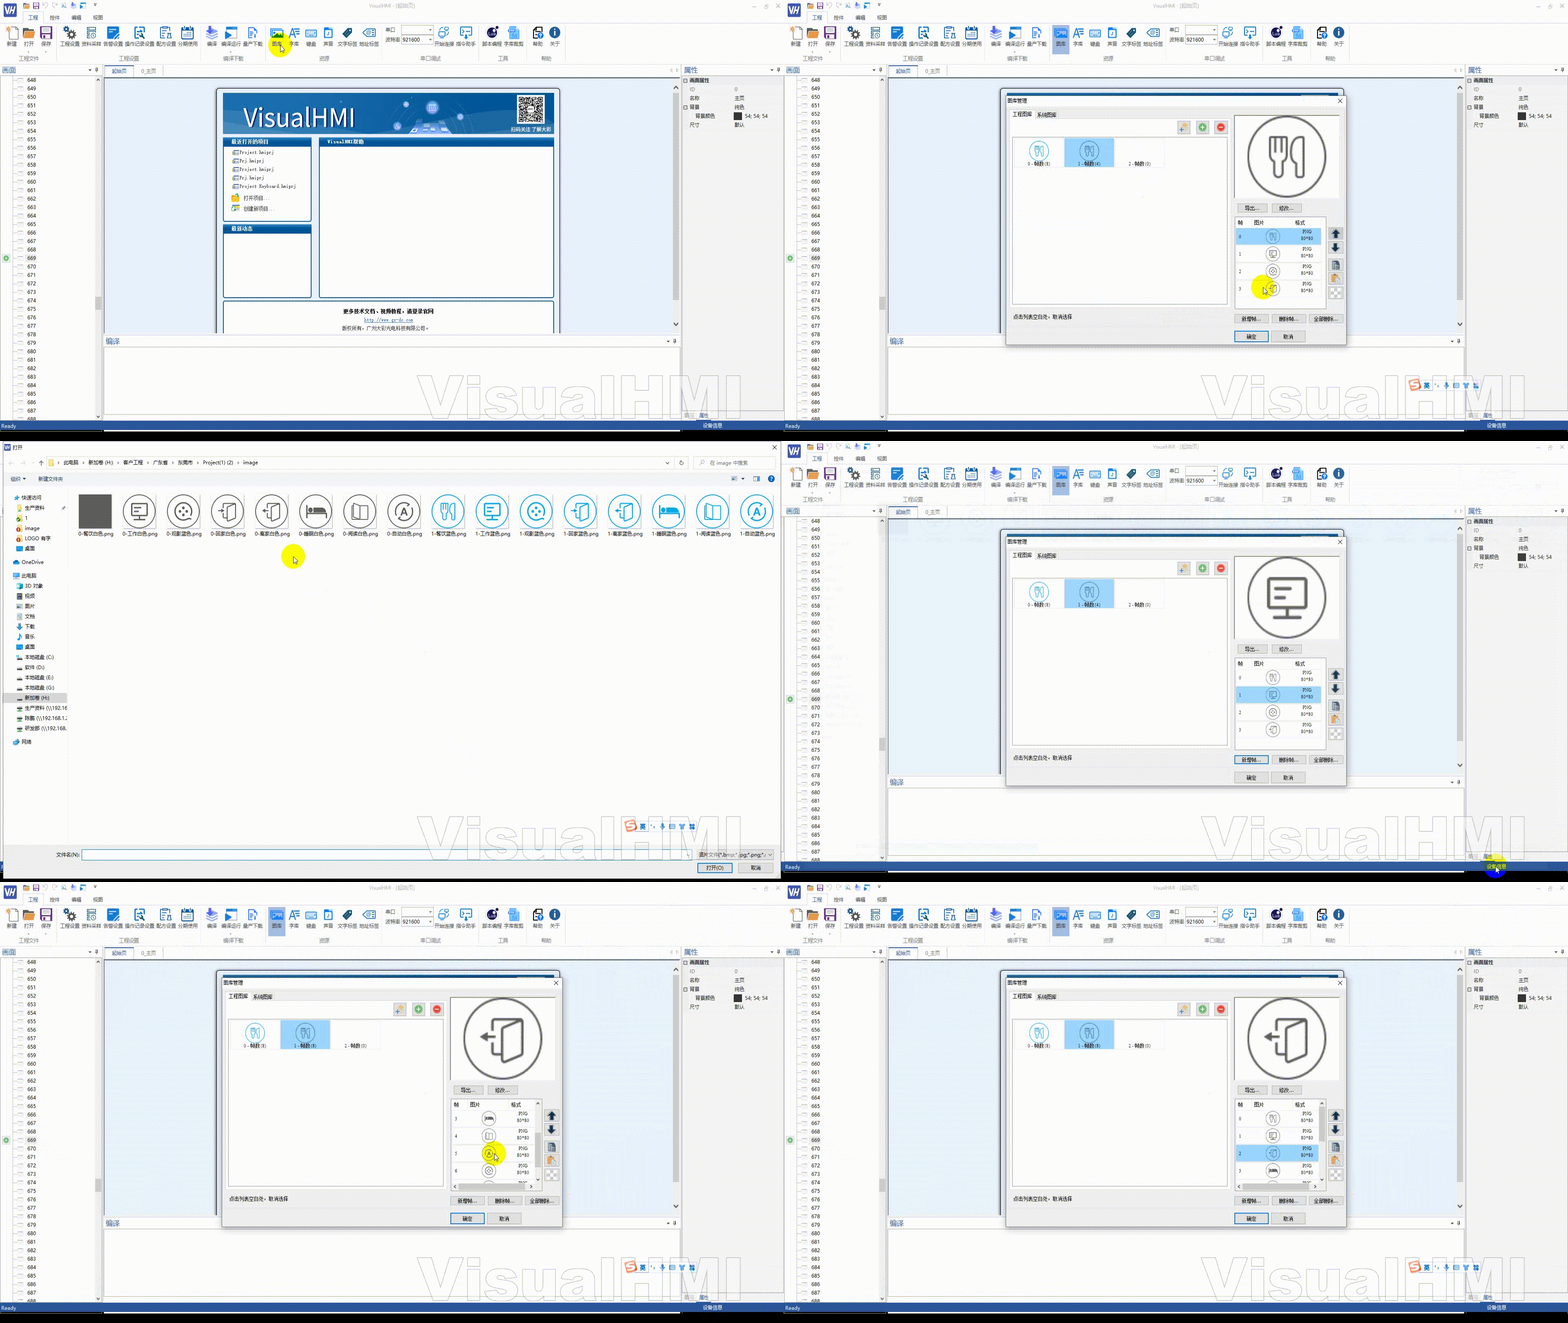
- Add frames: Select index → Add frame number → Select image, and the new frame is appended at the end
- Insert frames: Select a frame → Add frame number, and the new frame is inserted after that frame
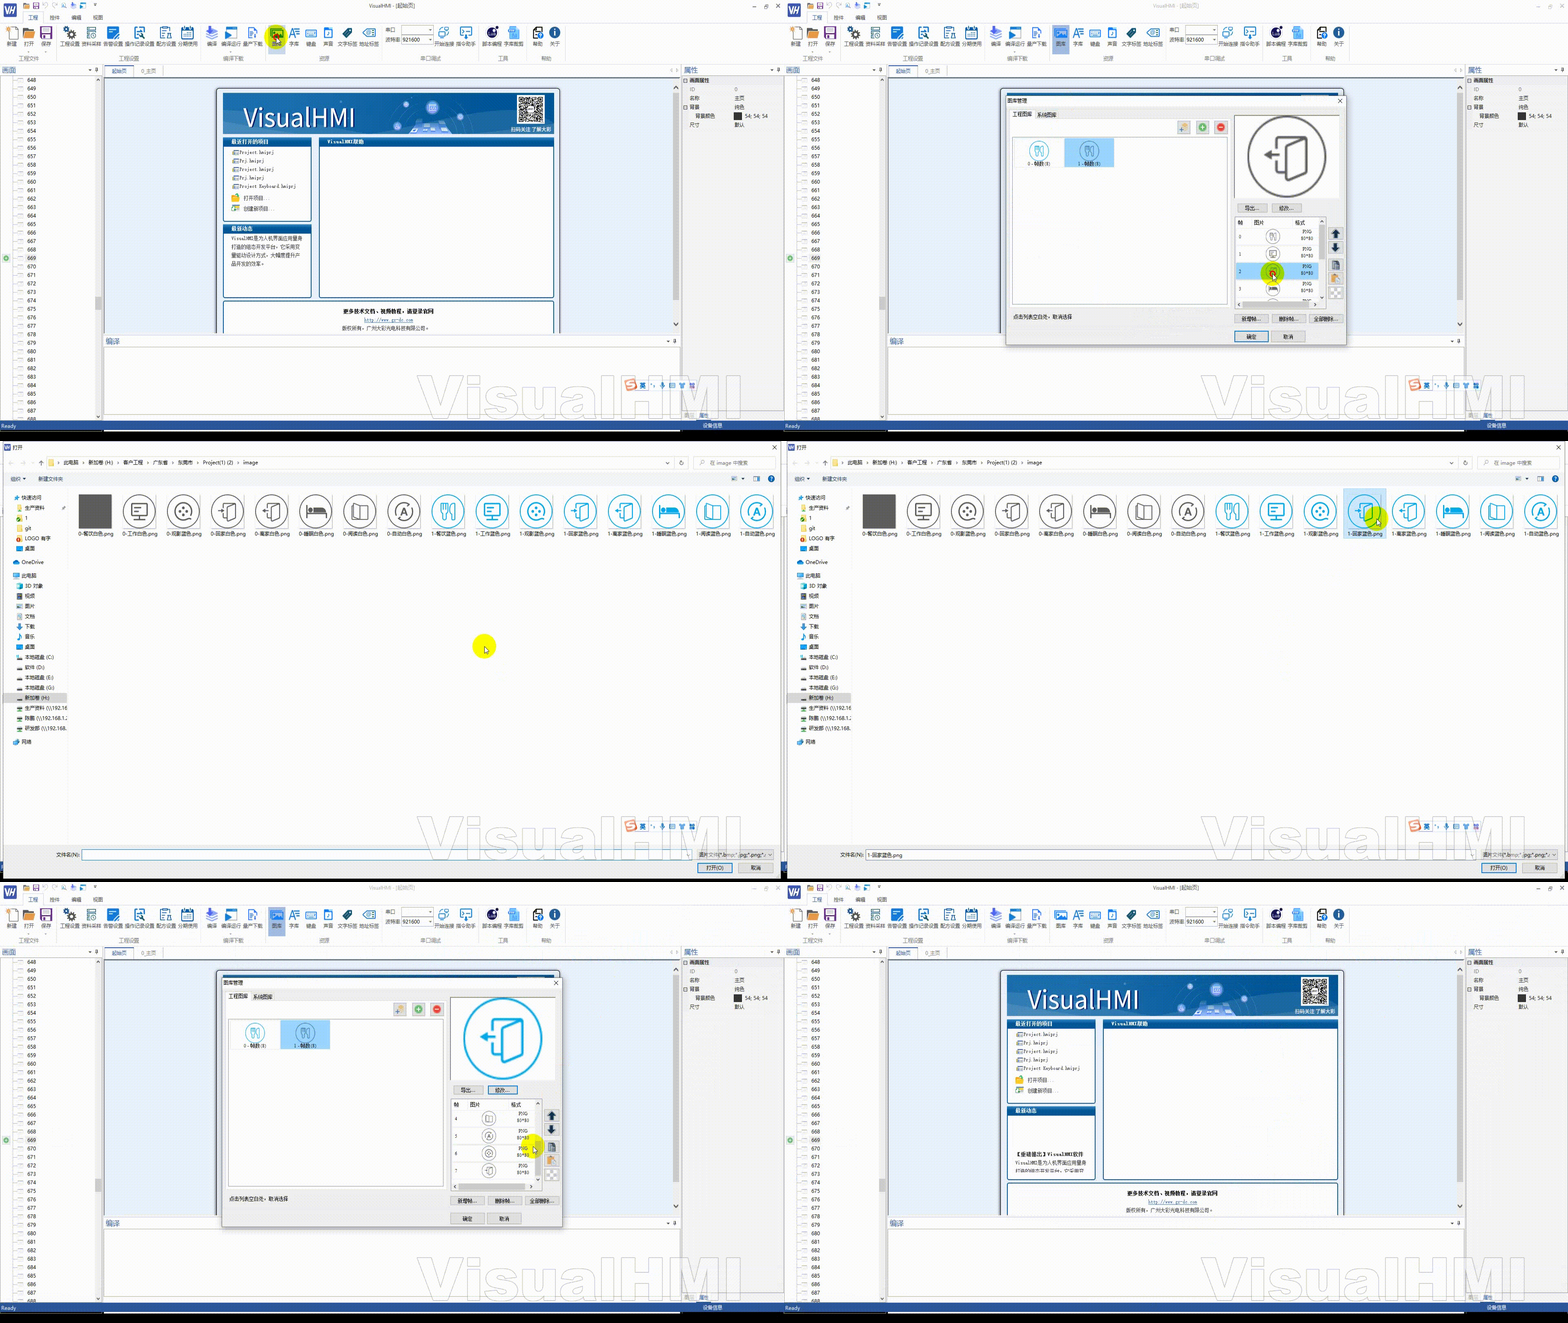
- Modify/Replace Frame: Select a frame → Modify → Select a new file, replace in place
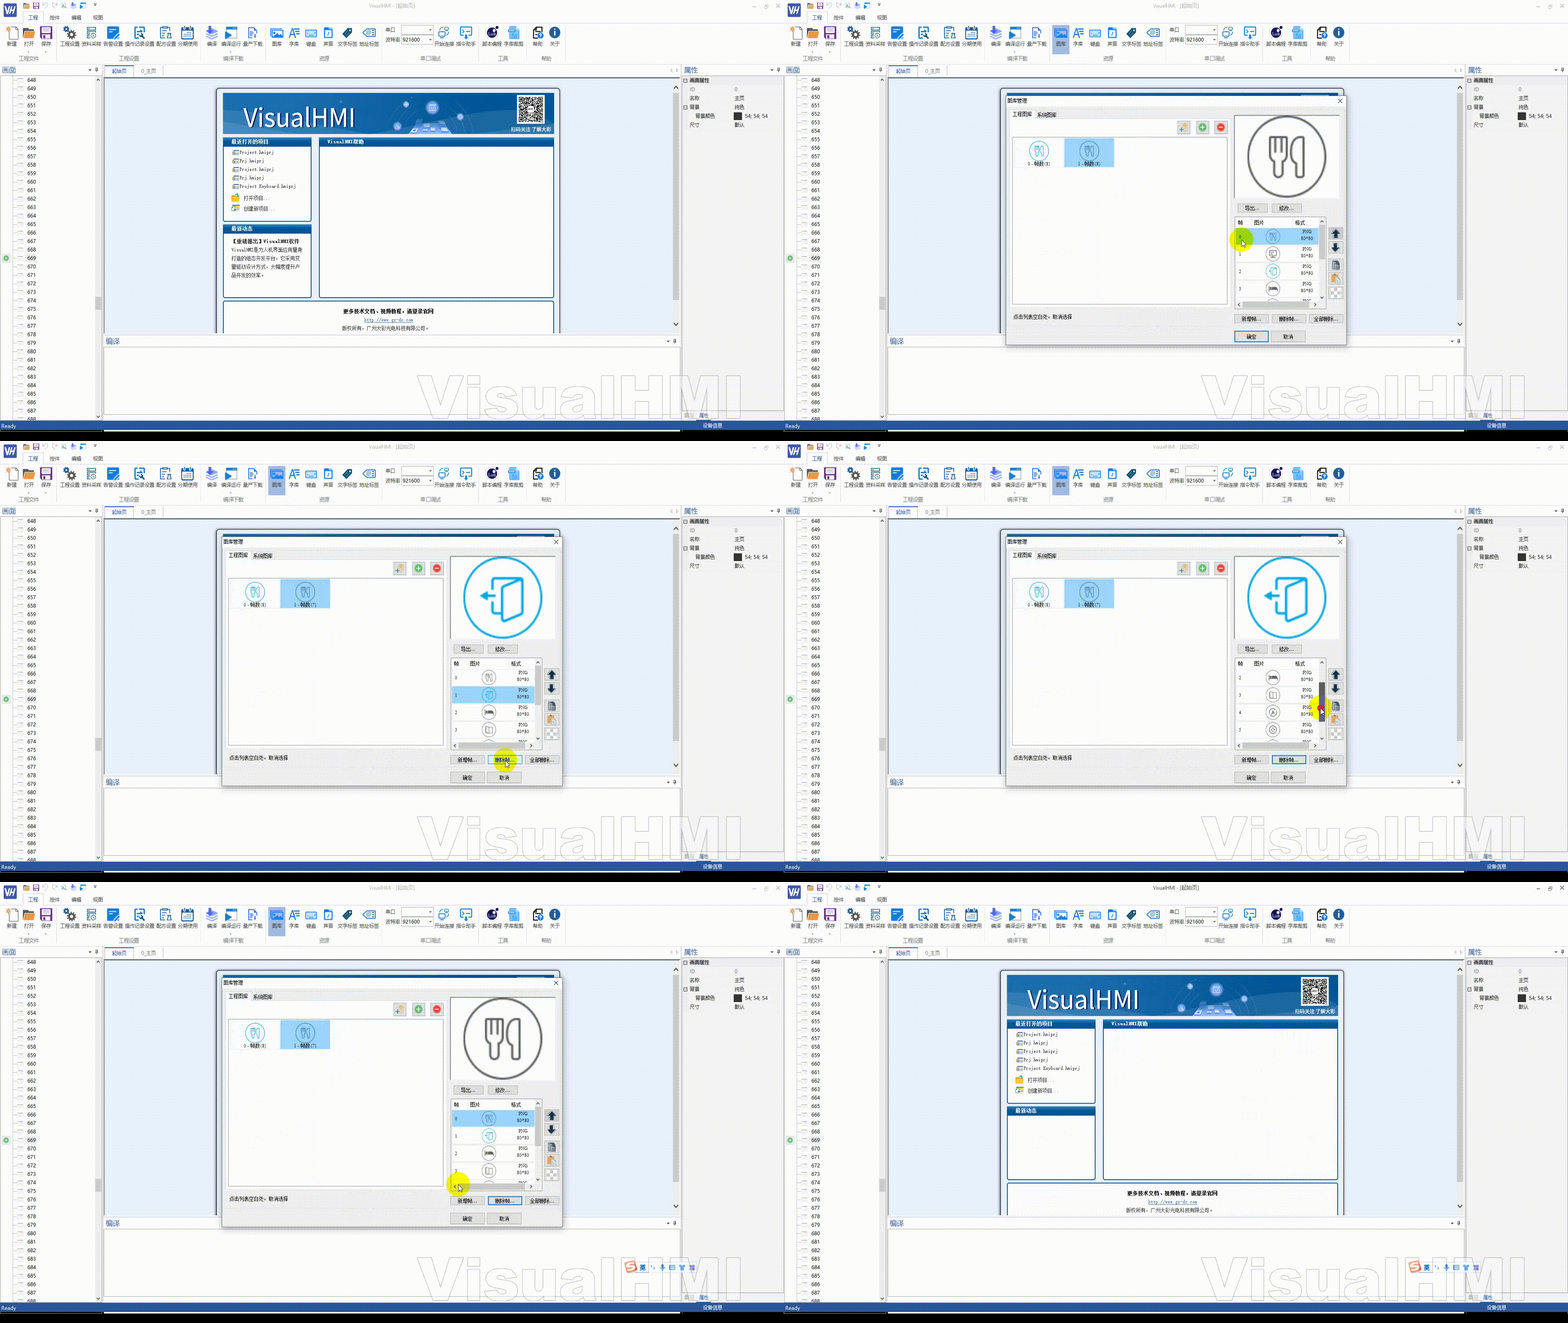
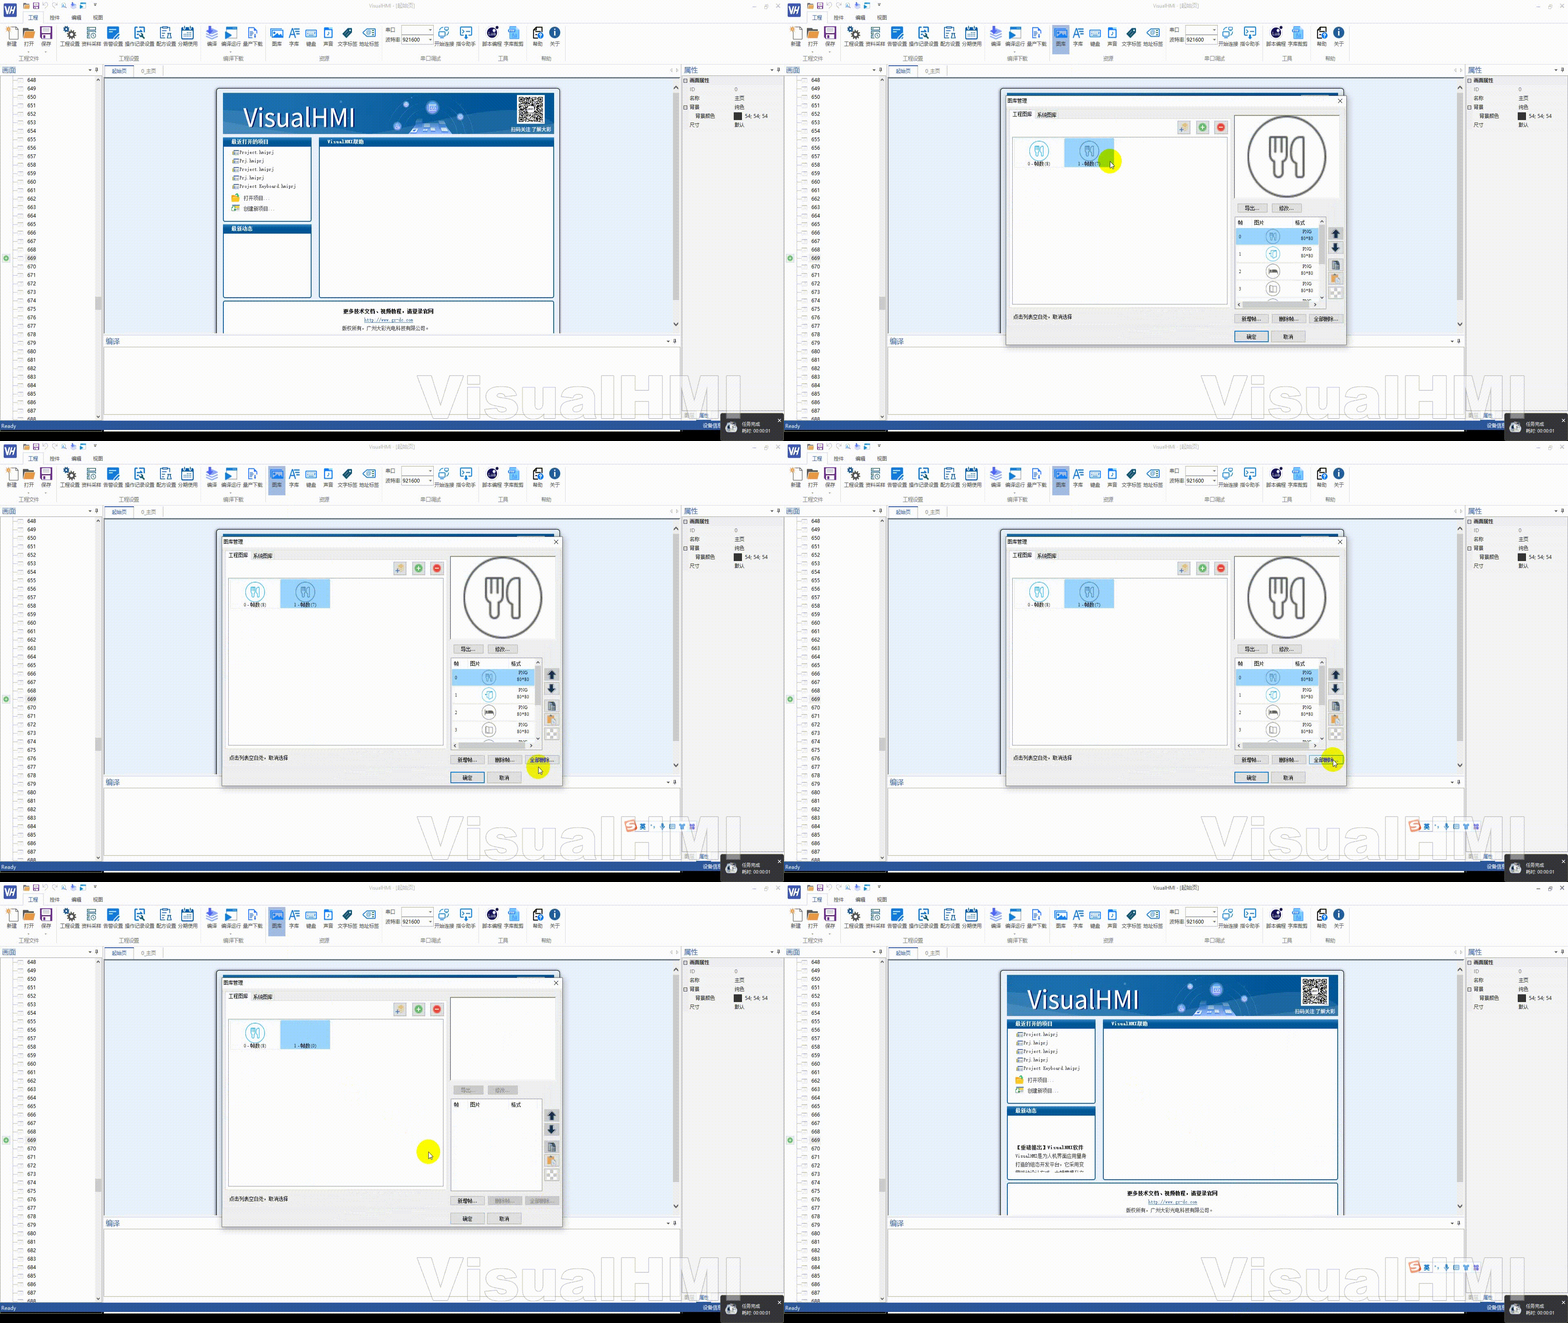
- Delete Frame: Delete a single frame, or delete all frames
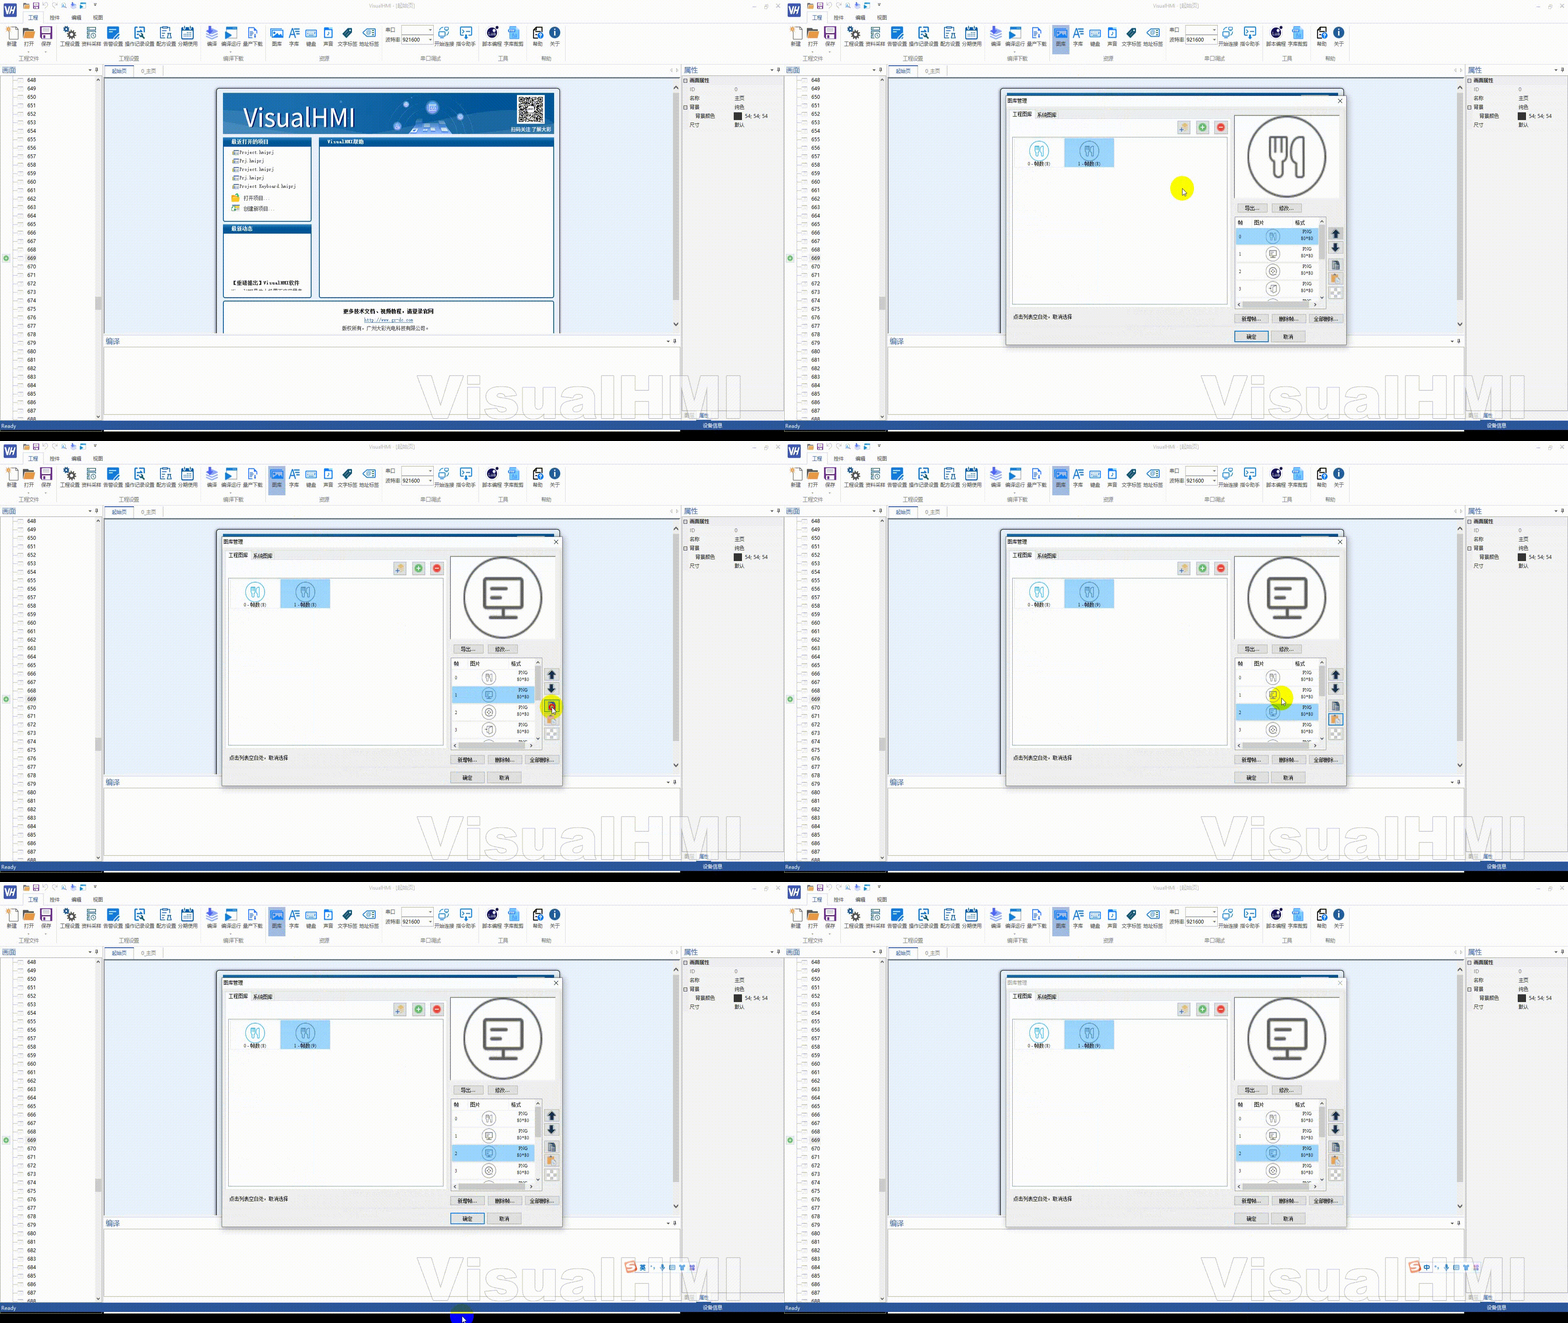
- Copy Frame: Select a frame → Copy → Paste, generate an identical frame
- Move Frame: Select a frame → Move Up/Down, adjust the order (affects the display order of animations/multiple states)
- Export Frame: Select a frame → Export, save as an image file
5. Debugging tips for multi-frame icons
- The number of states and frames for multi-state indicator lights should match: prepare 3 frames for 3 states, and if the frames are insufficient, the states will display as blank
- The playback order of animation controls = frame order. To play in reverse, reverse the frame order
- If the screen does not refresh after replacing frames, recompile it
Organized from Guangzhou Dacai Technology VisualHMI development document (hmi-doc.gz-dc.com) resource introduction "icon library", copyright belongs to Dacai Technology.


Leave a Reply