
The function button serves as the "universal button" in the HMI: it is responsible for switching screens, popping up dialog boxes, opening menus, executing conditions, sending notifications, and acting as a virtual button. This article will clarify each of its uses.
1. Button Uses (5 Types)
| Use | Description |
|---|---|
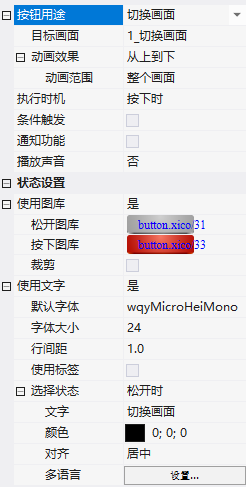
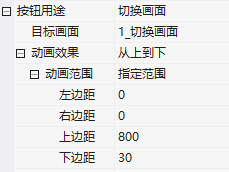
| Switch Screen | Jump to the target screen, with animation effects (from left to right/from right to left/from top to bottom/from bottom to top) and animation range (entire screen/specified range with four-sided margins) |
| Open Dialog Box | Pop up the target screen as a dialog box, with a background mask of 0~100 (0 is transparent), and the pop-up position can be specified by coordinates (default is centered) |
| Close Dialog Box | In conjunction with opening a dialog box, press to return to the original screen |
| Virtual Button | Configure Keyboard Functions (see Keyboard Article) |
| Open menu | Open menu screen, background mask/pop-up position configurable, menu return address: write the selected item value to this address |
| Close menu | Used in conjunction with opening menu |
2. Condition triggering + notification
- Condition triggering: button action binds to logical expression, executed only when condition is met. Trigger address + comparison (>, =, <=, ==, !=, within range, outside range) + value
- Notification: write value to PLC address when executing action. Notification address + value
3. Application cases
3.1 Full screen/specified range switching screen
Place function buttons on homepage (switching screen→1_switching screen, animation from top to bottom, entire screen); place return button on subpage (animation from left to right, specified range: left 60/right 60/top 185/bottom 195) -- only animate the middle area during switching.
3.2 Condition-triggered Switching
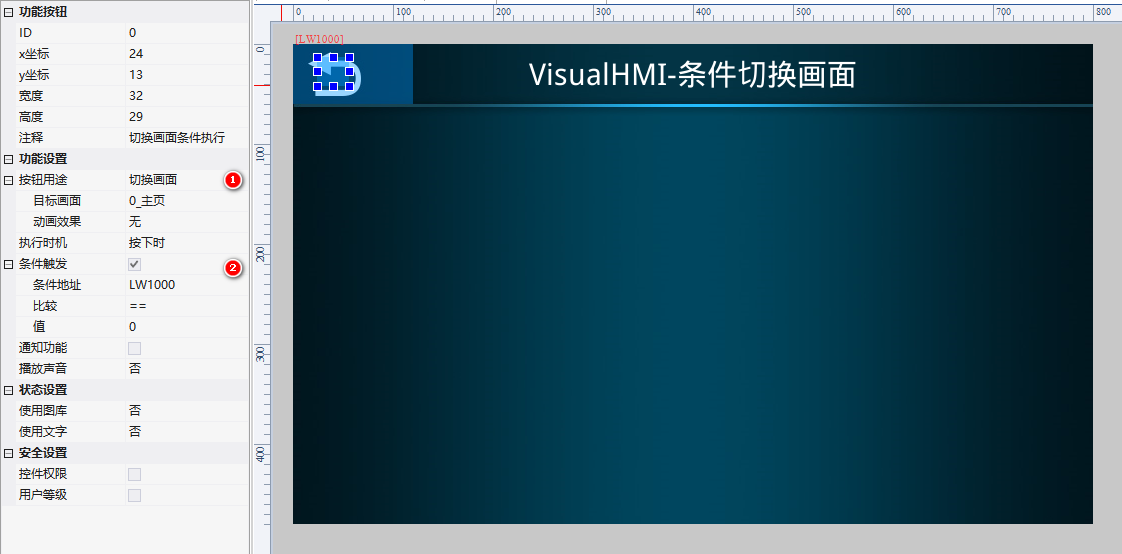
Function Button (switching screen, condition addressLW1000== 1) + a word setting button (write LW1000=1) stacked on top. Click the word setting button → condition is met → switch to the target screen. Commonly used in scenarios where "execution only when value changes", such as logging out of a login level.
3.3 Dialog Box (confirm operation)
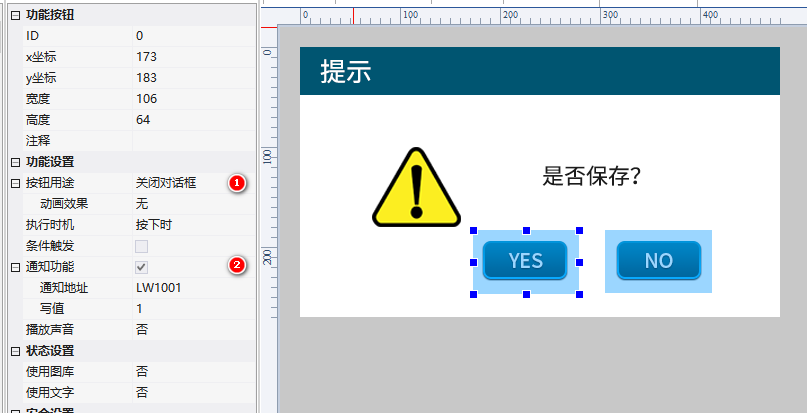
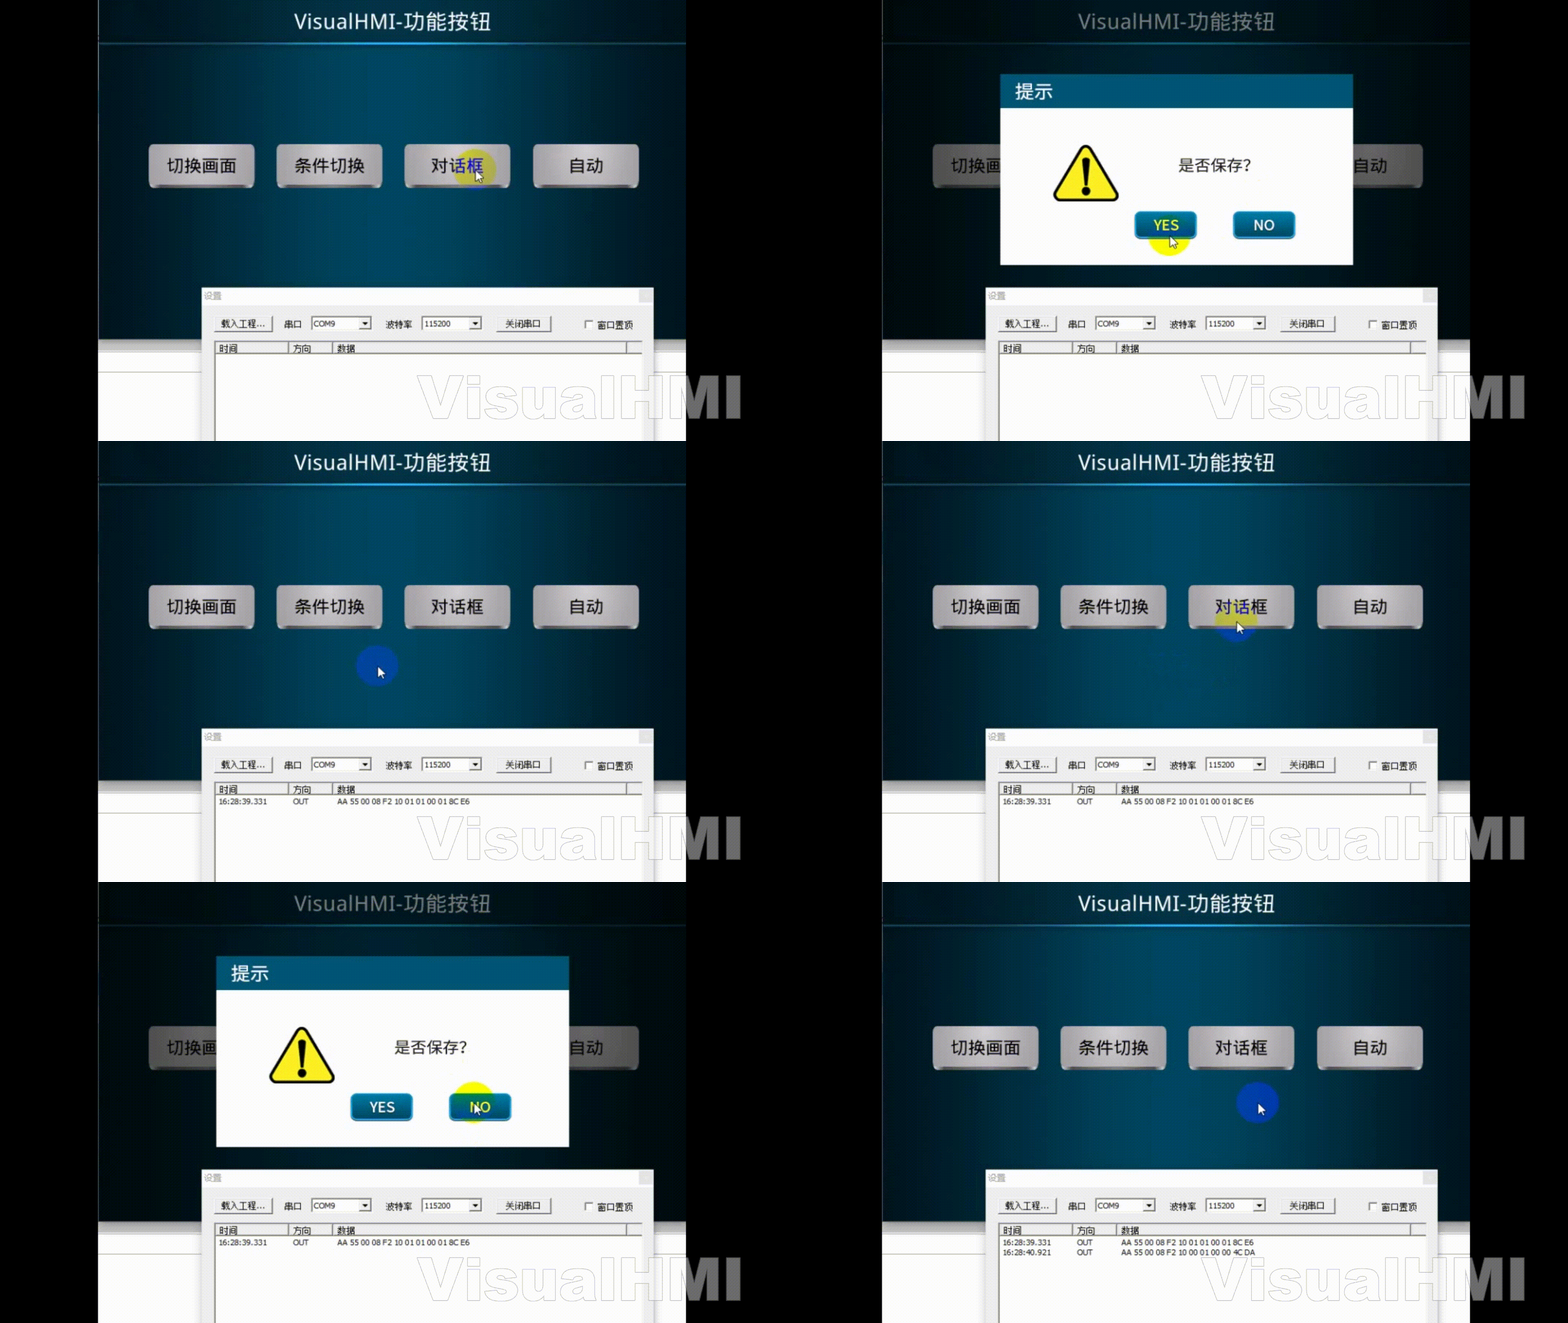
Home page function button (open dialog box → 3_Dialog Box, background mask 50). The dialog box screen contains two function buttons (close dialog box + notify: LW1001 write 1). Click OK → close dialog box + send notification; click Cancel → directly return. Suitable for confirmations such as "Do you want to stop the machine?"
3.4 Menu (pop-up selection)
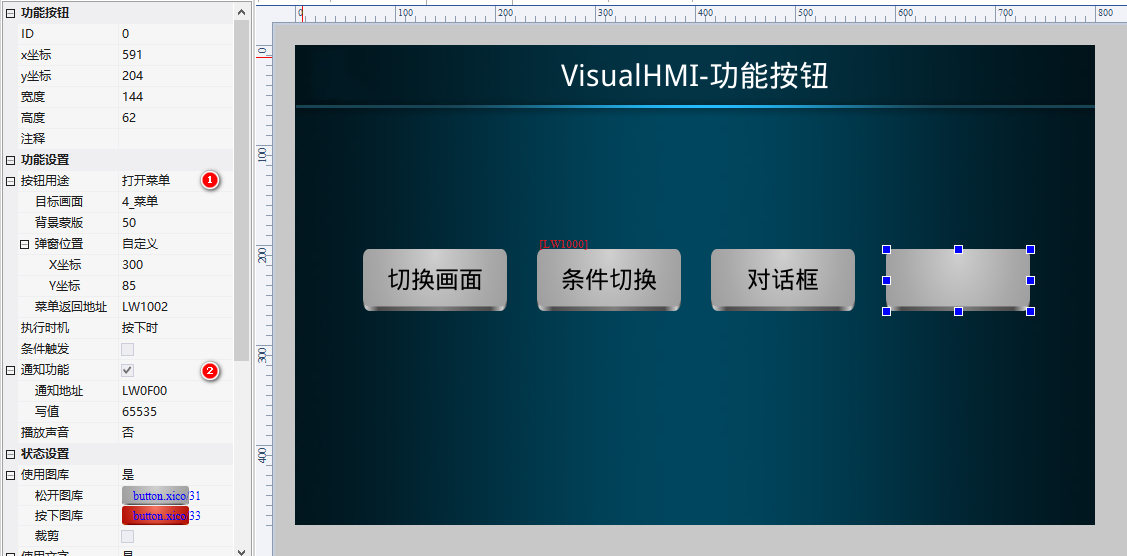
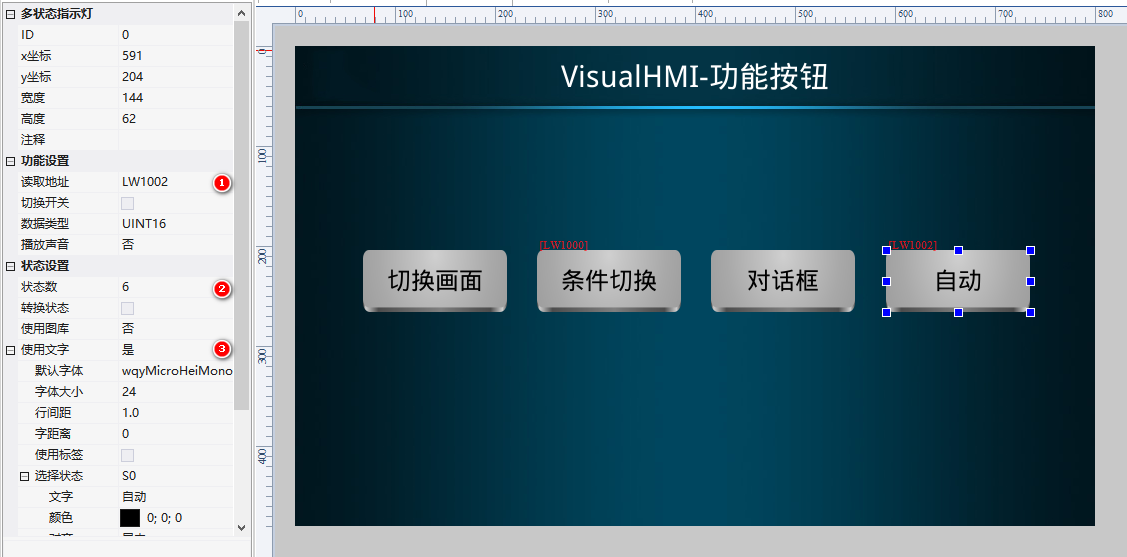
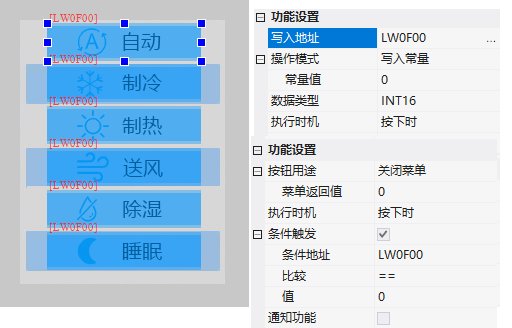
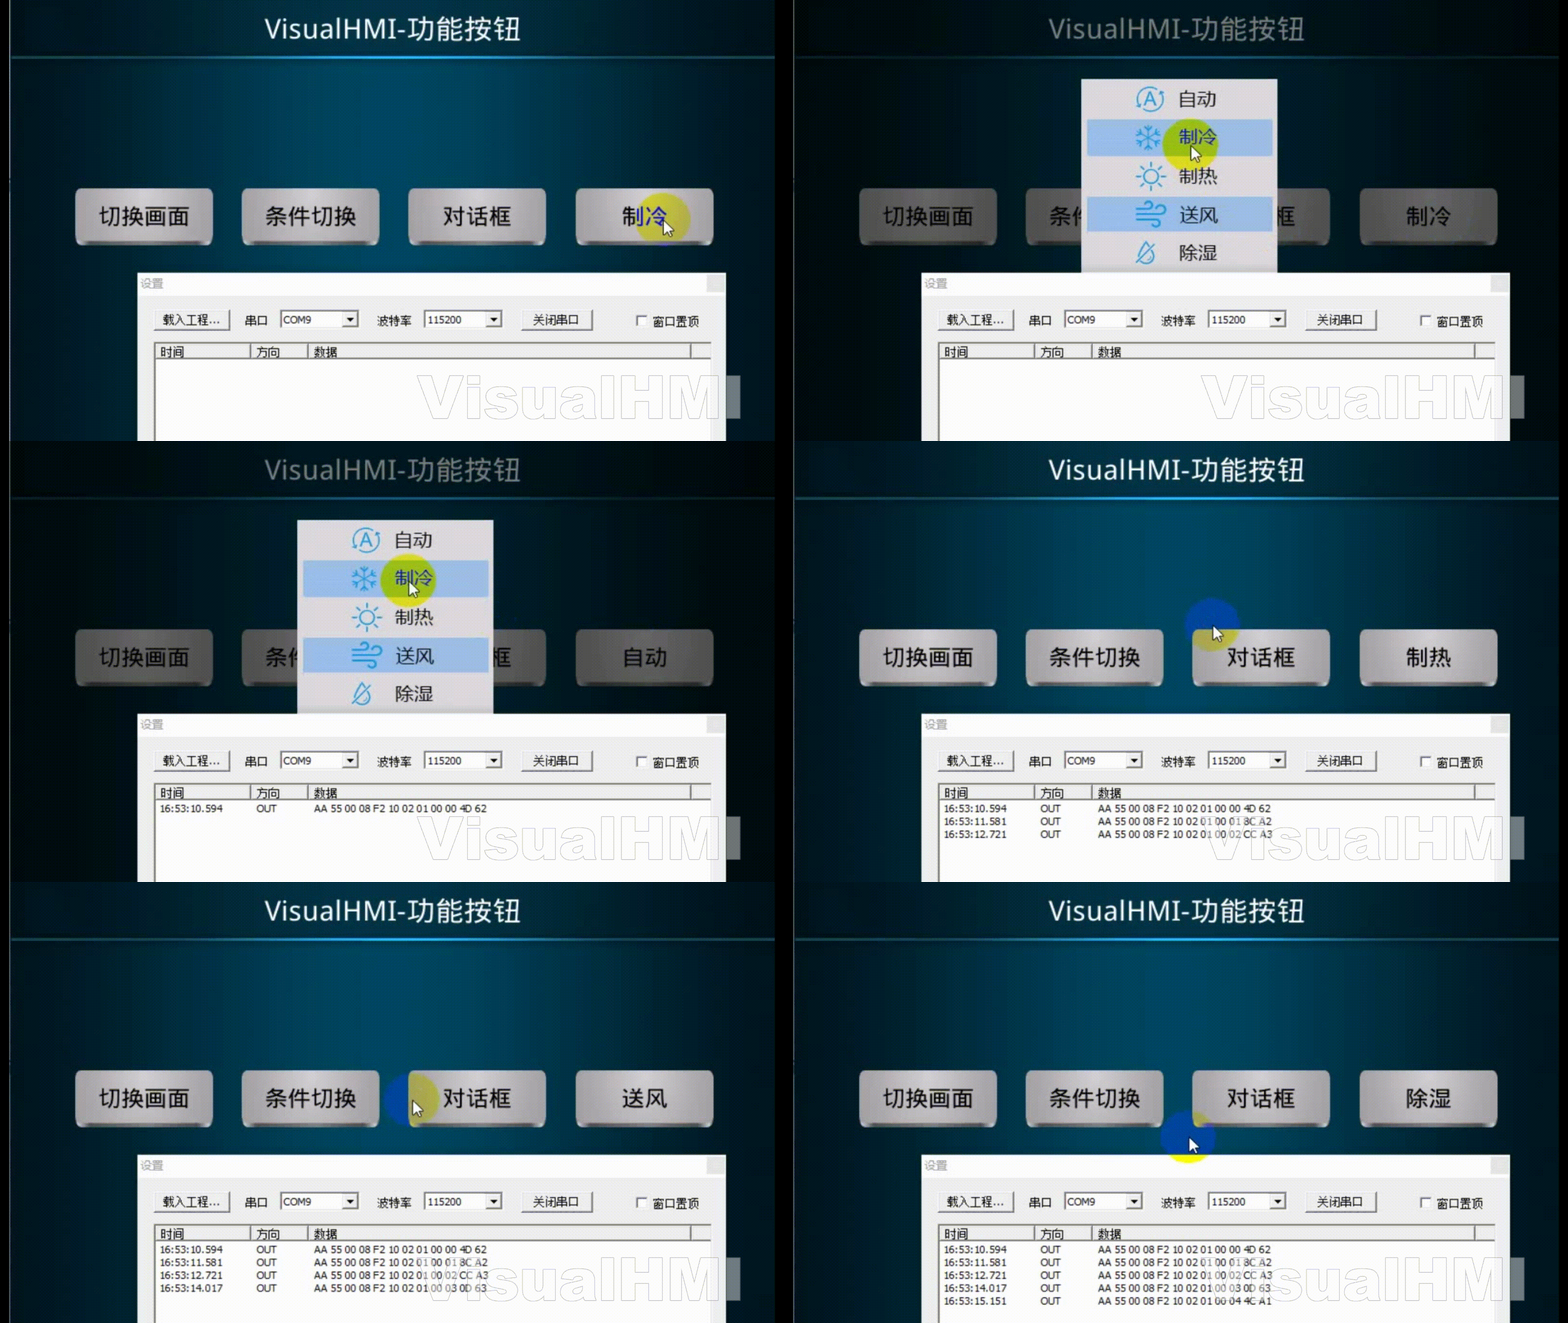
Home page function button (open menu → 4_Menu, mask 50, position X300/Y85, menu return addressLW1002, notify 0x0F00 write 65535 to reset). The menu screen contains 5 function buttons (Auto/Cooling/Heating/Ventilation/Dehumidification/Sleep), each with a corresponding value written. When selected, the value is written to LW1002, and the multi-state indicator light displays the mode.
Compiled from Guangzhou Dacai Technology VisualHMI Development Documentation (hmi-doc.gz-dc.com) Configuration Control Tutorial "Function Button", copyright owned by Dacai Technology.


Leave a Reply