
1.5 Menu Control and Slider Selection Control
This section mainly introduces the common applications of sliding selection controls and menu controls in the Modbus protocol. Simple controls can be bound to variables, which can be associated on the configuration page or bound to variables in [Tools - Protocols and Variables - Logic Processing]
In this section, the screen acts as the master station, reading and writing slave instructions. If the screen acts as a slave, the application of slider selection controls and menu controls is the same and can be referenced. This section creates two save registers to illustrate the application of slider selection controls and menu controls, as shown below
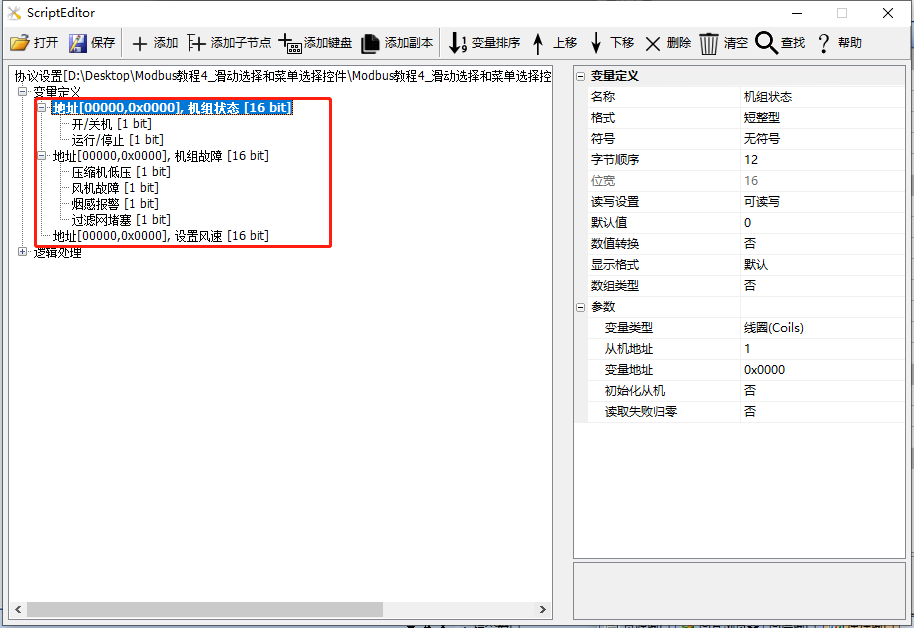
Routine download link:"Modbus Tutorial 4_Slider Selection and Menu Selection Controls V1.0.rar"
For protocol activation and variable-related instructions, refer to the link: "Modbus Basic Parameter Description"
1.5.1 Menu Control
The [Menu Control] screen primarily provides an example of how to use menu controls. There are two types of "styles" for menu controls: "Pop-up Menu" and "Fixed Menu". Here, we mainly focus on the instructions for using the pop-up menu. When the "Menu Style" is set to "Pop-up Menu", a button control is required to associate the menu control with the text control. Clicking the button will pop up the menu control, and selecting a menu item will directly display it in the text control
Screen/Logic Configuration
Method 1: Logic Processing Binding
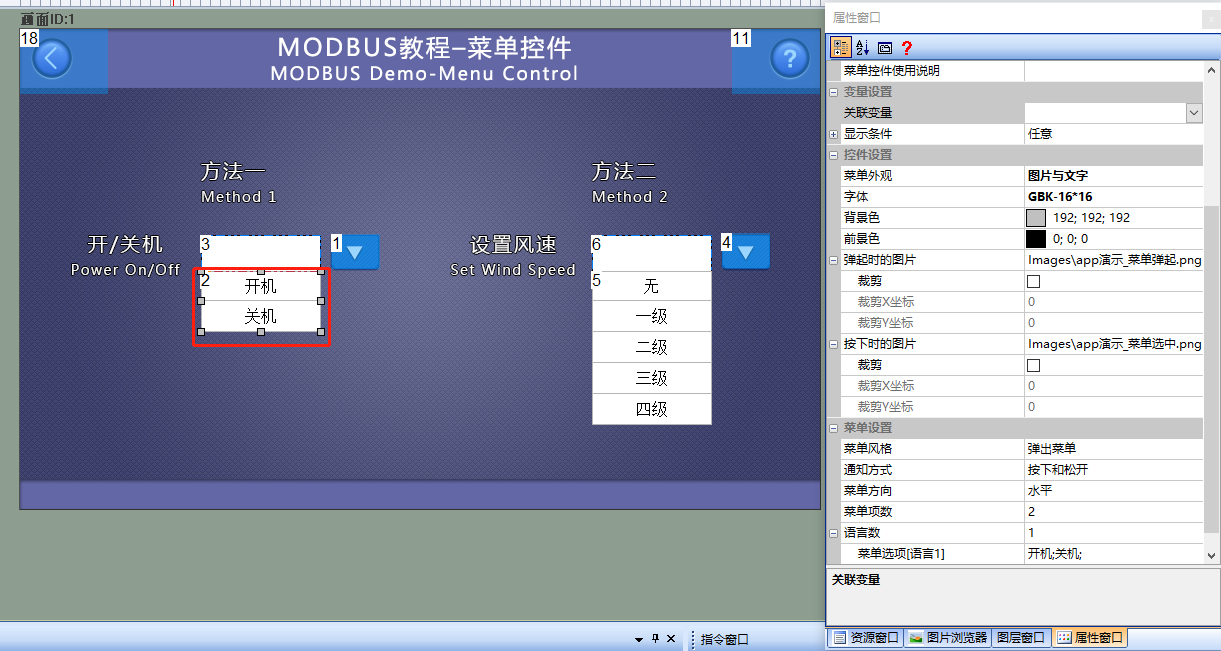
Add a menu control (control ID: 2) to the screen as a control for switching the slave on and off. The detailed configuration is shown below
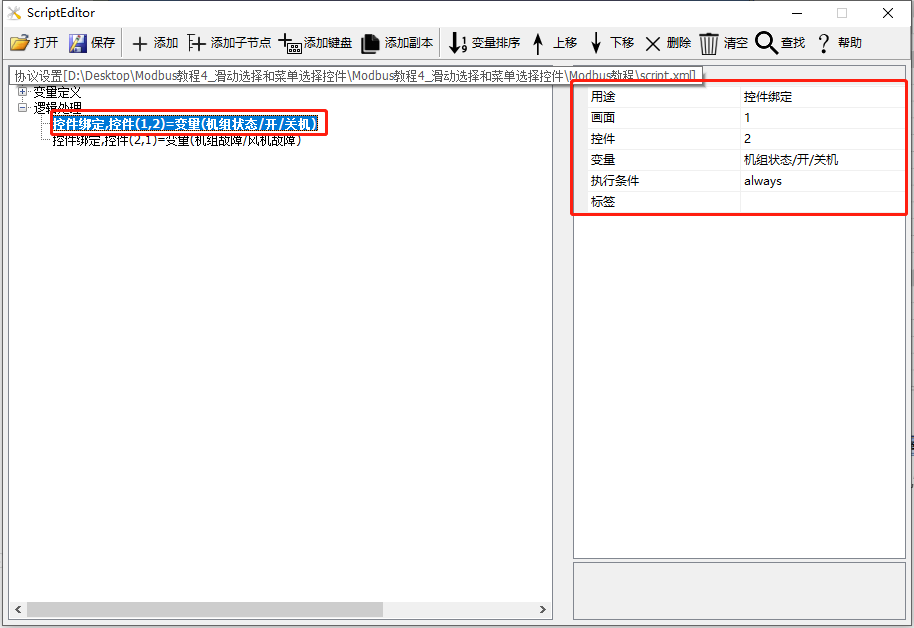
Add a logic processing in the "Protocol and Variable Settings", with the purpose of "Control Binding", the screen is "1"; the control is "2"; the variable is "Unit Status/On/Off", as shown below
Method 2: Configuration Screen Binding
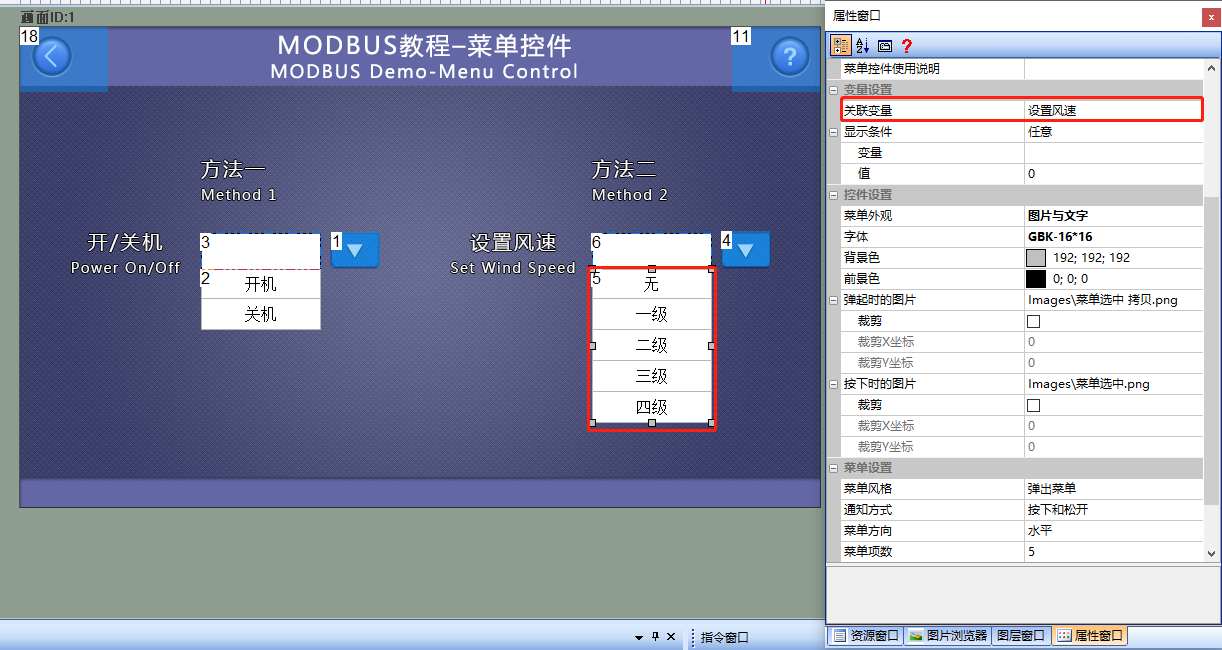
Add a menu control (Control ID: 5) to the screen as a control for the slave wind speed. Bind the "Set Temperature" variable in its property window, with the detailed configuration shown below
Run Preview
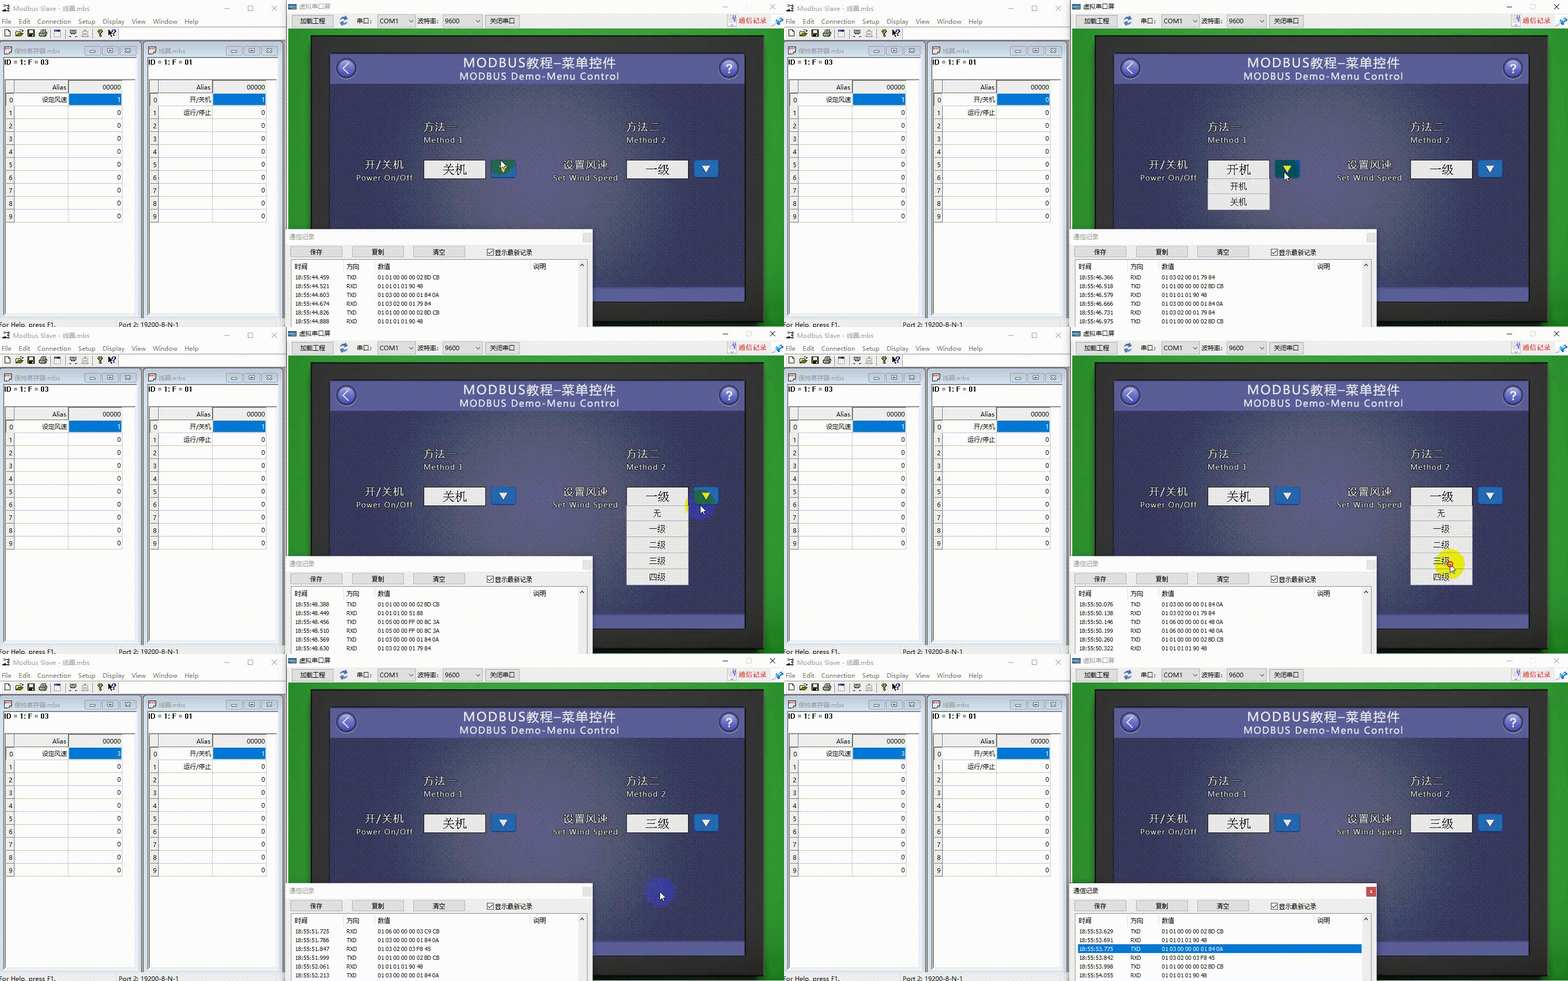
At this point, compile the project and run the virtual serial port screen, connecting it to the Modbus Slave software. When the button control (Control ID: 4) is pressed, the menu control (Control ID: 5) pops up. Select the "Level 1" option in the menu control, and "Level 1" will be directly displayed in the text control (ID: 6), and the slave variable "Set Wind Speed" will change accordingly
1.5.2 Sliding Selection Control
In the "Sliding Selection Control" screen, there are mainly two purposes for selecting controls: "Sliding Selection" and "Status Display". "Sliding Selection" is mainly used for selecting preset options through touchscreen sliding; "Status Display" is mainly used for displaying different preset options, similar to icon controls
Screen/Logic Configuration
Method 1: Logic Processing Binding
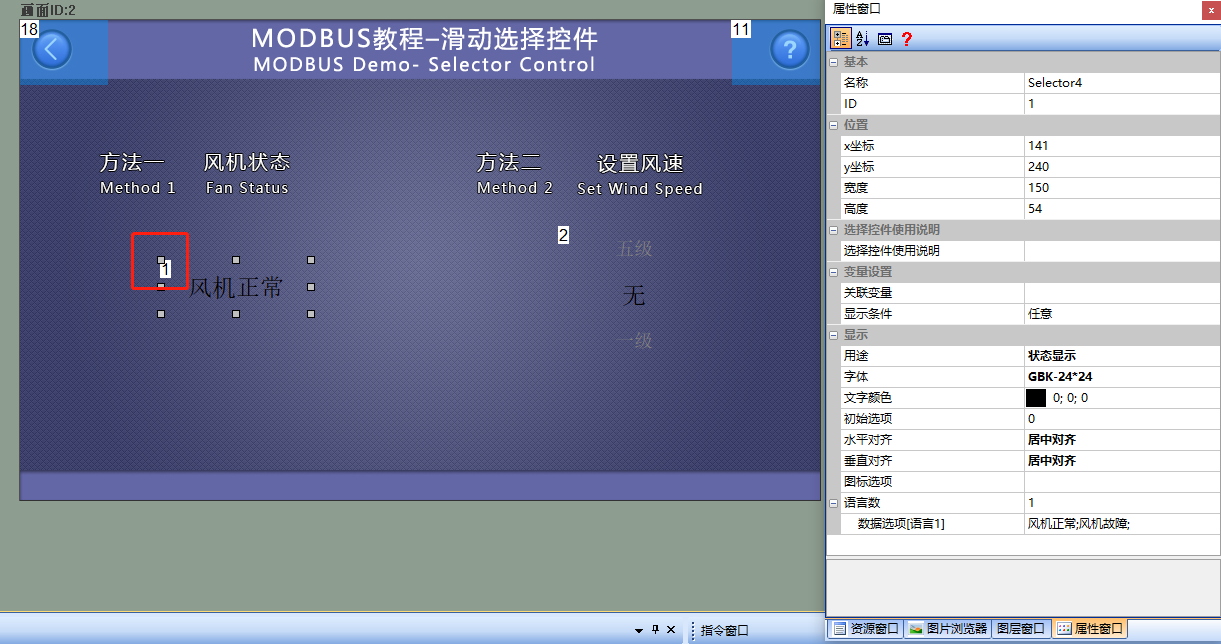
Add a sliding selection control (Control ID: 1) to the screen as a display for the wind turbine status; purpose is "Status Display", as shown below
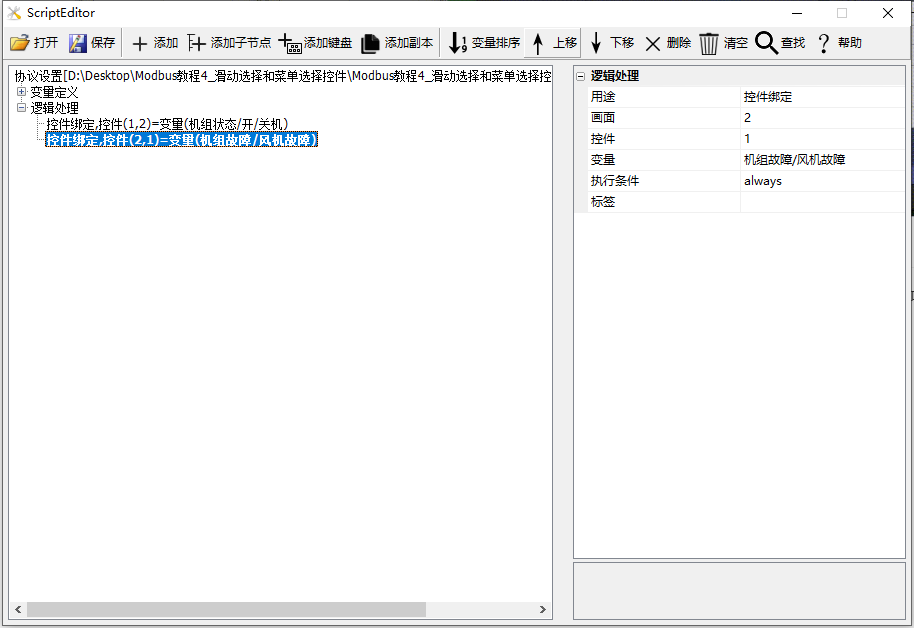
Add one logic processing in the "Protocol and Variable Settings": purpose is "Control Binding"; screen is "2"; control is "1"; variable is "Unit Status/Wind Turbine Fault". As shown below
Method 2: Configuration Screen Binding
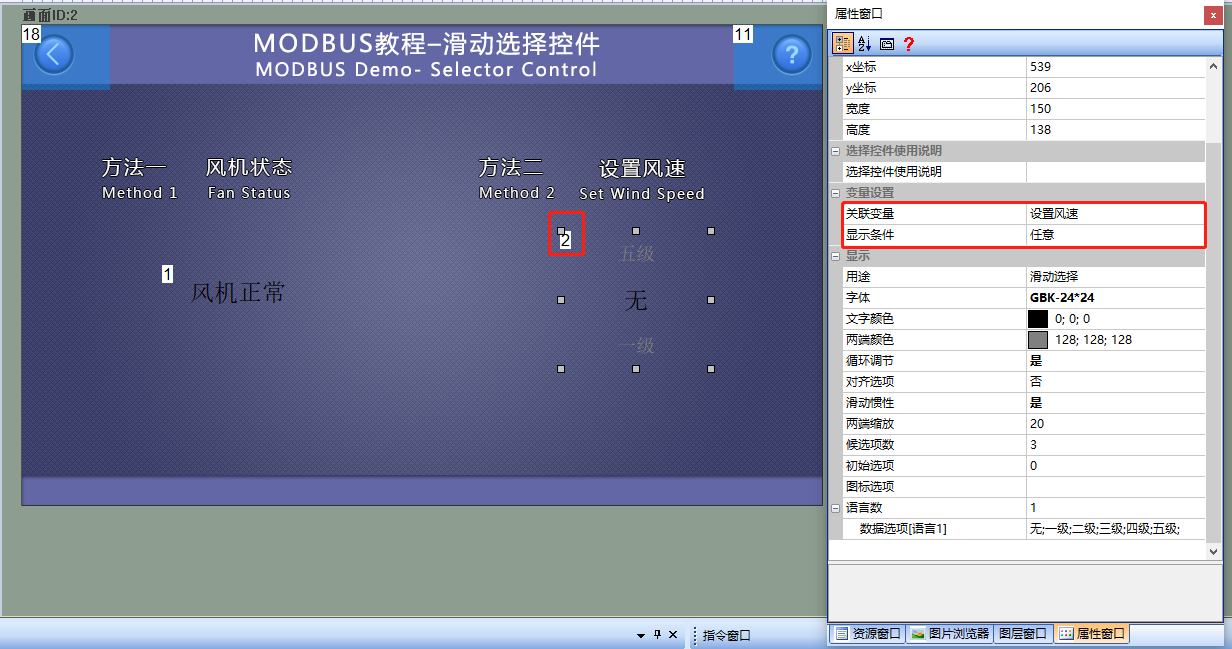
Add a menu control (Control ID: 2) to the screen as a control for the slave wind speed level. Bind the "Set Wind Speed" variable in its property window, as shown below
Run Preview
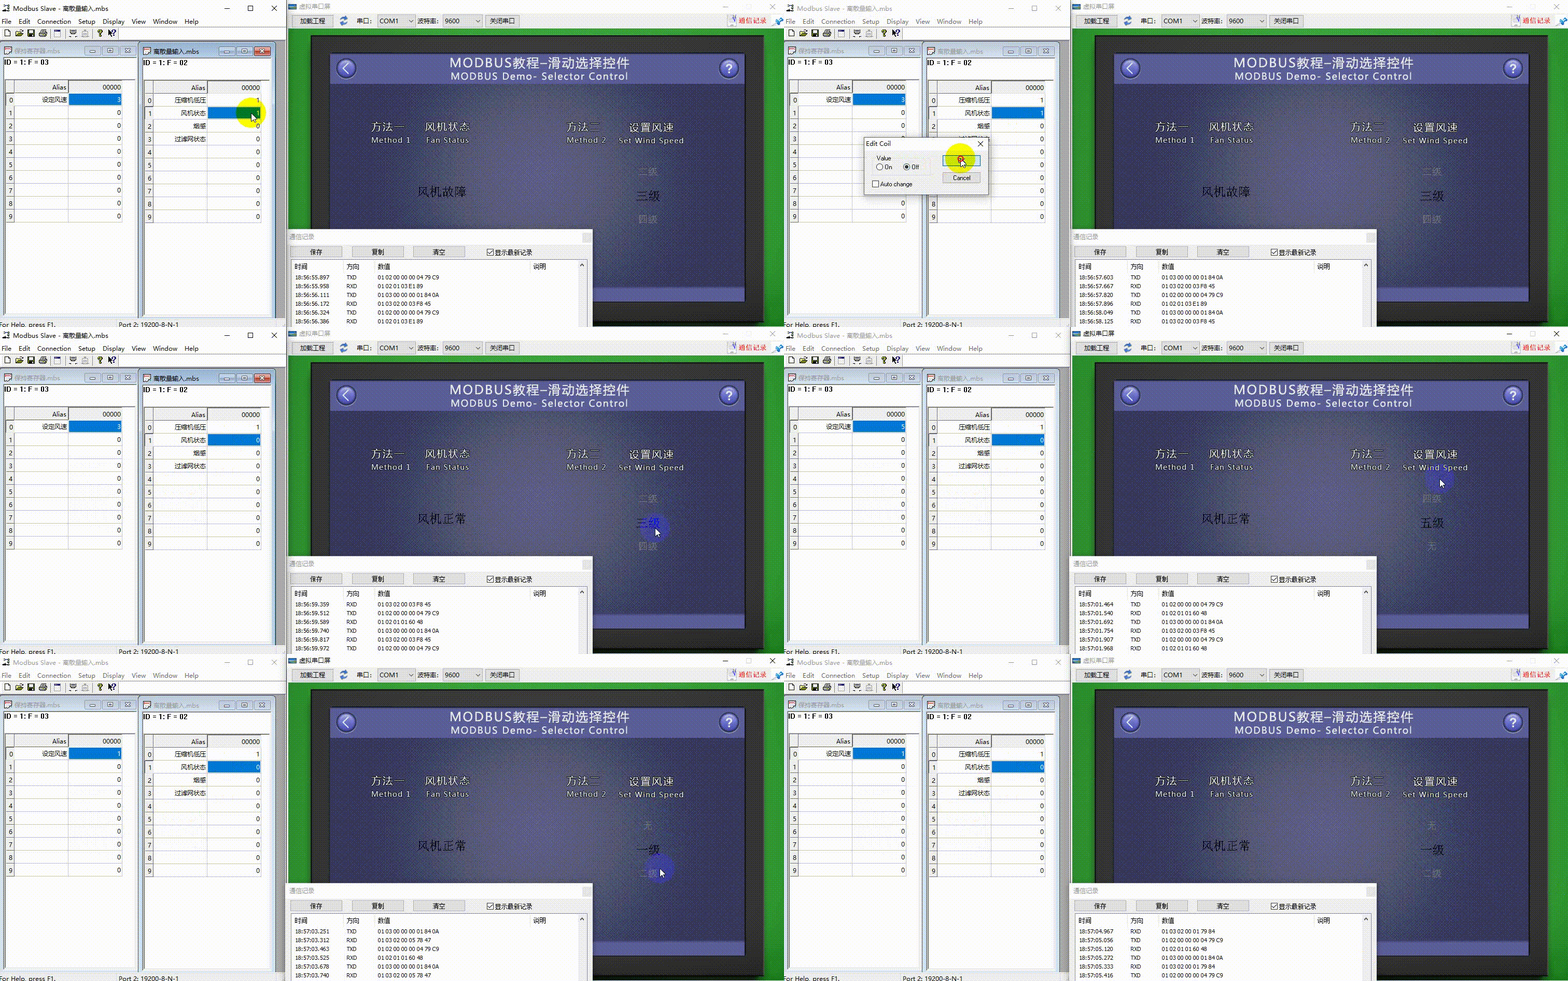
At this point, compile the project and run the virtual serial port screen, connecting it to the Modbus Slave software. When the value of the variable "unit status/fan fault" changes, the state displayed by the sliding selection control (control ID: 1) will be updated accordingly; by clicking on the sliding selection control (control ID: 2) with the mouse and dragging it, when the dragging stops and a certain option is selected, the value of the variable "set wind speed" will also change and update


Leave a Reply