

The serial device server is a communication interface protocol converter that performs data conversion between RS-232/RS-485/RS-422 terminals and TCP/IP. It provides bidirectional transparent transmission of data between RS-232 terminals and TCP/IP networks, offering serial-to-TCP/IP functionality and solutions for converting RS-232/RS-485/RS-422 to TCP/IP. It allows RS-232/RS-485/RS-422 serial devices to connect to the network immediately.
The serial device server, also known as the terminal server, essentially enables serial devices to immediately gain networking capabilities. It allows for centralized management of scattered serial devices and hosts through a network, making it simple and convenient. It supports TCP, UDP, ARP, ICMP, HTTP, DNS, and DHCP protocols, as well as Windows Native COM and automatic network interruption recovery connection functions.
Serial device servers are widely used in scenarios requiring sensor data collection and remote control. A considerable number of users on the MODBUS IoT platform are using serial device servers to access devices. Typically, serial device servers are mostly connected to Modbus slave devices through RS485/232/422 ports, such as switch relays, temperature and humidity sensors, various gas sensors, electric energy meters, water meters, PLCs, motor controllers, etc. The relationship between the serial device server connected to the MODBUS IoT platform and sub-devices is usually as follows:
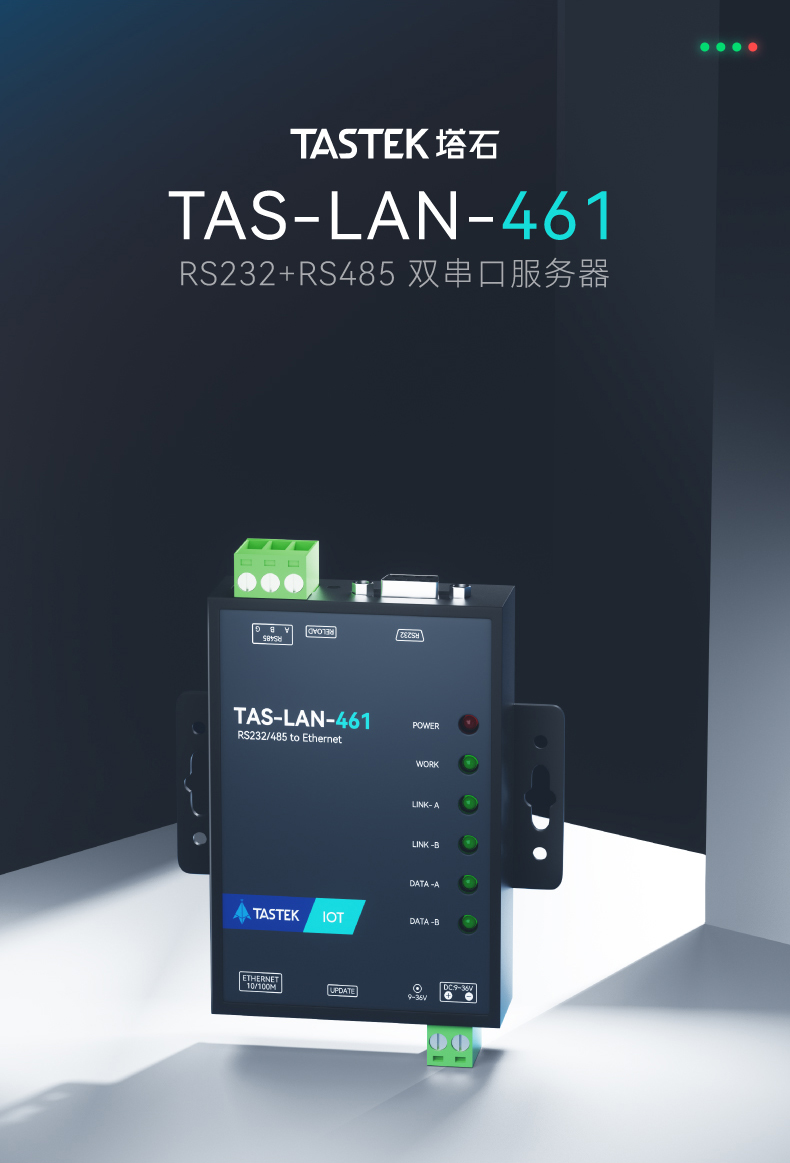
This time, we introduce the serial device server TAS-LAN-461 from Tashi Company. It supports access to the MODBUS IoT platform through TCP and UDP, and has been running very stably in many users' IoT projects.
Taking this TAS-LAN-461 as an example, we will introduce the steps for connecting to the MODBUS IoT platform. Other serial device server products from Tashi Company can also be connected in the same way.
Preparations on the MODBUS IoT platform
In practice, we usually use the serial device server as a transparent gateway to forward messages between Modbus slave devices and the cloud platform.
- Create a project (Project Management → New Project).
- Create device (Device Management → Device Information → Add Device)
- Fill in the device name, generate a device number randomly or manually, select ModBus RTU in the device protocol, locate the device's latitude and longitude, and save. (Copy and save the device number for future use.)
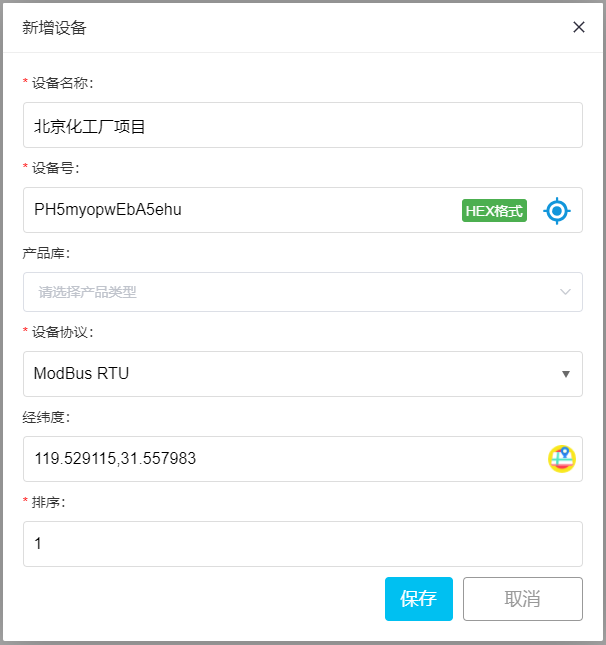
For specific steps, please visit:Introduction to ModbusIt usually takes a few minutes to complete.
For configuring the TAS-LAN-461 serial server,
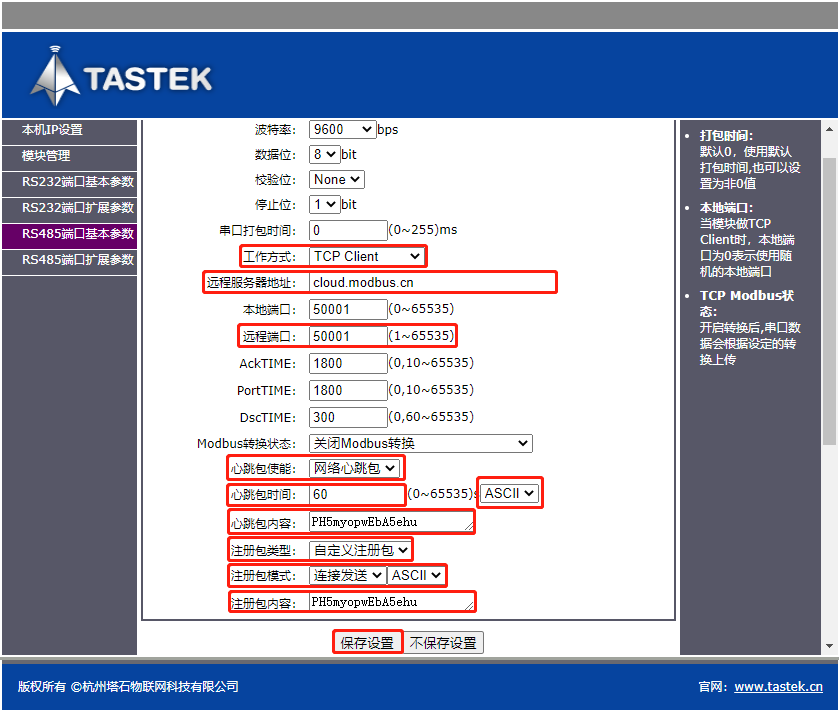
open the device manager configuration software, connect to the Ethernet port or serial port, and only need to fill in the following sections:
Step 1:
- Working mode: TCP Client
- Remote server address: cloud.modbus.cn (recommended)
- www.wulianwang.net.cn (alternate)
- 47.104.68.157 (alternate)
- Remote port: 50001
- Save settings (Save)
As shown below:
Connect RS485 Modbus relay
Here, we take the 8-channel relay as an example:
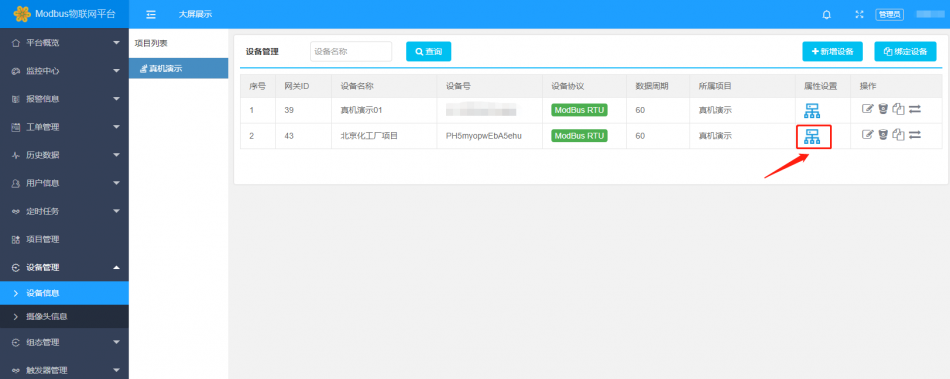
Click on "Property Settings"
Click on "Add Sensor" to add 1-channel relay control
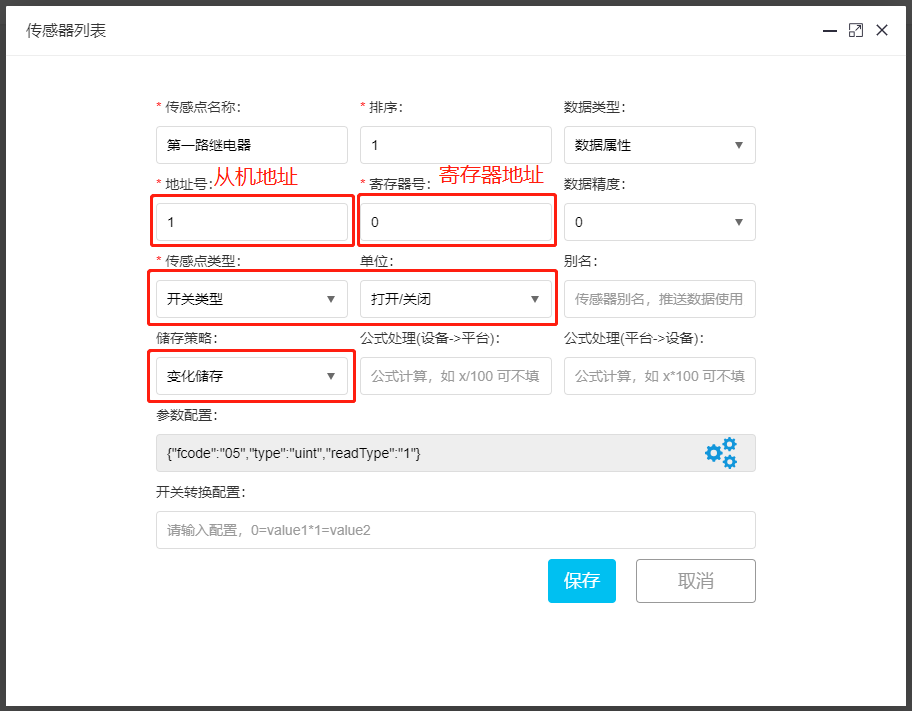
Parameter Configuration:
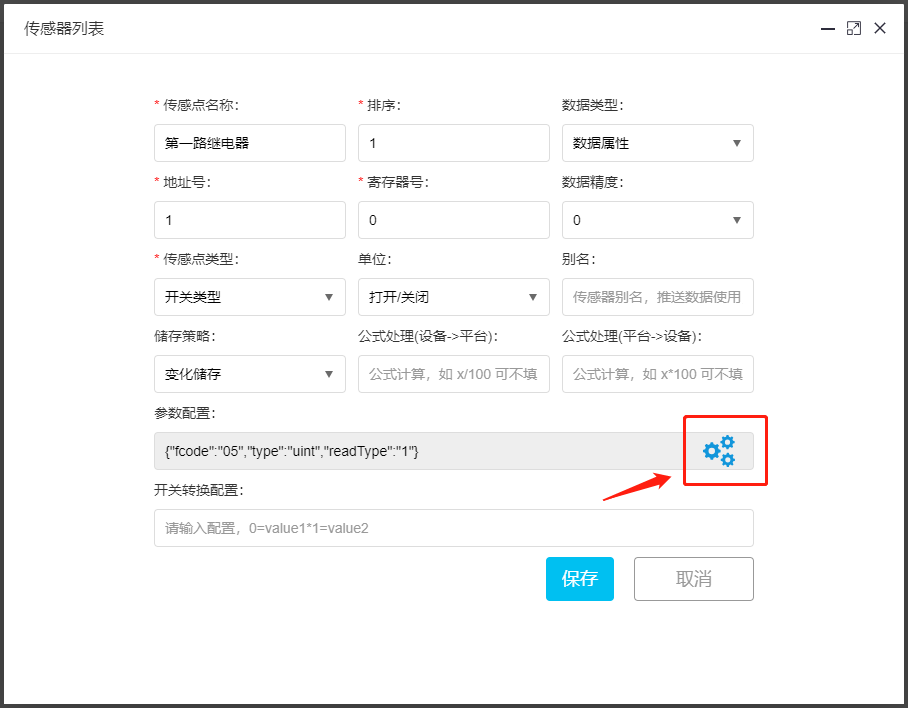
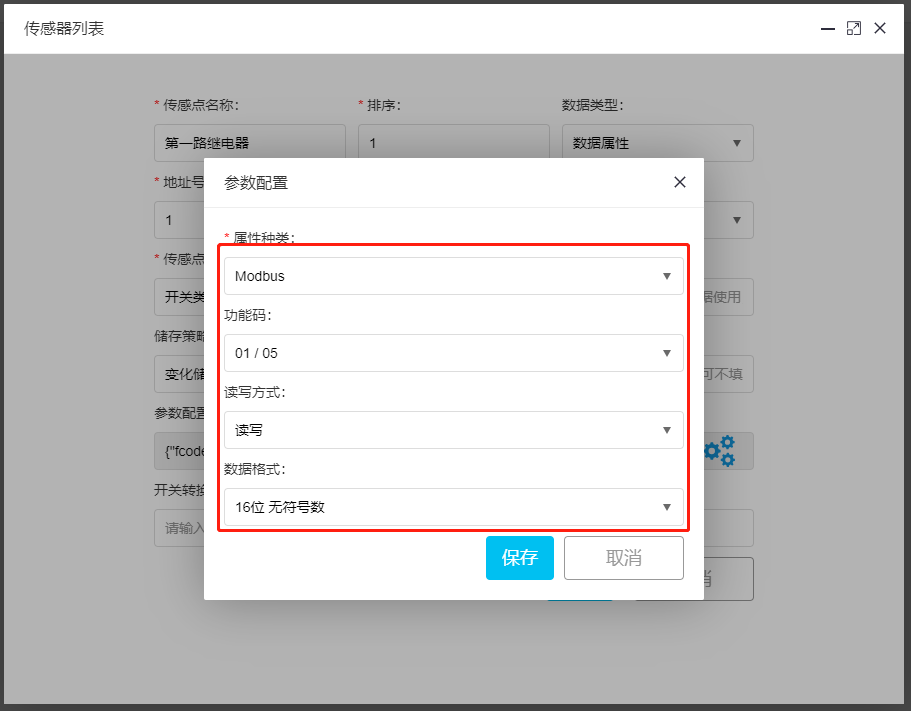
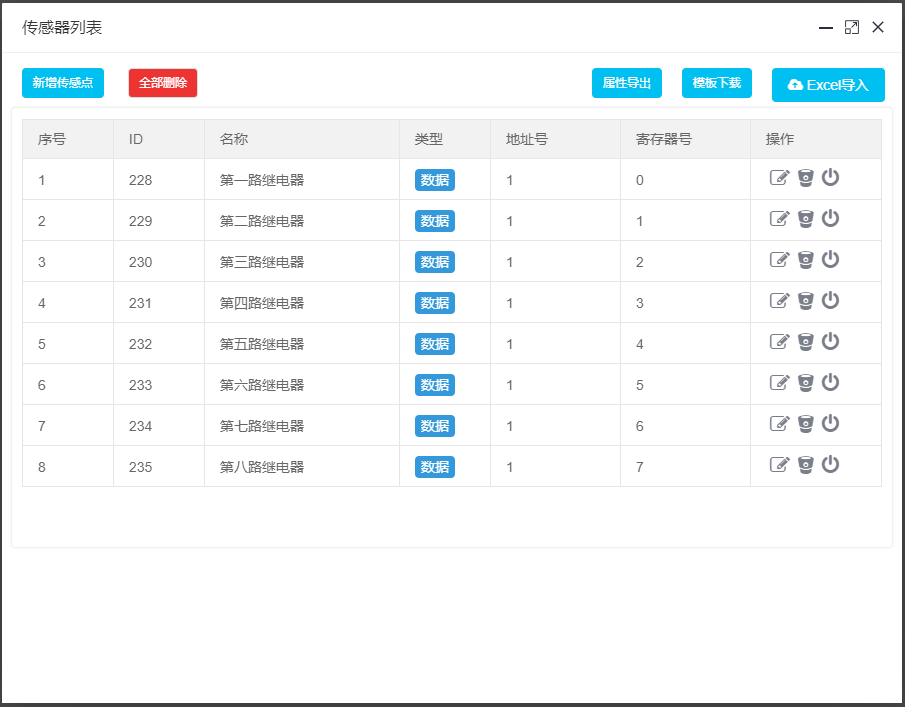
Add 8-channel relays in sequence, only needing to modify the register number.
After adding all 8-channel relays, the interface is as follows
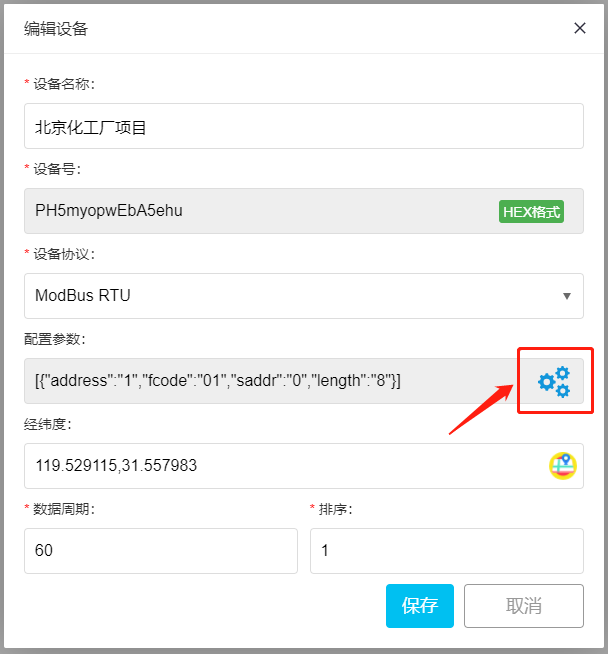
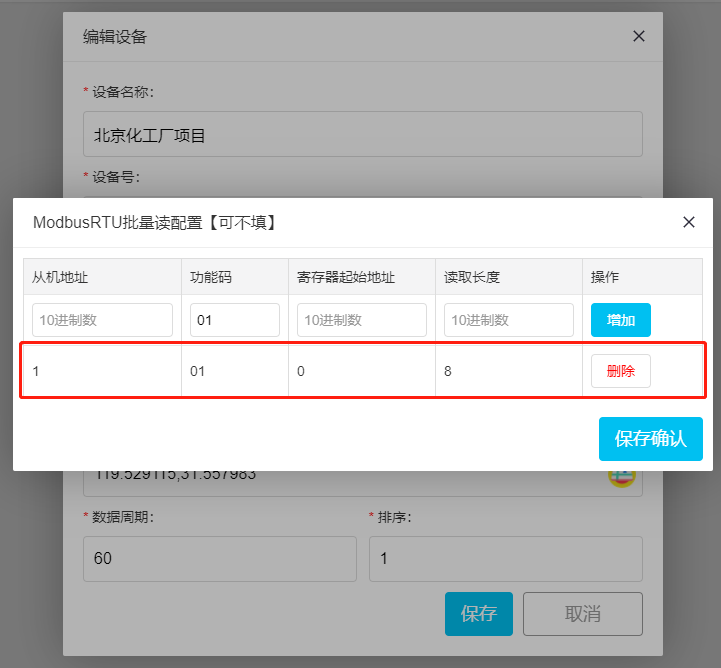
Modbus Batch Read Configuration
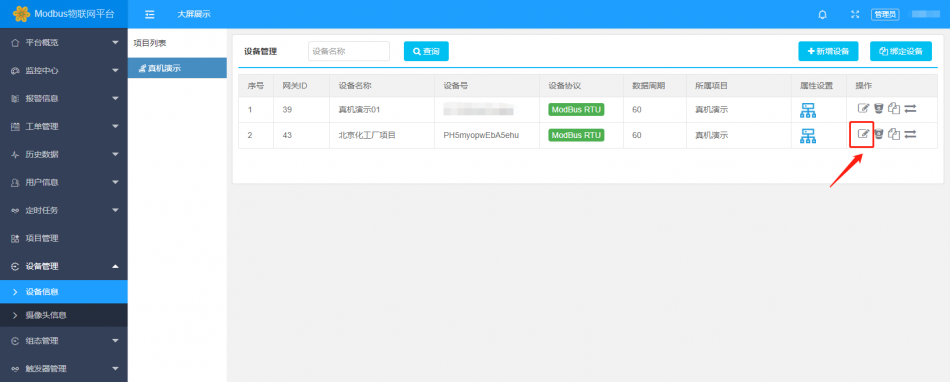
Click on "Configuration Parameters"
In this article, we have introduced the detailed steps for the TAS-LAN-461 serial port server from Tashi Technology to access the MODBUS IoT platform through TCP transparent transmission, upload the 8-channel relay module to the cloud platform, and generate customized dashboards and apps. These steps are also applicable to other manufacturers' serial port server products that support TCP transparent transmission.


Leave a Reply