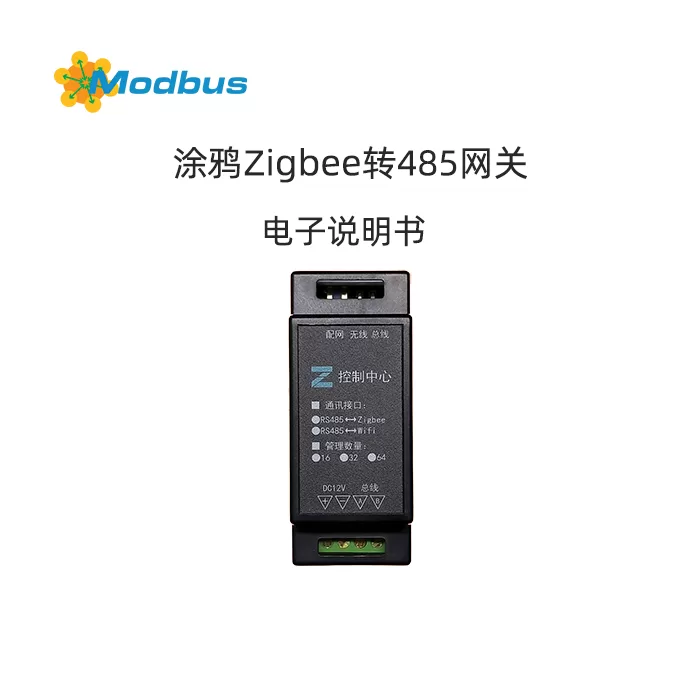
I. Background
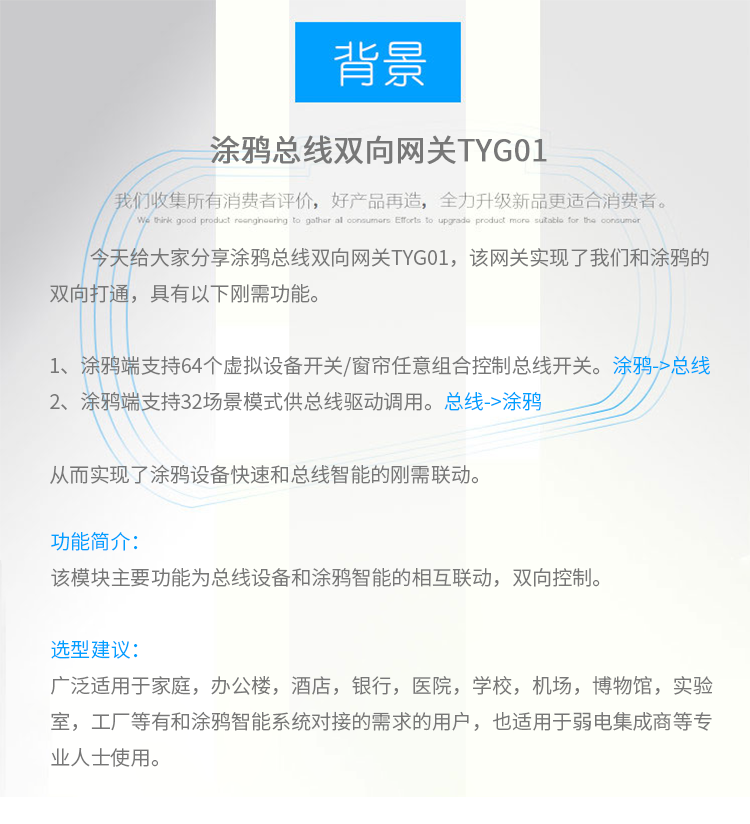
We collect all consumer reviews, redesign good products, and strive to upgrade new products that are more suitable for consumers. Today, we will share with you the bidirectional gateway TYG01 for the Graffiti bus, which enables us to connect with Graffiti in both directions and has the following essential functions.
Software Download
3, Video tutorial
4, Product parameters
Product model: TYG01
Product Name: Graffiti Bus Bidirectional Gateway
Product size: 358844 mm
Product weight: 100g
Product color: Black
Shell material: Plastic PC
Input Voltage: DC12V
Communication Method: WIFI/ZIGBEE/485
Platform: Smart Life/Graffiti
Virtual Switching Devices: 64
Virtual Curtain Devices: 64
Virtual Scene: 32
Custom Instructions: ≤ 40 bytes
Installation Method: Install anywhere with power supply and WiFi signal, also supports DN35 rail installation
V. Functional Features
- The graffiti terminal supports 64 virtual device switches/curtains in any combination to control the bus switch. Graffiti ->Bus
- The graffiti terminal supports 32 scene modes for bus driver calling. Bus ->Graffiti
- Compact in size and lightweight.
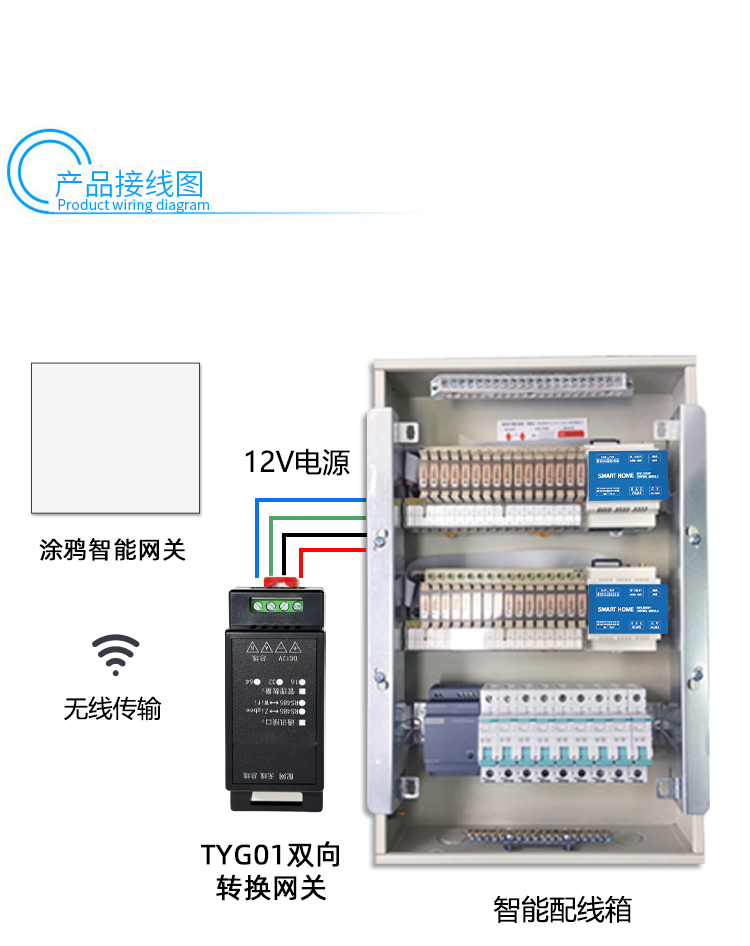
6, Product wiring diagram
7, Usage method
- Connect the device to USB and convert it to 485, then power it on;
- Insert USB to 485 into the computer, open the software, fill in the port number and baud rate according to the actual situation, and then click start to establish communication between the software and the device.
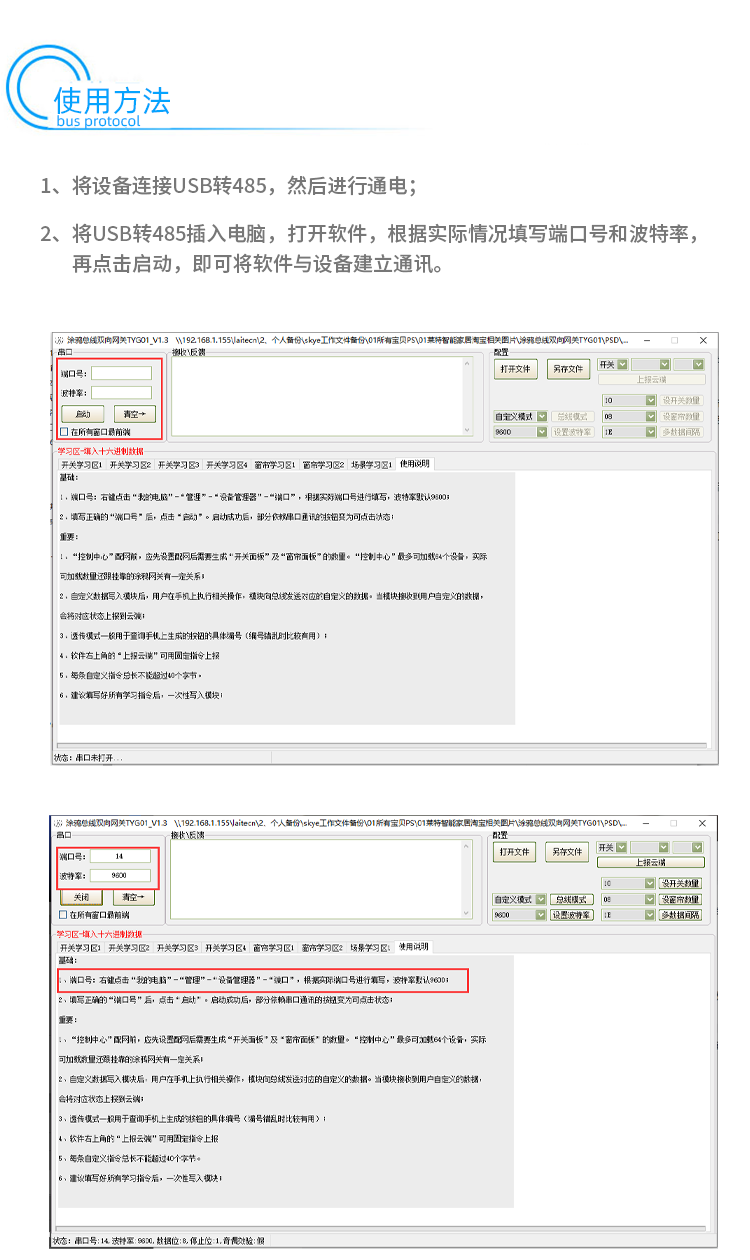
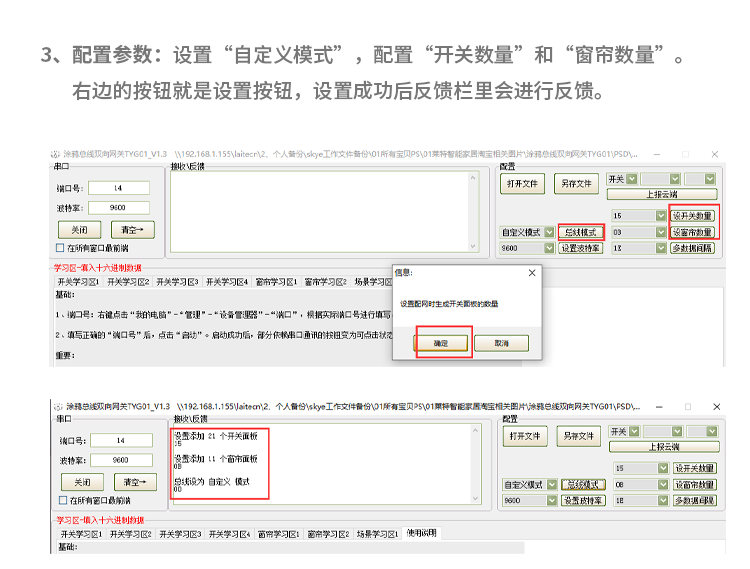
- Configuration parameters: Set "Custom Mode", configure "Number of Switches" and "Number of Curtains". The button on the right is the settings button, and feedback will be provided in the feedback bar after successful settings.
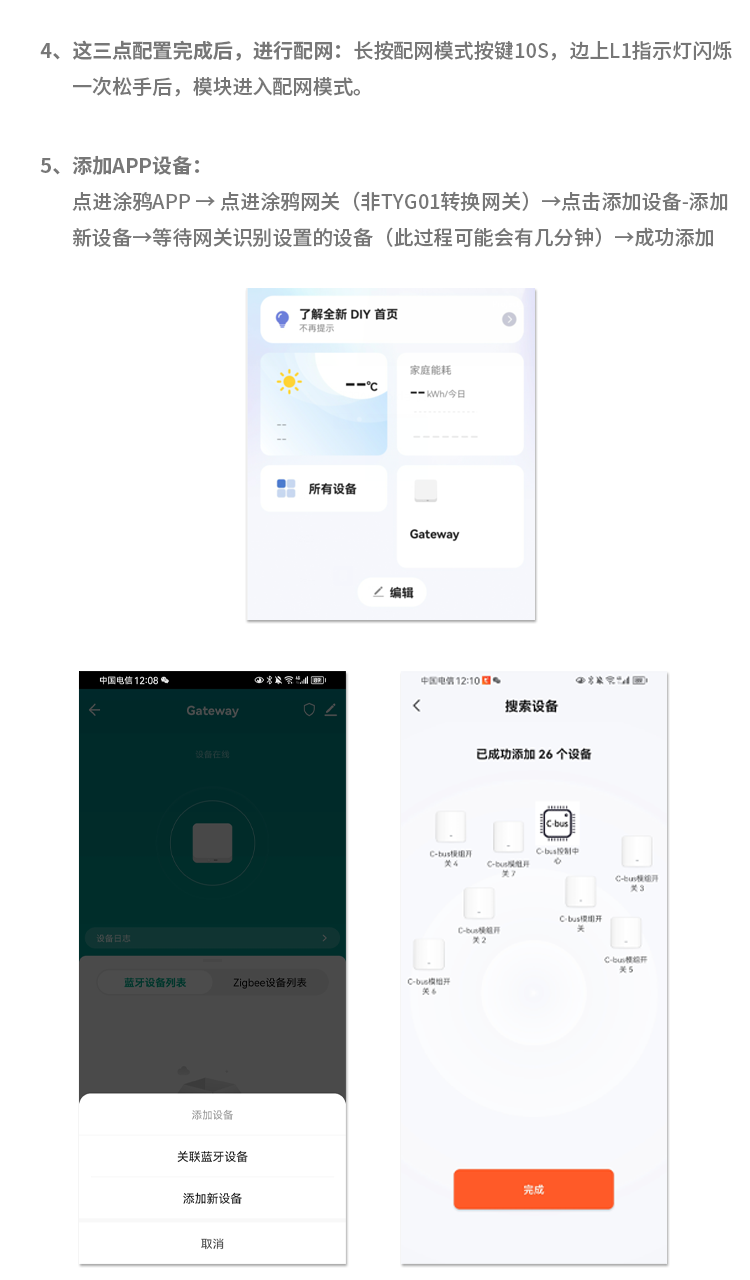
- Press and hold the distribution network mode button for 10 seconds, and the L1 indicator light on the side will flash once. After releasing it, the module enters distribution network mode.
- Click on the Graffiti APP → Click on the Graffiti Gateway (non TYG01 conversion gateway) → Click on Add Device - Add New Device → Wait for the gateway to recognize the set device (this process may take a few minutes) → Successfully add
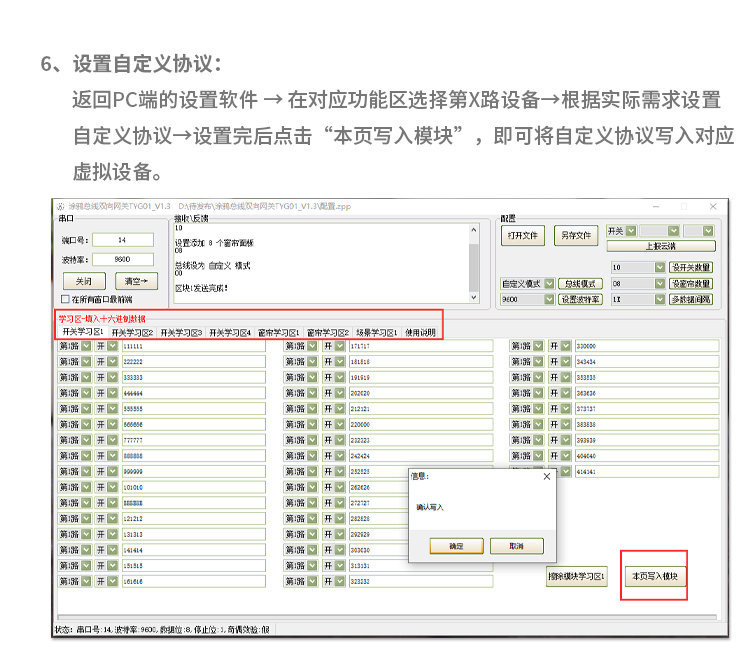
- Return to the settings software on the PC end → select the Xth device in the corresponding function area → set the custom protocol according to actual needs → after setting, click "Write Module on This Page" to write the custom protocol to the corresponding virtual device.
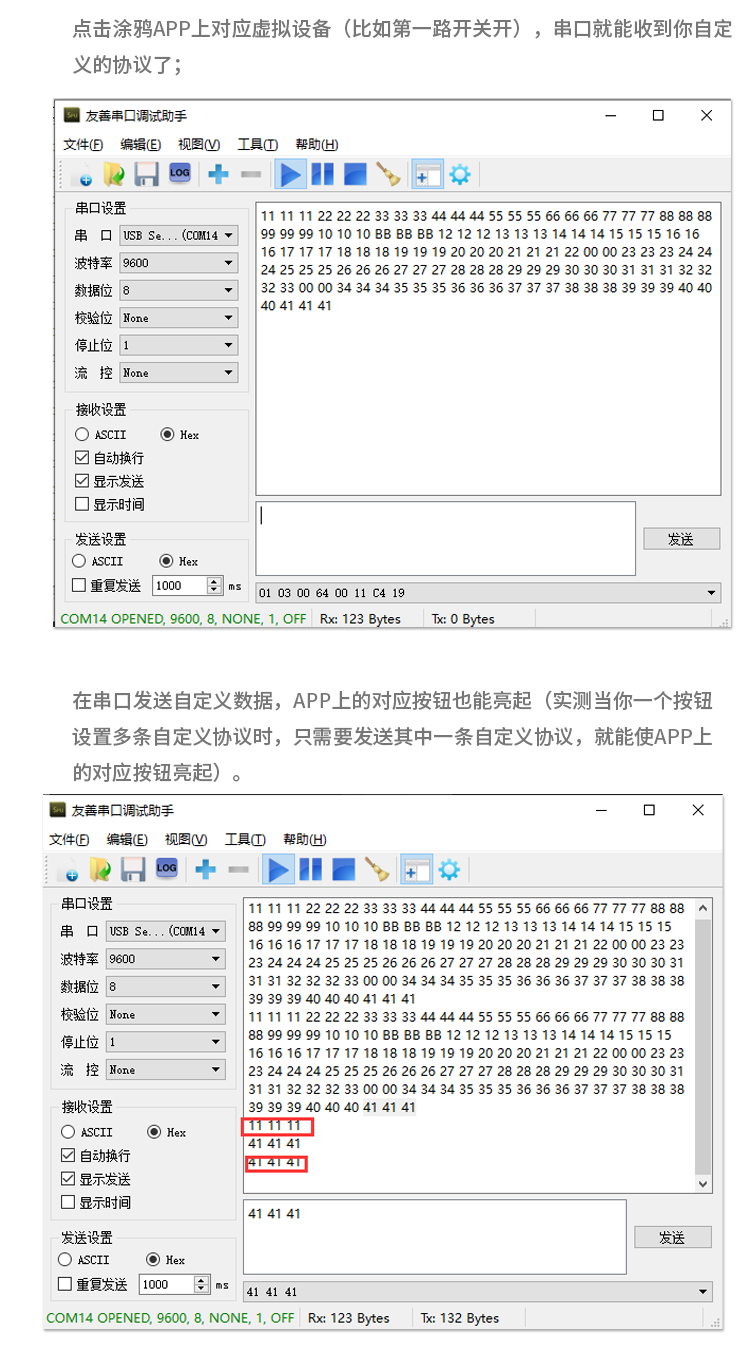
- Click on the corresponding virtual device on the graffiti app (such as turning on the first switch), and the serial port will receive your custom protocol; When sending custom data through the serial port, the corresponding button on the APP can also light up (tested that when a button is set to multiple custom protocols, only sending one of the custom protocols can make the corresponding button on the APP light up).

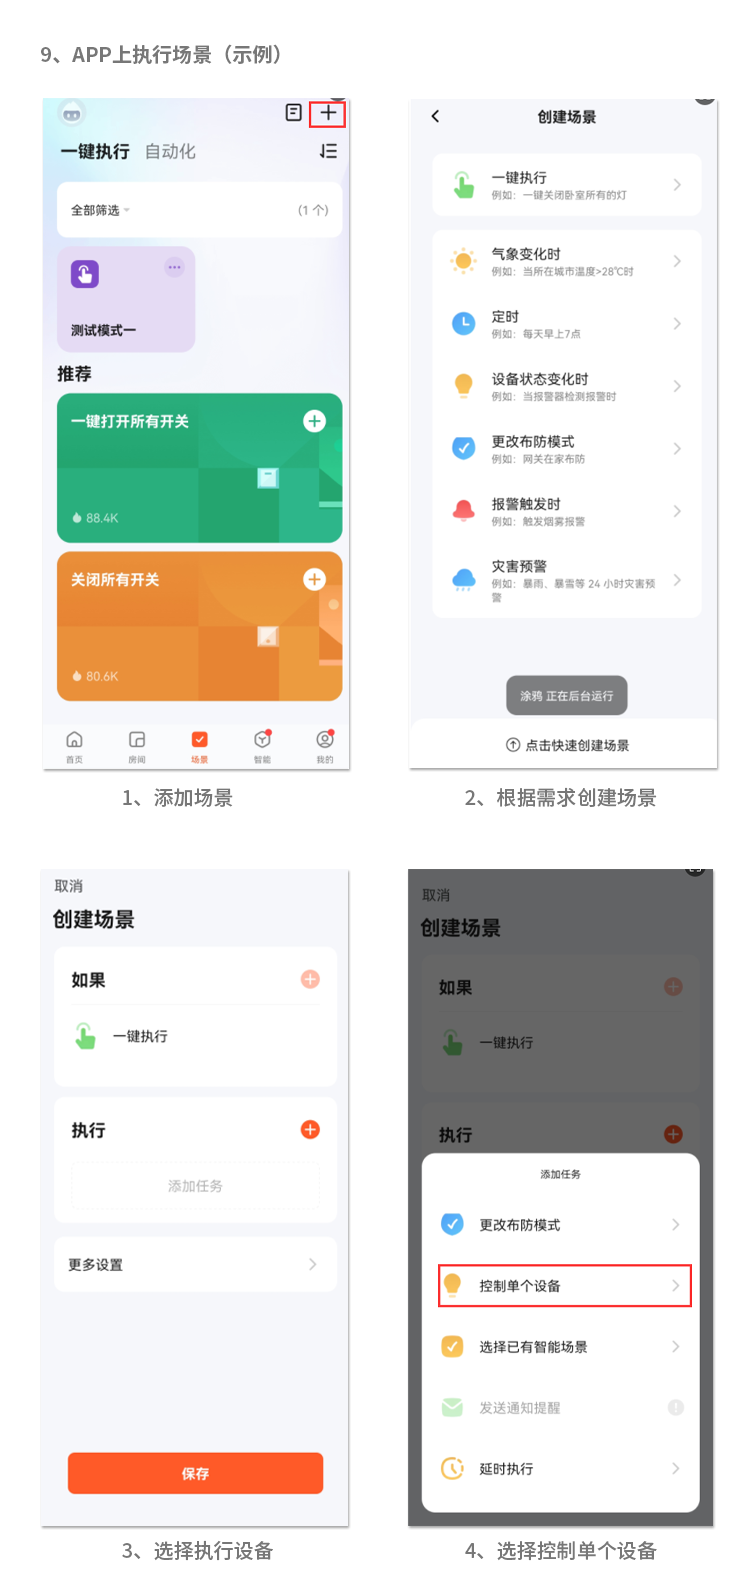
- Execution Scene on APP (Example):
- Add Scene;
- Create scenarios based on requirements;
- Select the execution device;
- Choose to control a single device;
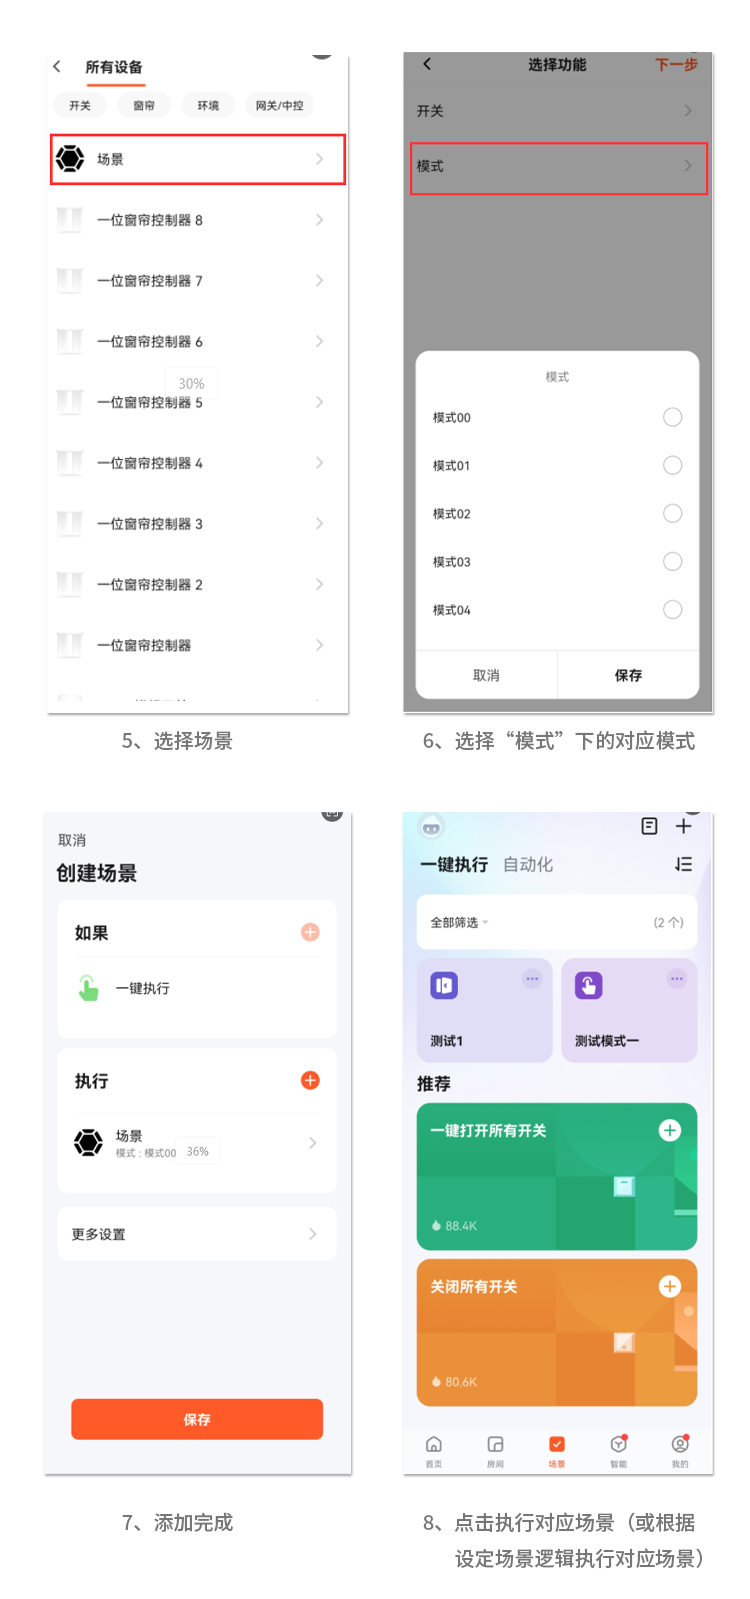
- Select Scene;
- Select the corresponding mode under "Mode";
- Addition completed;
- Click to execute the corresponding scene (or execute the corresponding scene according to the set scene logic
Curtain and scene setting methods are the same.
Customizable data in switch area: 41X4=164
Customizable data in curtain area: 41X2=82
Customizable data in scene learning: 41


Leave a Reply