
1.4 Gauge, Slider, and Progress Bar Controls
This section primarily introduces the common applications of gauge controls, slider controls, and progress bar controls in the Modbus protocol. Simple controls can be bound to variables, which can be associated on the configuration page or bound to variables in [Tools - Protocols and Variables - Logic Processing]
In this section, the screen acts as the master station, reading and writing slave instructions. If the screen acts as the slave station, the application of gauge, slider, and progress bar controls is the same, and reference can be made. This section creates two save registers and two input registers to illustrate the application of gauge controls, slider controls, and progress bars, as shown below
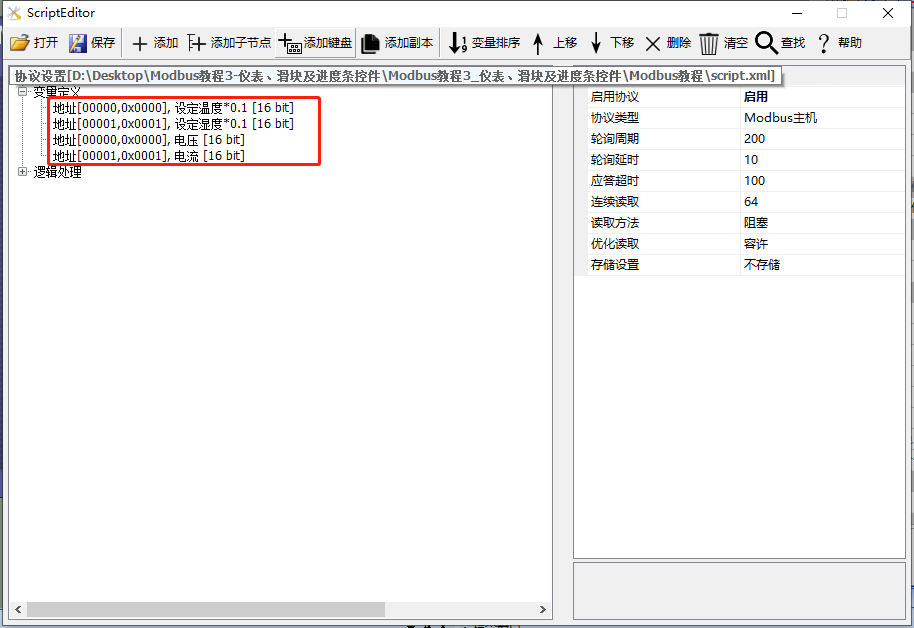
Scope of Application: Full Series
Example Download Link:Modbus Tutorial 3 - Gauge, Slider, and Progress Bar Controls V1.0(Click to Jump)
Protocol Enablement and Variable-Related Descriptions, Reference Link: "Modbus Basic Parameter Description"
1.4.1 Gauge Controls
The [Instrument Controls] screen primarily provides demonstrations on the use of instrument controls. These controls reflect data changes on the user's host device and cater to the user's needs for an instrument interface
Screen/Logic Configuration
Method 1: Logic Processing Binding
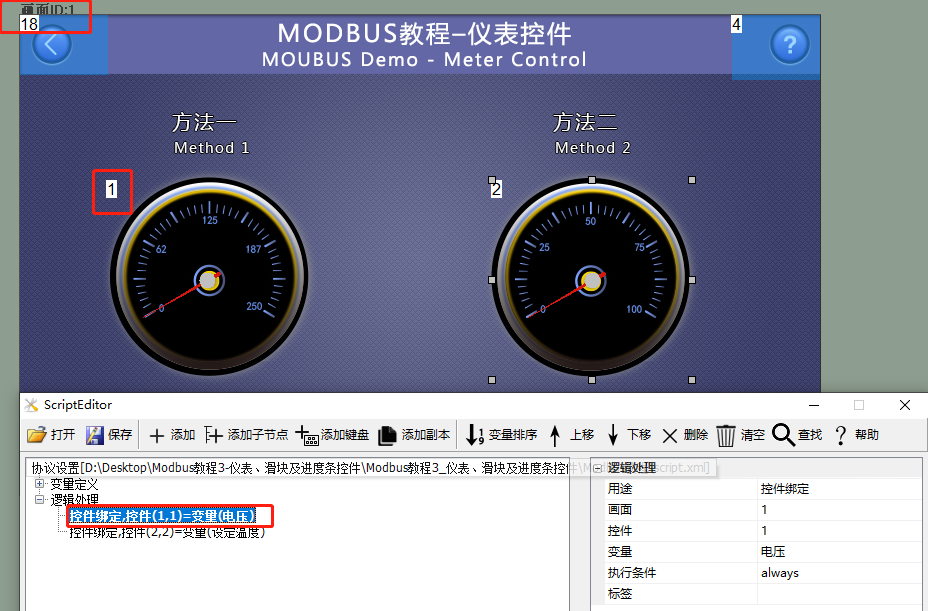
Add a gauge control (Control ID: 1) to the screen to display the voltage value of the slave device. Open "Tools - Protocols and Variables" and add one logic processing
For the purpose of [control binding], fill in the corresponding screen ID1 and gauge control ID1. The bound variable is [voltage], as shown below
Method 2: Configure screen binding
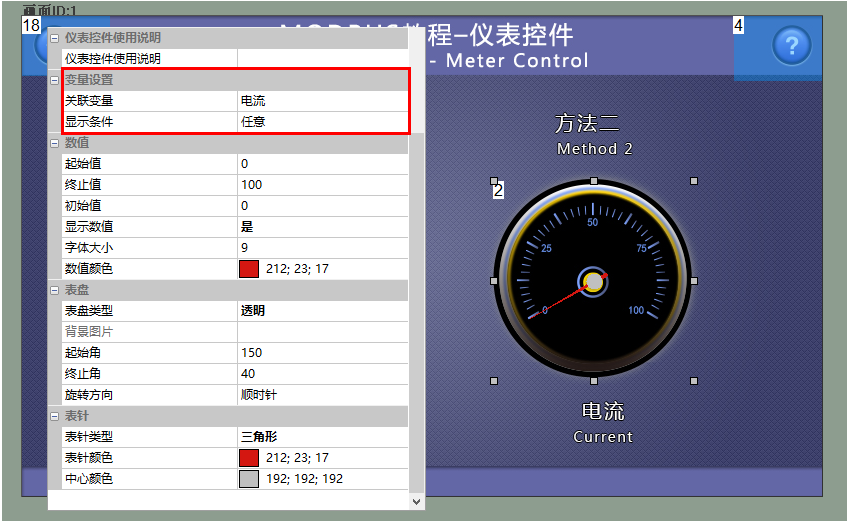
Add a gauge control (Control ID: 2) to the screen to display the current of the slave device. And bind the "Current" variable in its property bar window, as shown below
Run preview
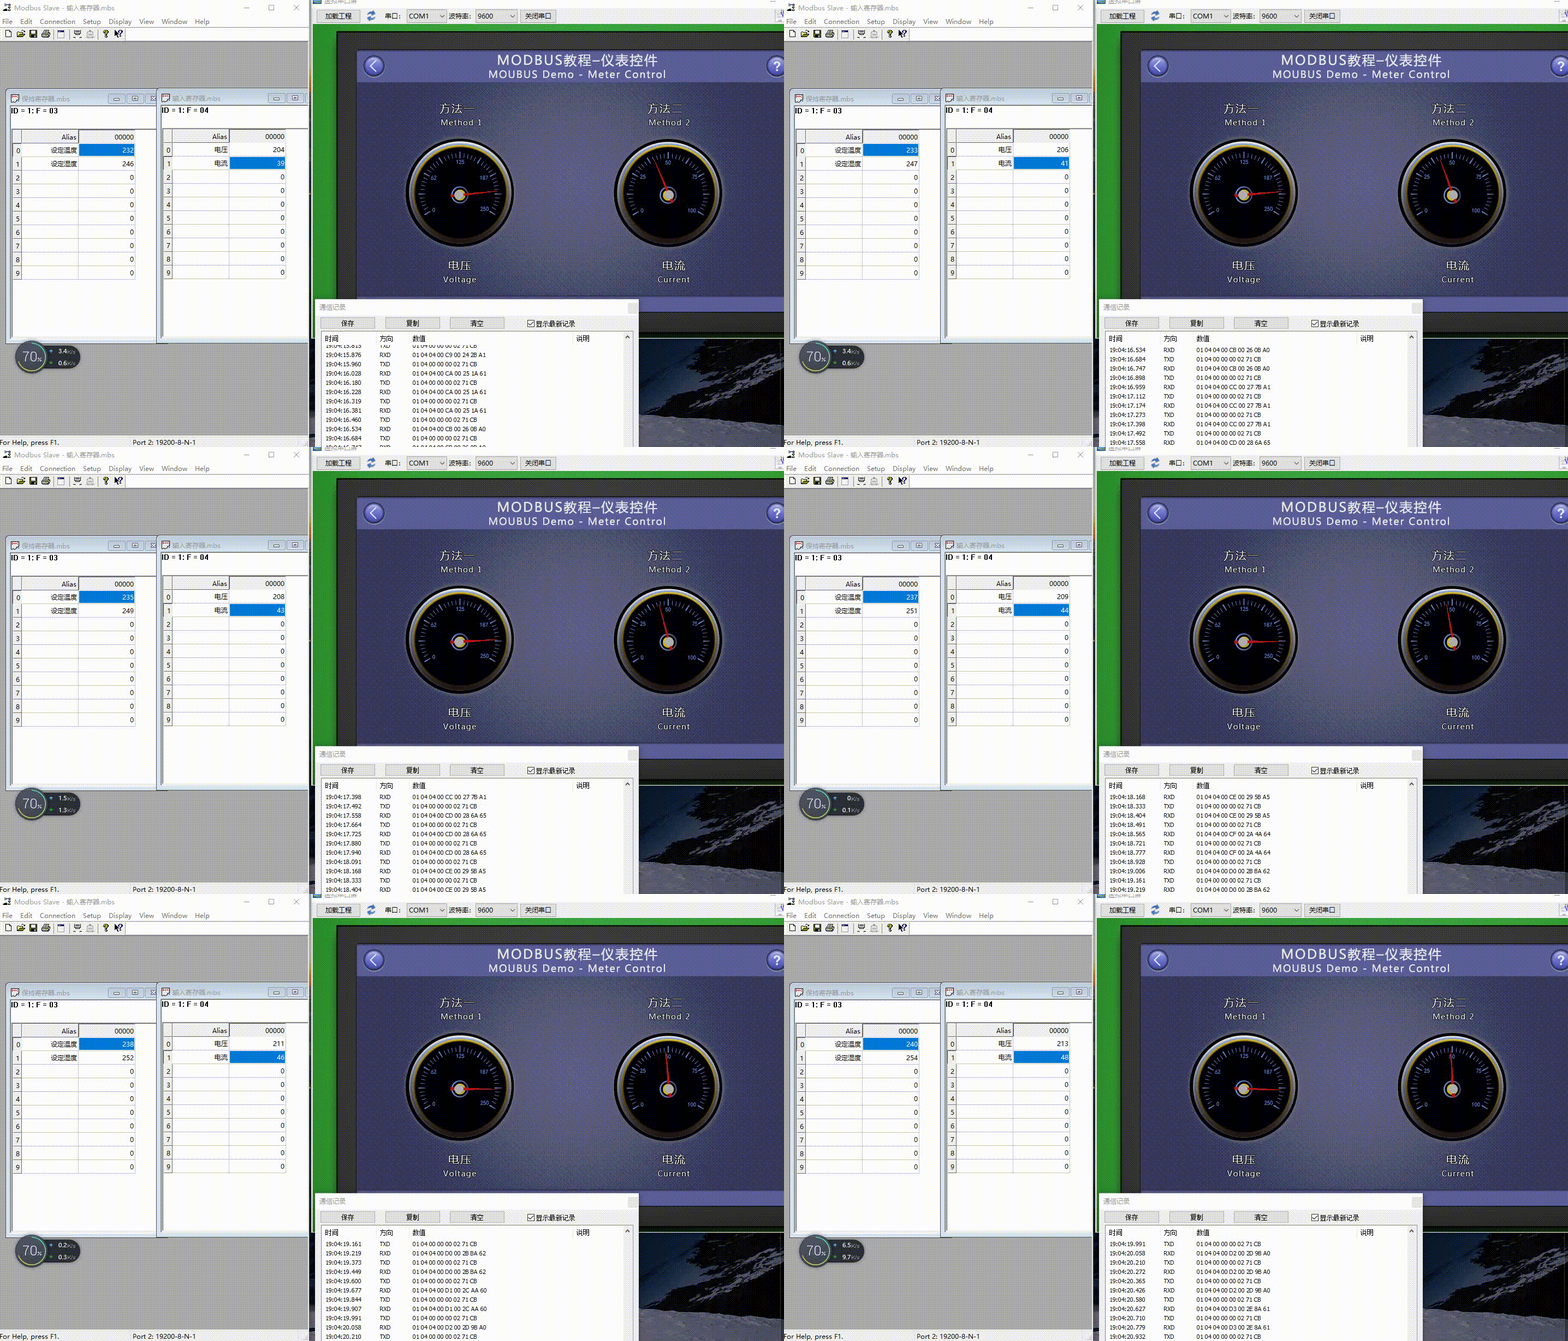
At this point, compile the project and run the virtual serial port screen, connect it with the Modbus Slave software, and the gauge control will display the changes in voltage (Control ID: 1) and current (Control ID: 2) in real time
1.4.2 Slider and Progress Bar Controls
[Progress Bar and Slider Controls] On the screen, the progress bar control and slider control are used together. The notification of the progress bar is associated with the slider, mainly used to display the bound variable value. By dragging the cursor of the slider control, the variable value can be changed
Screen/Logic Configuration
Method 1: Logic Processing Binding
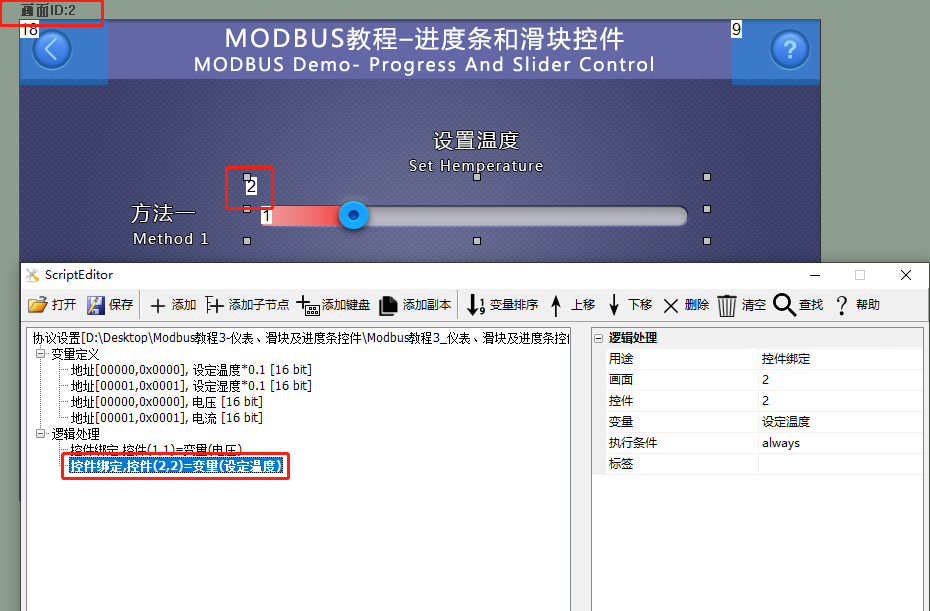
Add a progress bar control (control ID: 1) and a slider control (control ID: 2) to the screen. Add one logic processing in [Protocol and Variable Settings]
For use in [control binding], fill in the corresponding screen ID2 and gauge control ID2. The bound variable is [set temperature], as shown below
Method 2: Configure software binding
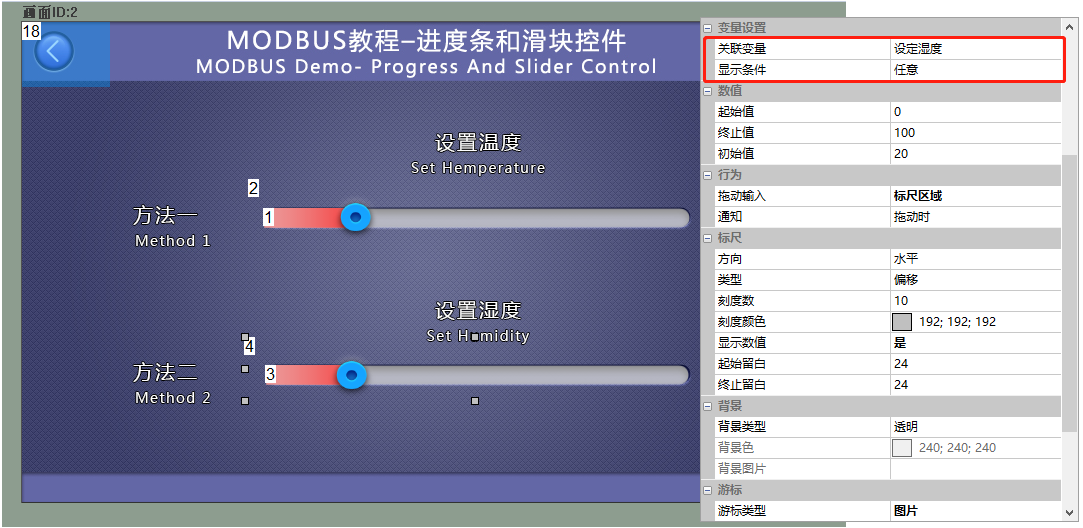
Add a progress bar control (control ID: 3) and a slider control (control ID: 4) to the screen. The slider control is directly bound to "Set Humidity", with the configuration shown below
Run Preview
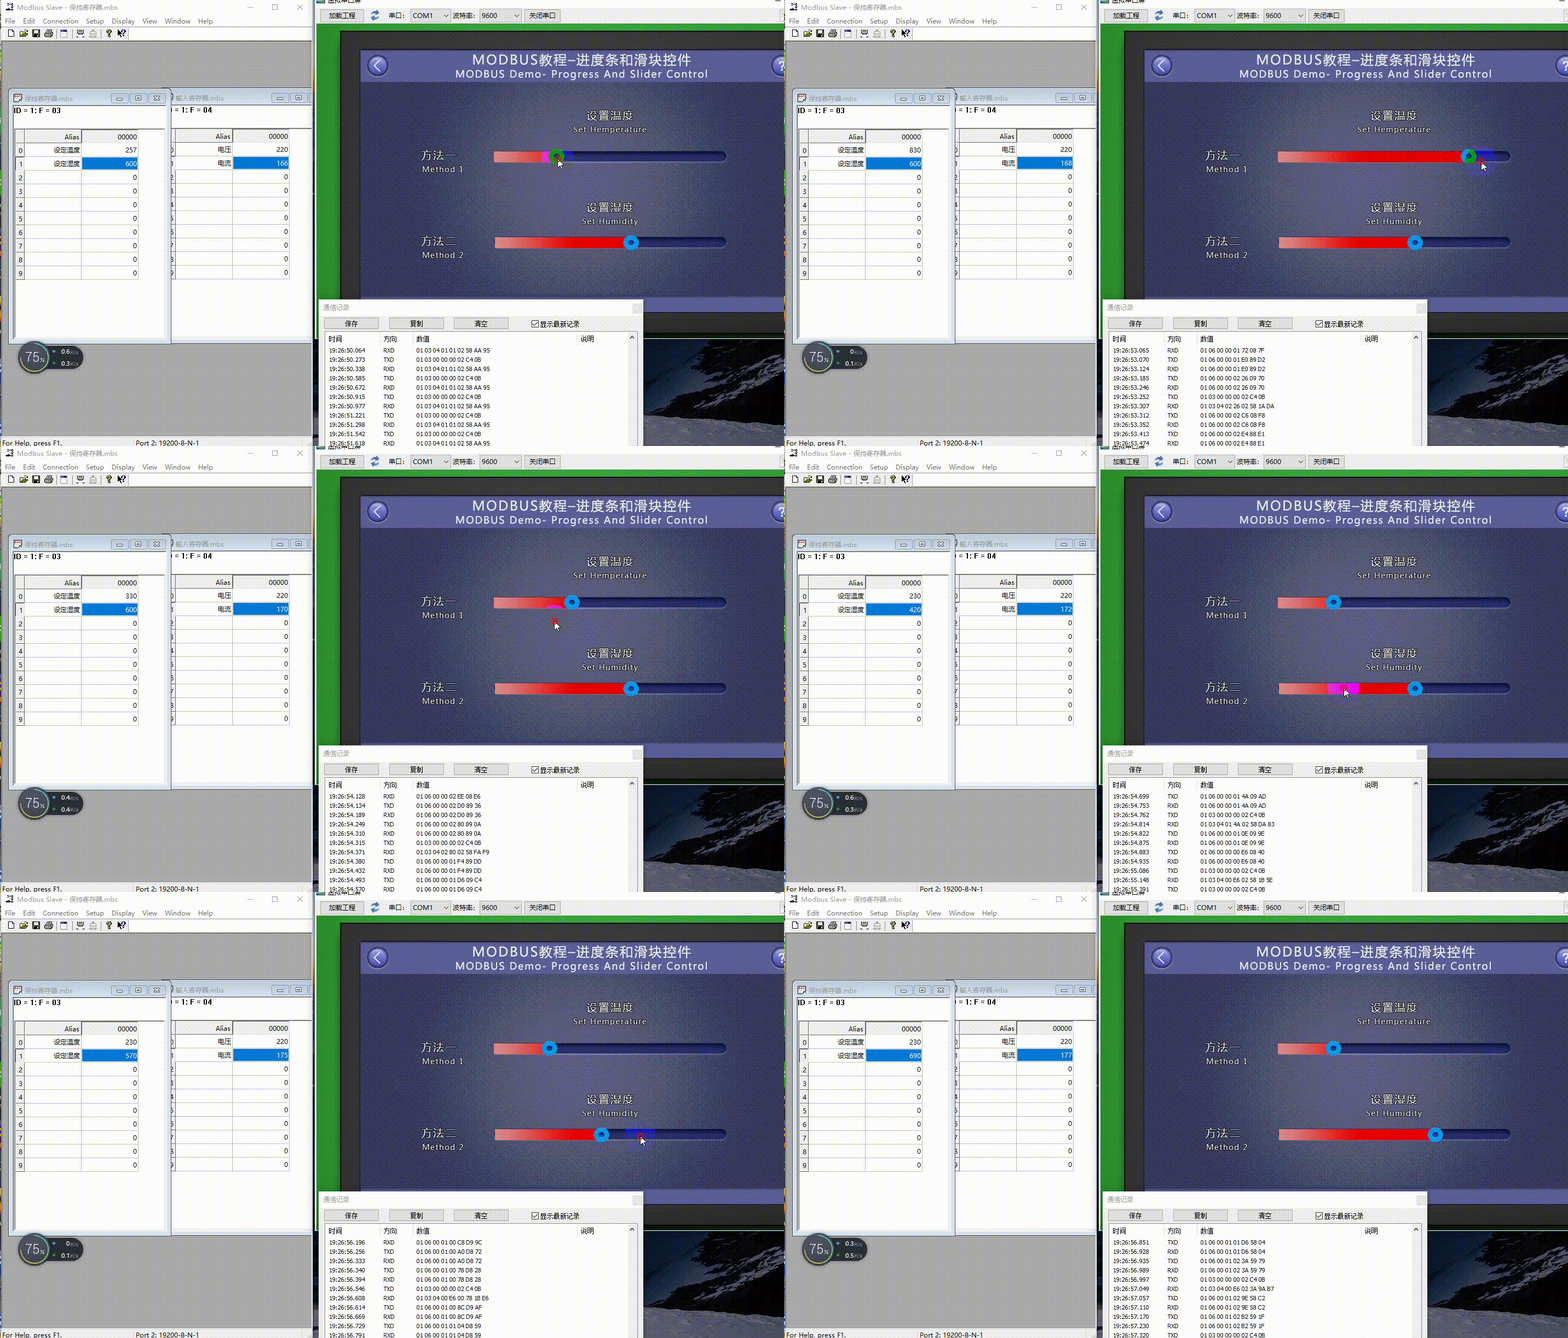
At this point, compile the project and run the virtual serial port screen, connecting it to the Modbus Slave software. When the value of the variable changes, the status displayed by the slider control and progress bar will be updated accordingly; by clicking and dragging the slider control with the mouse, the value of the variable will also change and update accordingly


Leave a Reply