
When using the Siemens S7-200, the Weinview touch screen can communicate directly with the S7-200 using the PPI protocol without the addition of other communication interface modules. However, due to limitations inherent in the communication protocol, the communication speed is relatively slow when there is a large amount of communication data. Using the Modbus protocol can increase the communication speed by approximately 100%. Below is an introduction to how to establish communication between the S7-200 and the Weinview touch screen using the Modbus protocol:
Hardware Connection
When using the Modbus protocol, direct communication between the computer and the S7-200 can be achieved using a PPI communication cable.
Select a touch screen communication port
Here, we use the MT6070IH2 and S7-200 for communication
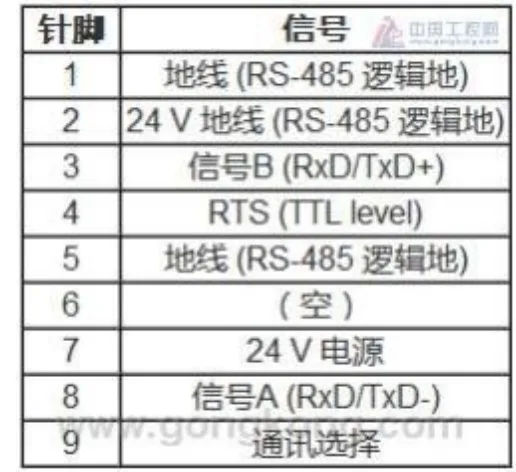
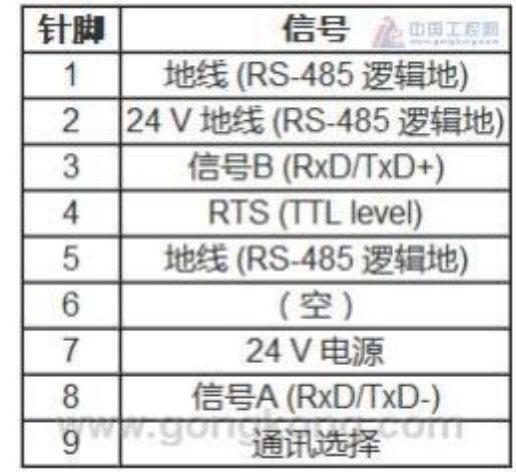
The communication port of the S7-200 is a 9-pin (famel) D-type plug, with the pin distribution shown below:
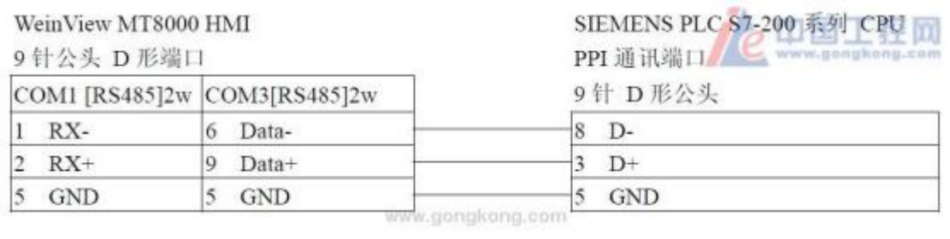
The communication connection between the S7-200 communication port (Port 0) and the Weinview touch screen is shown in the figure below:
S7-200 Programming and Settings
By default, the communication port of the S7-200 does not support the Modbus protocol. To enable Modbus communication, it is necessary to call the Modbus communication subroutine in the main program module of the PLC. The Modbus communication subroutine can be obtained from the "STEP 7-Micro/WIN Add-On: Instruction Library". After installing the "STEP 7-Micro/WIN Add-On: Instruction Library", we can find "Modbus Protocol" under the "Instructions/Libraries" section in the navigation tree. It includes two subroutines, MBUS_INIT and MBUS_SLAVE
, where MBUS_INIT is used to initialize Modbus communication, and MBUS_SLAVE is used to provide Modbus slave communication services on a specified port.
Call Modbus communication initialization command
First, establish a trigger condition (triggered only once) for the MBUS_INIT command, such as SM0.1. From the navigation tree under "Commands/Libraries/Modbus Protocol", drag the MBUS_INIT command to the main program block. Then, correctly set the various calling parameters of MBUS_INIT and the output address for the execution result. We can establish the initialization calling process as shown in the figure below:
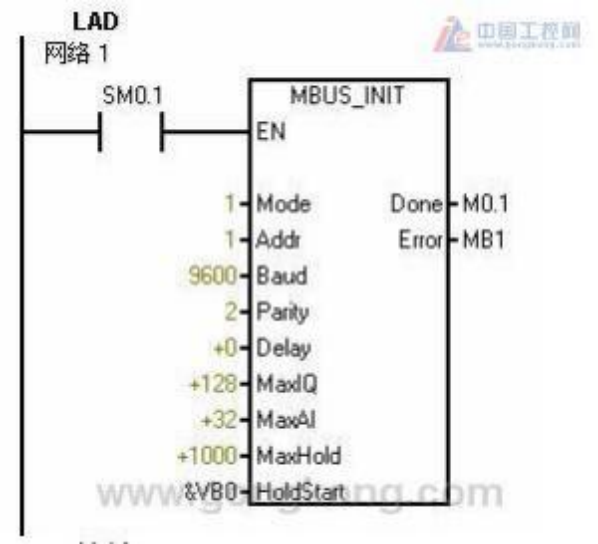
Mode: Protocol type, 1-Modbus protocol; 0-PPI protocol.
Addr: PLC address, 1~247.
Baud: Communication baud rate, 1200, 2400, 4800, 9600, 19200, 38400, 57600, or 11520.
Parity: Parity check, 0-no parity; 1-odd parity; 2-even parity.
Delay: Message end timeout, 0~32767. For wired connections, set to 0.
MaxIQ: 0~128, mapped to I or Q number in discrete input register or discrete output register. Recommended value: 128.
MaxAI: 0~32; mapped to AIW number in analog input register; 0 for CPU 221, 16 for CPU 222, and 32 for CPU 224, 226, and 226XM.
MaxHold: Number of registers mapped in the hold register.
HoldStart: Starting address for V memory mapping.
Done: Output is on when initialization is complete; binary (Bit).
Error: Initialization error code. Please refer to Modbus slave protocol for execution error codes; output is in bytes. After initialization is complete, you can call the Modbus slave communication command (MBUS_SLAVE). Typically, the Modbus slave communication command is executed in every execution cycle of the main program block (maintaining a communication state at all times), as a normally open quantity can be used as the trigger condition for the command,
such as SM0.0.
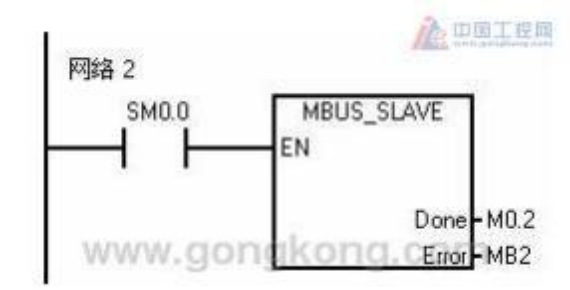
Done: When the MBUS_SLAVE command responds to a Modbus request, "Done" is in the on state. When there is no communication request, "Done" is in the off state.
Error: Command execution result. This status is only valid when "Done" is in the on state. Please refer to the Modbus slave protocol for execution error codes; the output is in bytes.
System settings for the touch screen EB8000 software
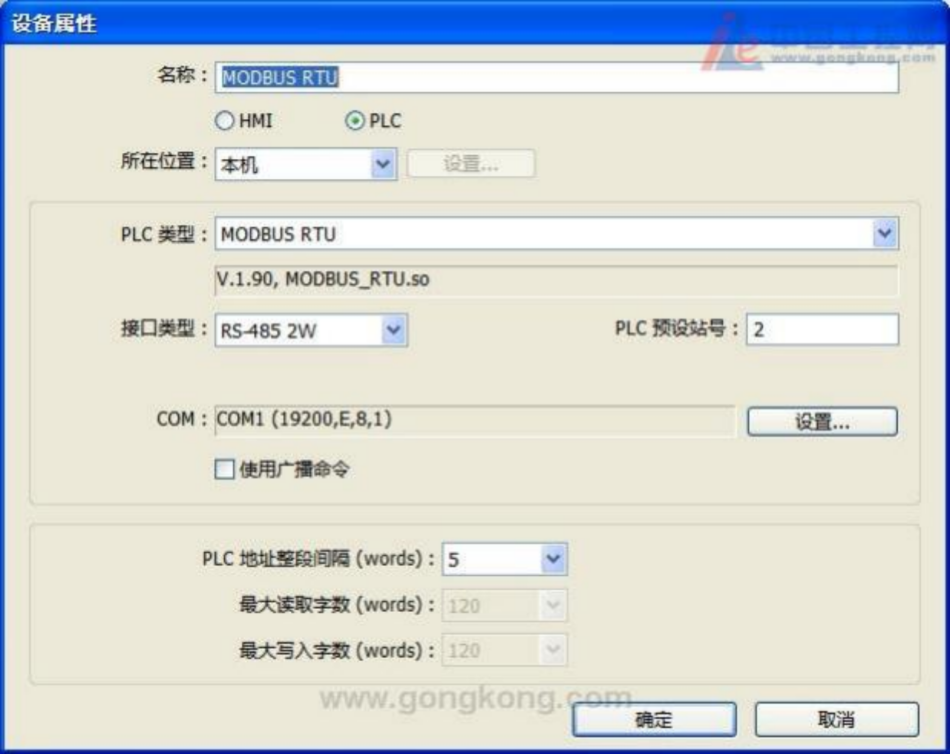
Select MODBUS RTU in system parameter settings
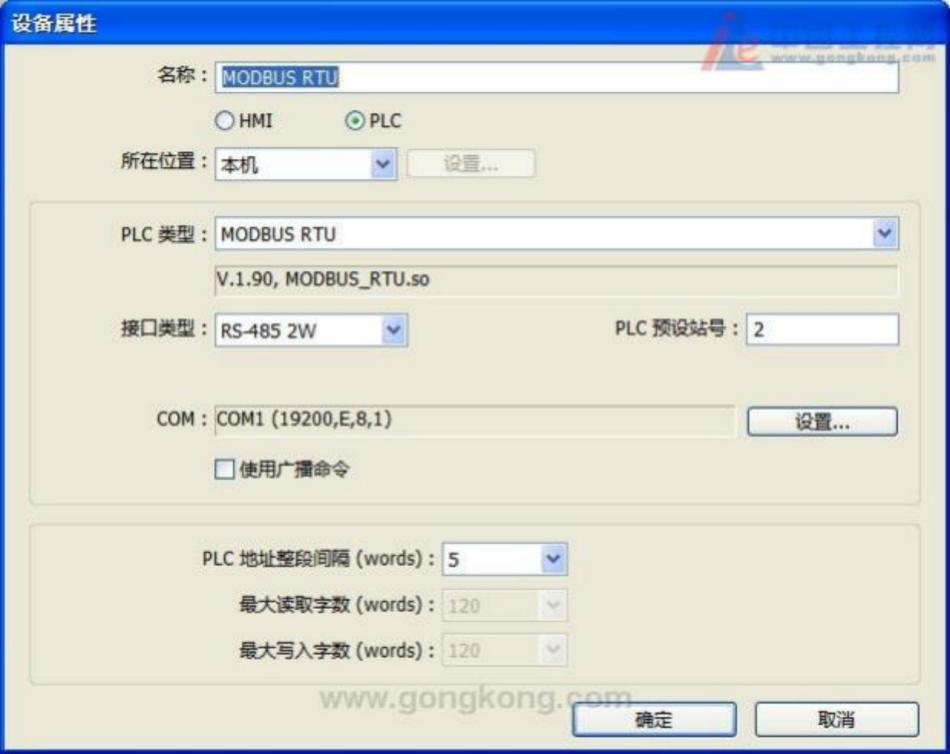
Communication parameter settings
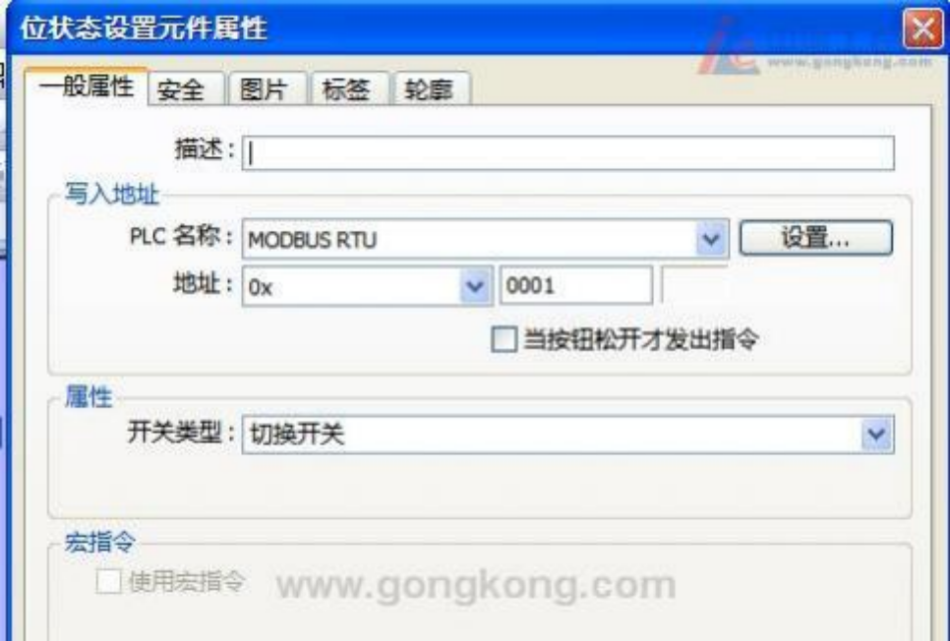
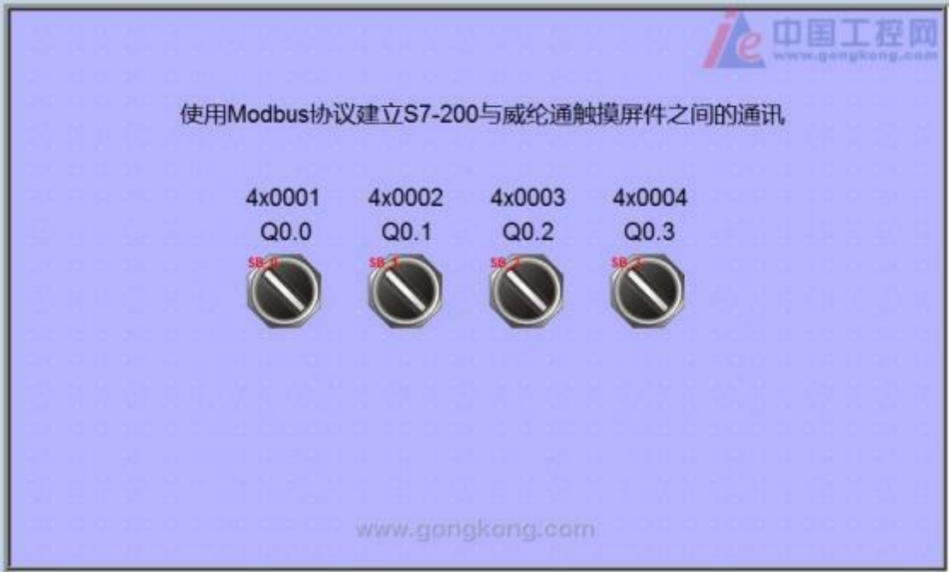
A set bit status switch
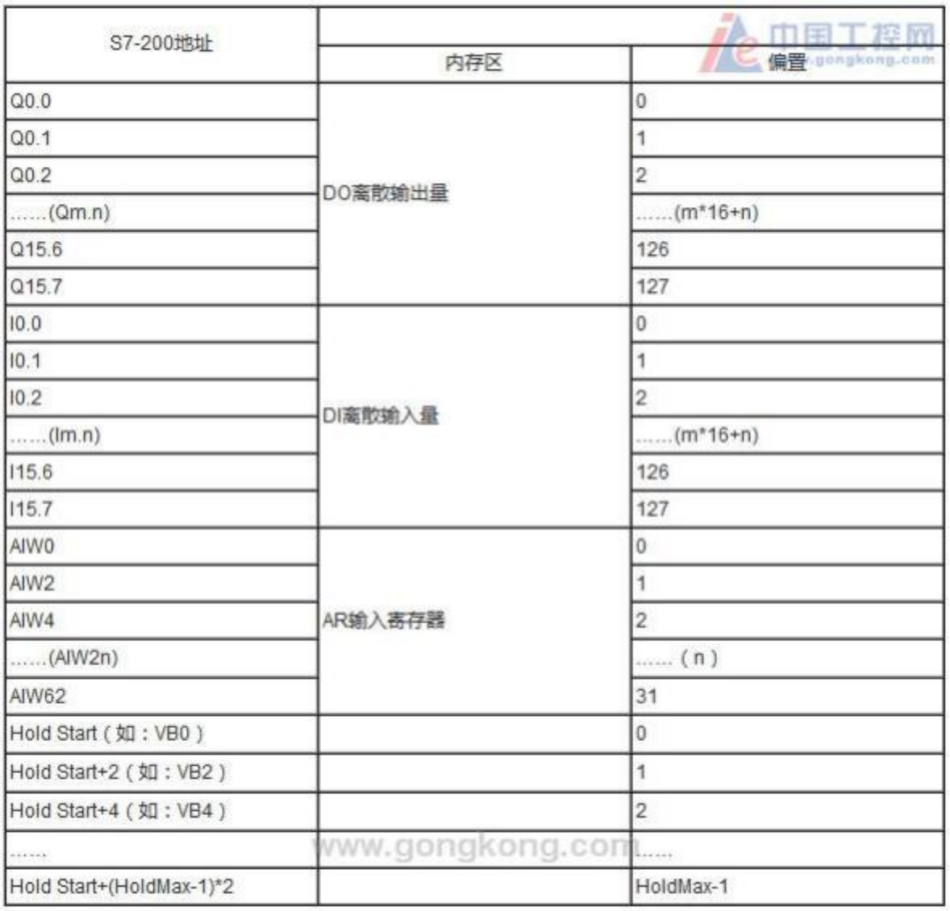
Correspondence between MODBUS RTU and s7-200 addresses
Note: STEP 7-Micro/WIN accessories: Where can I download the instruction library? Versions later than sp5 come with the instruction library. However, if it is the first time you install STEP 7-Micro/WIN, the instruction library will not appear.
You can download the Toolbox_V32-STEP 7-Micro WIN 32 Instruction Library. Install this small software, and the instruction library will appear in the STEP 7-Micro/WIN command tree


Leave a Reply