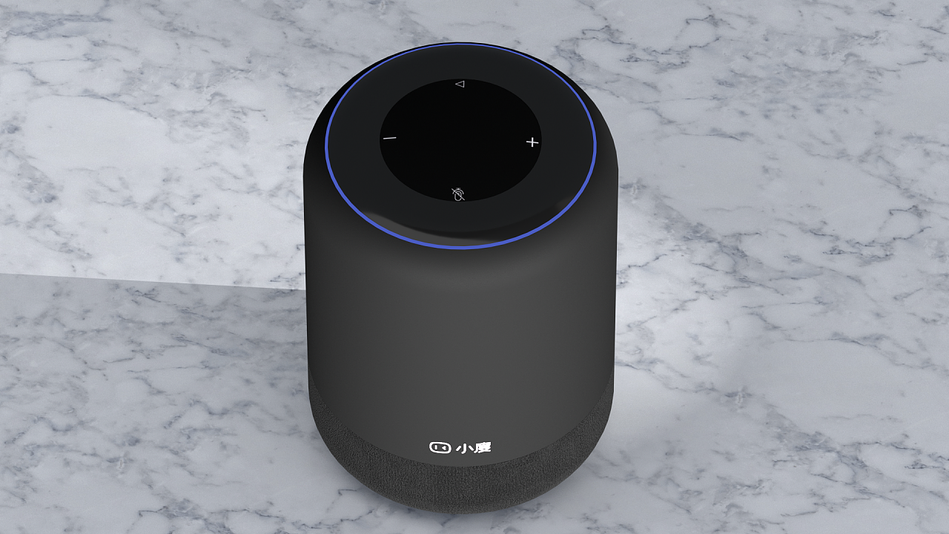
如何利用小度音响控制Modbusdevice?

freeFree Technical Resource

This content is free to read, suitable for basic learning and search traffic.

如何利用小度音响控制Modbusdevice?

第一步:注册账号

https://iot.modbus.cn

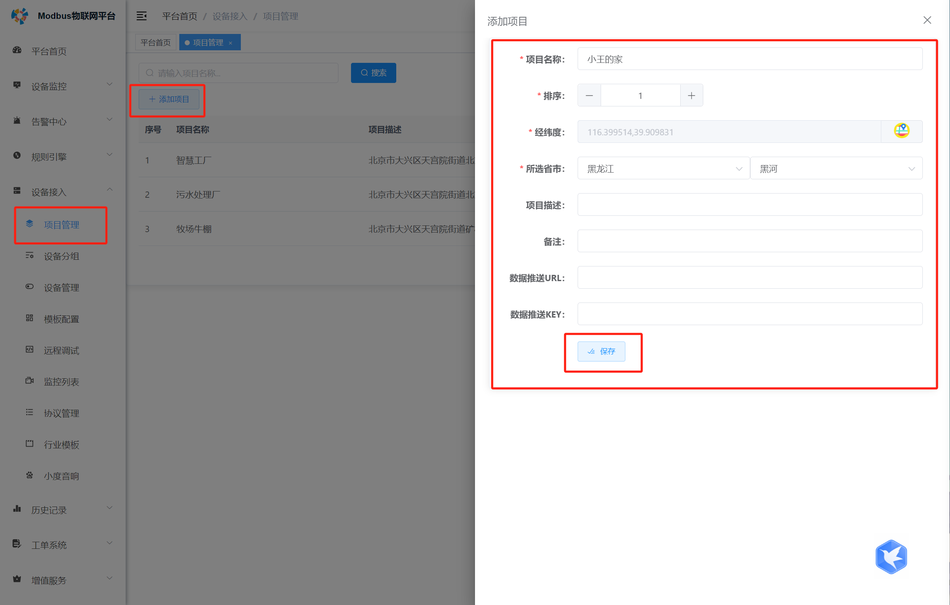
第二步:创建项目

如何利用小度音响控制Modbusdevice?Figure

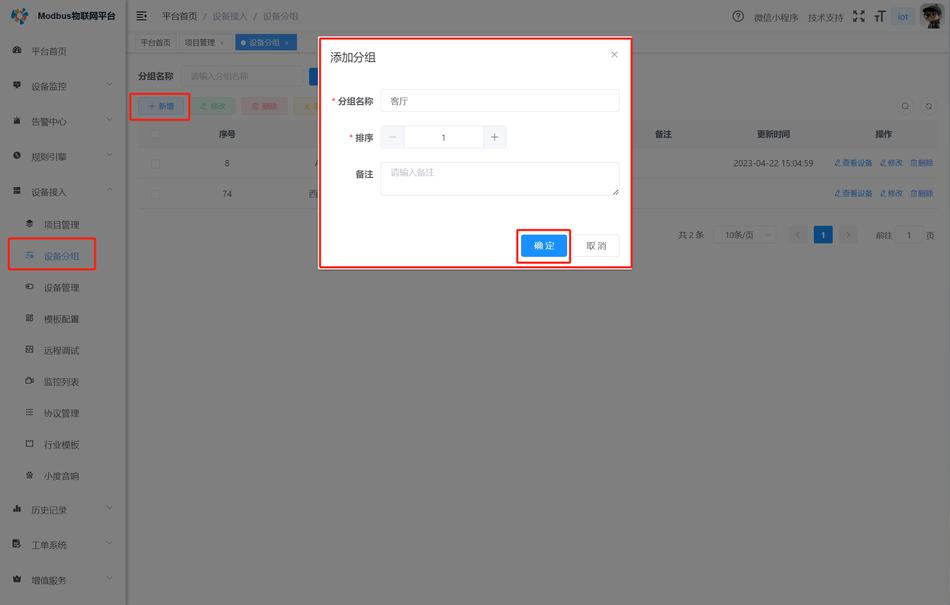
第三步:创建分组

如何利用小度音响控制Modbusdevice?Figure1

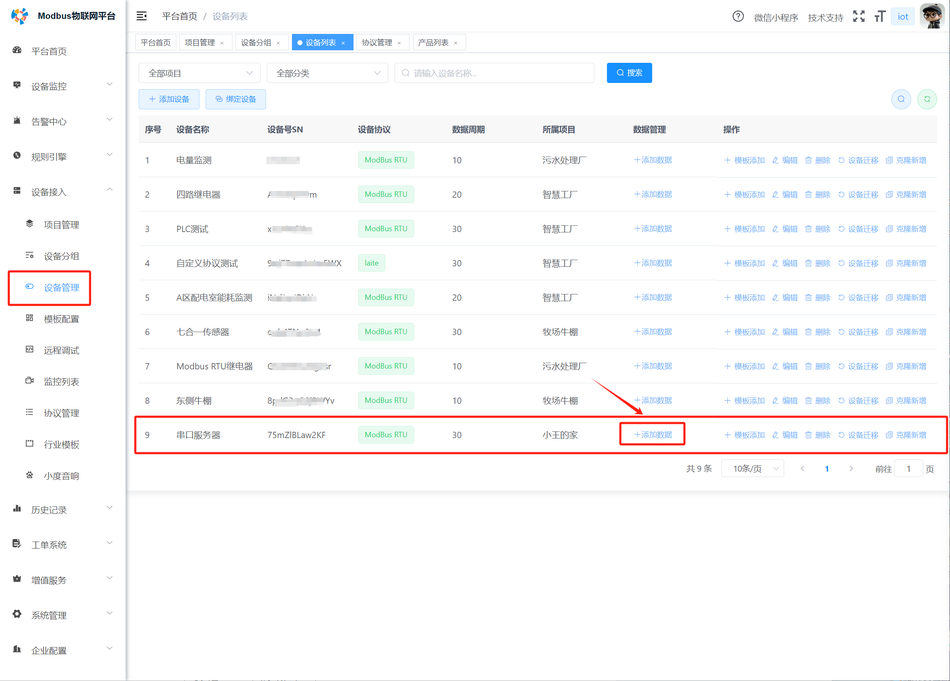
第四步:Create device

如何利用小度音响控制Modbusdevice?Figure2

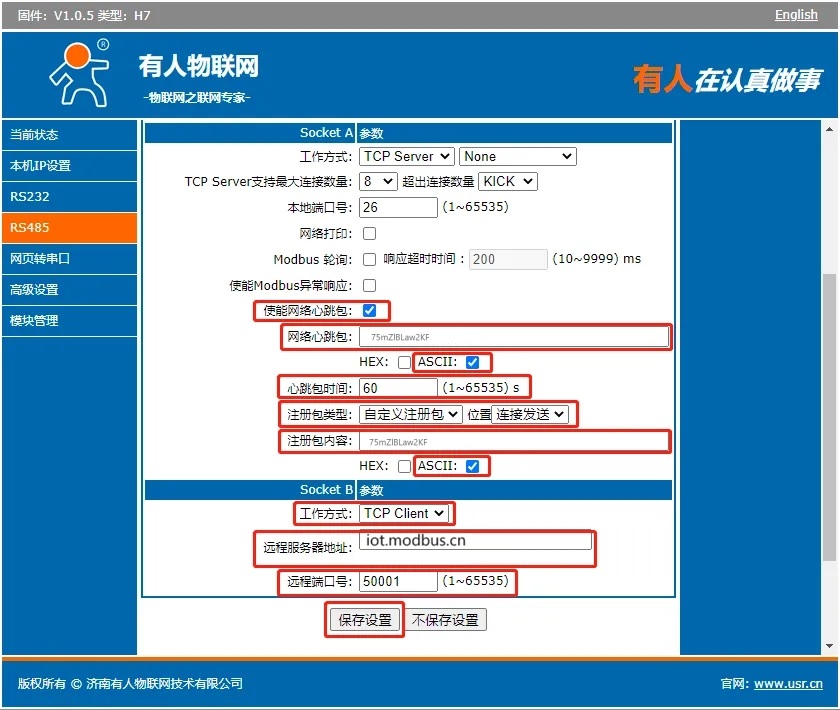
注意:设备号即是心跳包,也是注册包

第五步:시리얼 서버/4G DTU配置

下面以有人的串口服务器为例演示

  • 工作模式:TCP Client
  • 远程服务器地址:iot.modbus.cn
  • 远程端口号:50001
  • 保存设置(保存)
    如下图:
如何利用小度音响控制Modbusdevice?Figure3

保存设置后,重启设备!

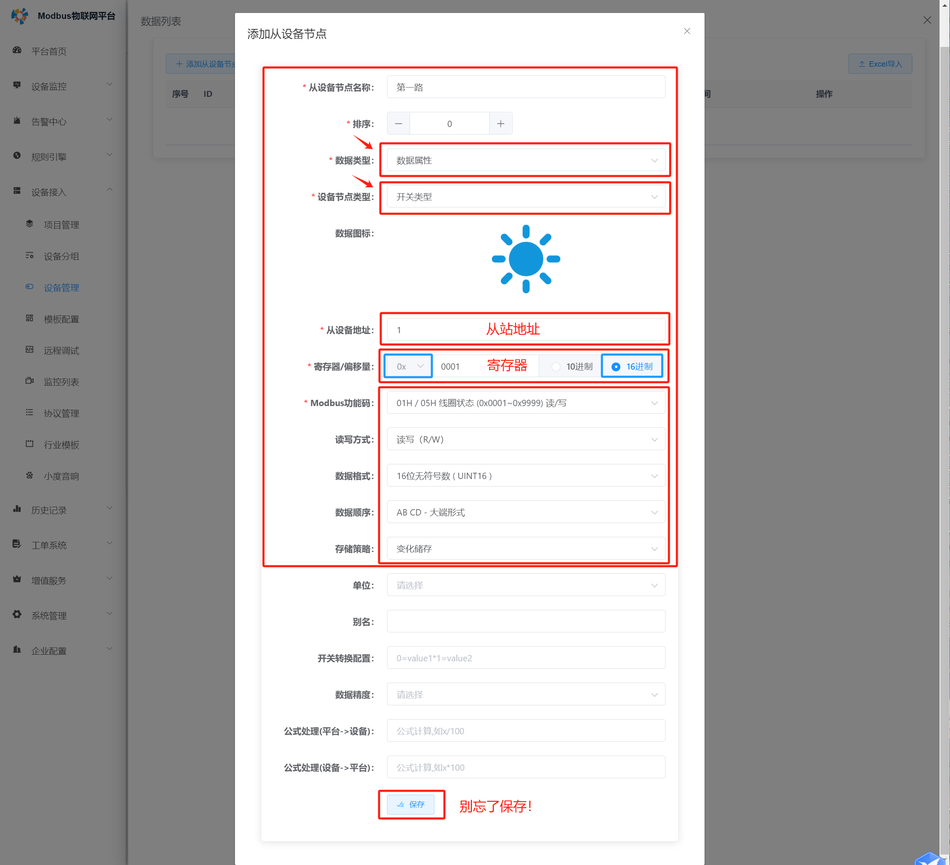
第六步:Add 레지스터

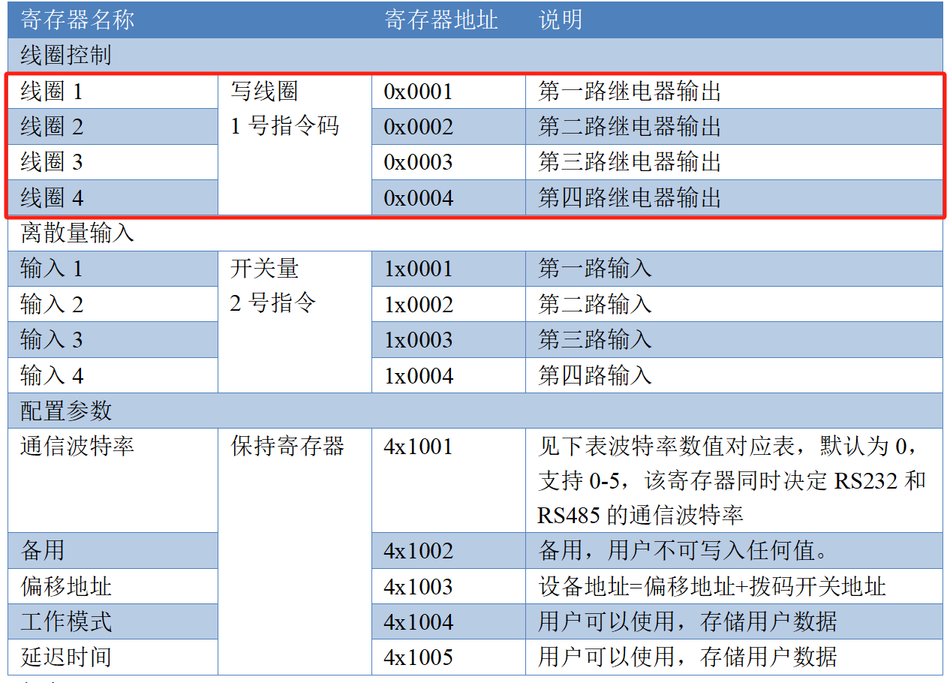
下面以聚英电子的4路继电器为例演示:
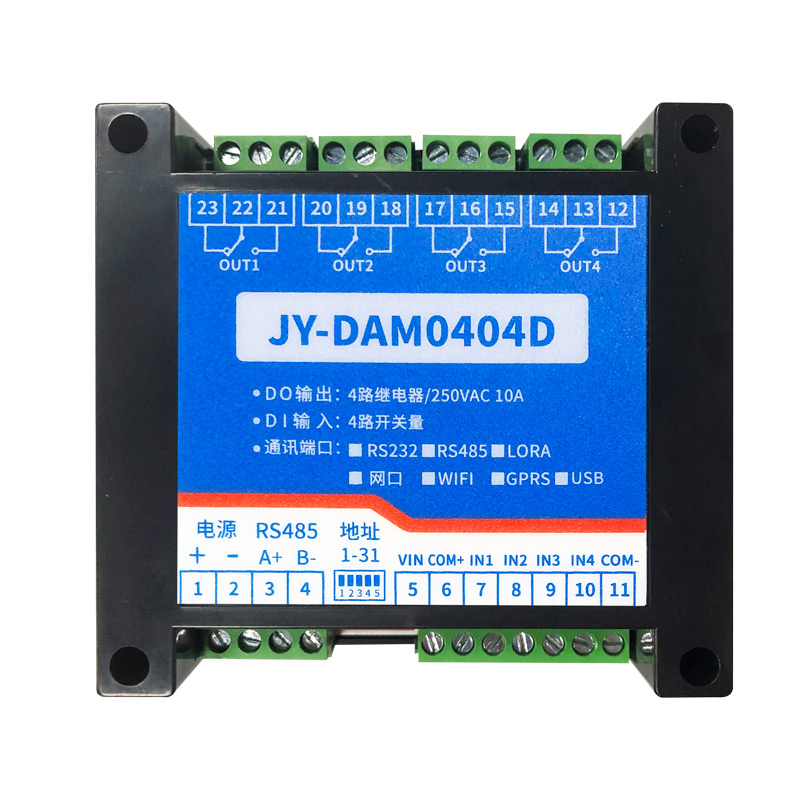
如何利用小度音响控制Modbusdevice?Figure4
如何利用小度音响控制Modbusdevice?Figure5

Add 데이터

如何利用小度音响控制Modbusdevice?Figure6

Add 레지스터

如何利用小度音响控制Modbusdevice?Figure7

以此类推,添加另外几个寄存器!

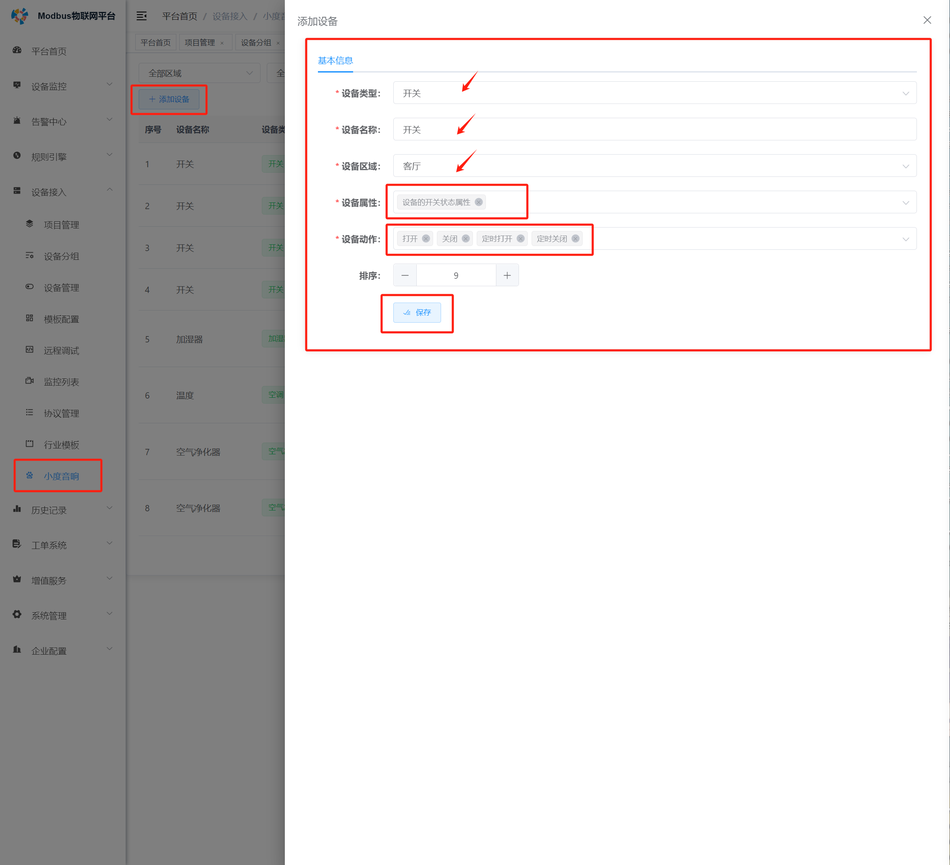
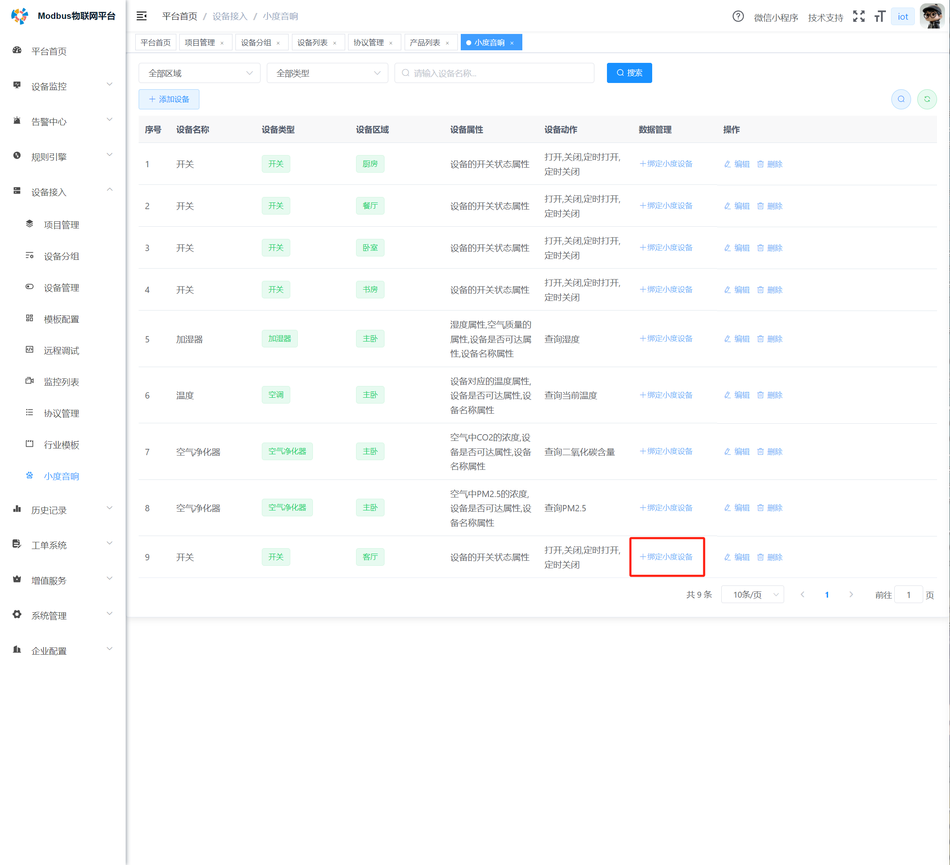
第七步:小度绑定寄存器

如何利用小度音响控制Modbusdevice?Figure8

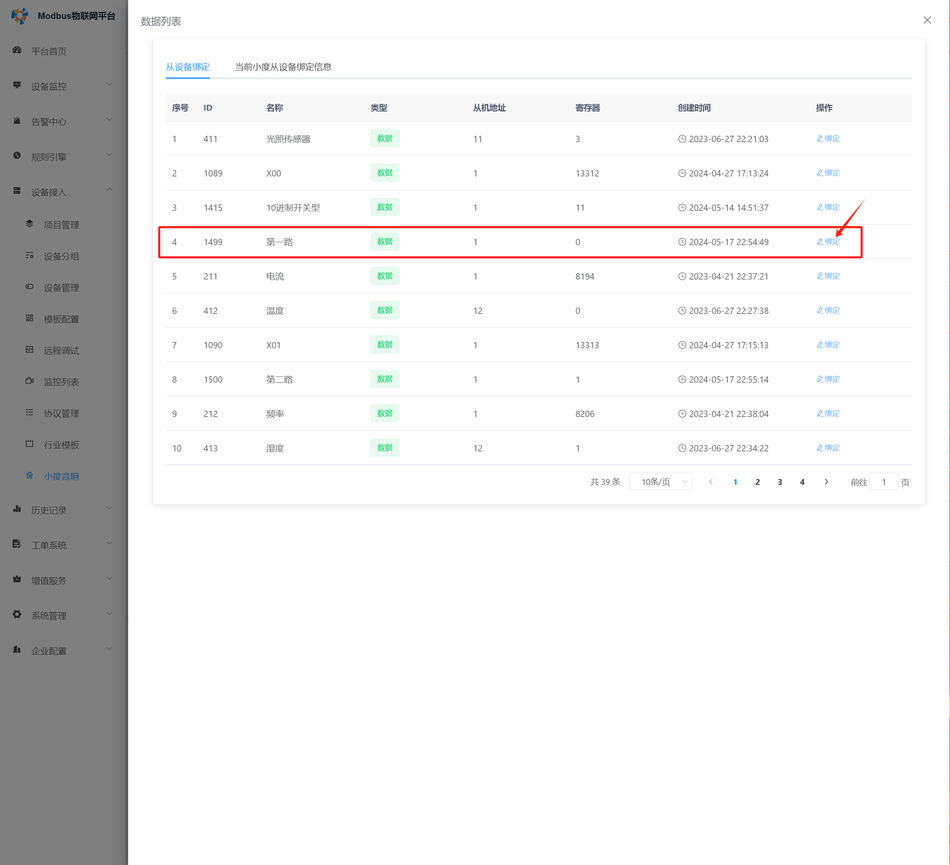
绑定寄存器

如何利用小度音响控制Modbusdevice?Figure9
如何利用小度音响控制Modbusdevice?Figure10

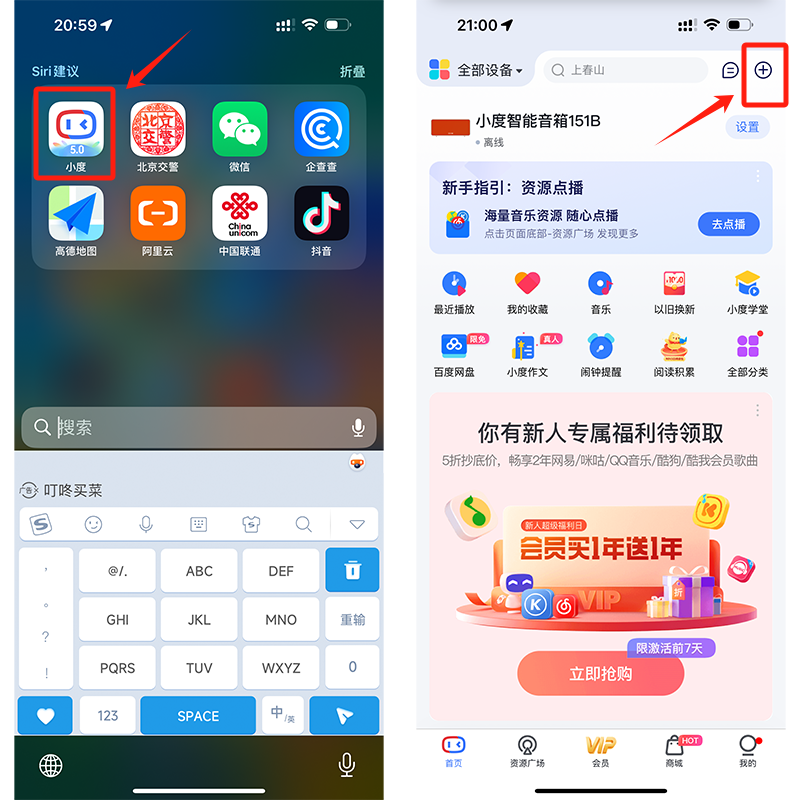
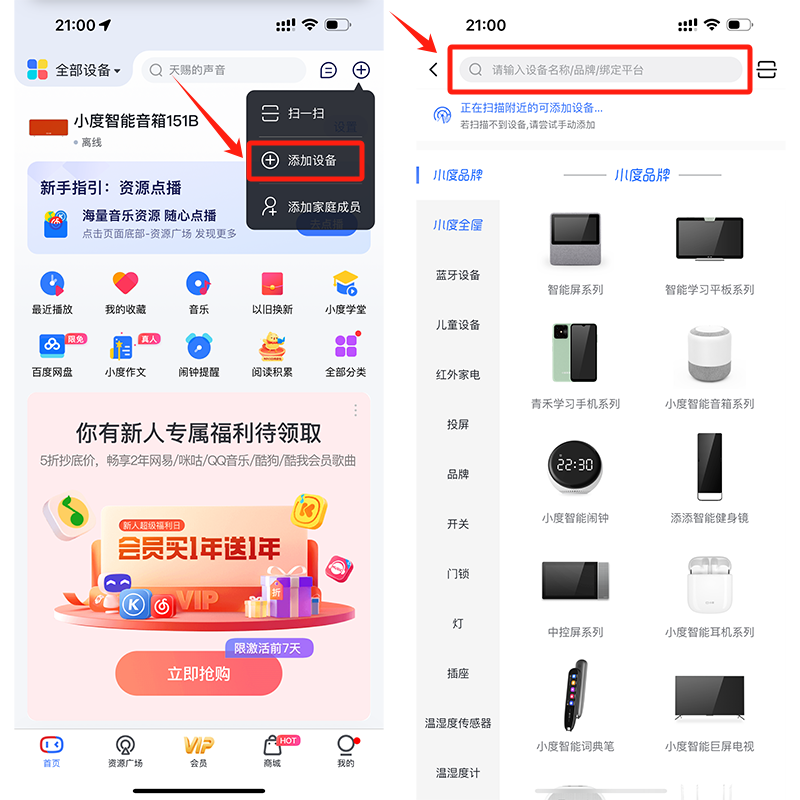
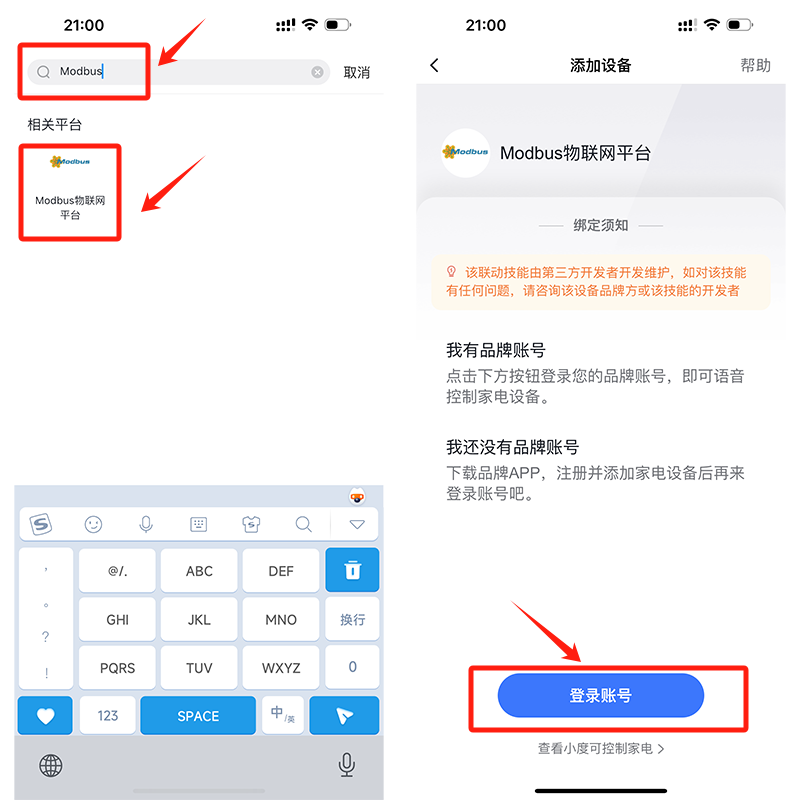
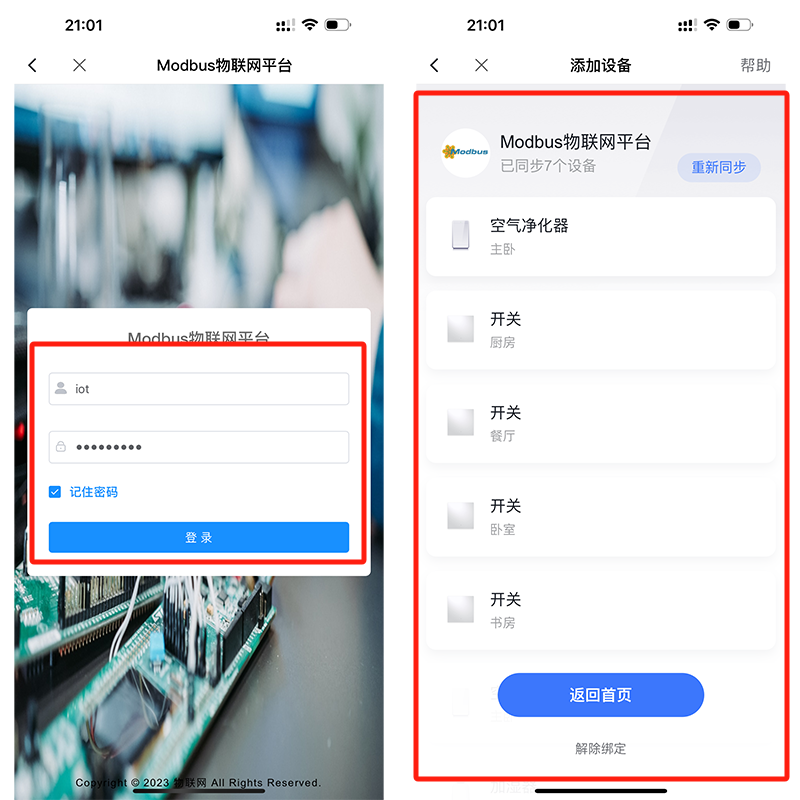
第八步:用小度音响连接Modbus 物联网平台

如何利用小度音响控制Modbusdevice?Figure11
如何利用小度音响控制Modbusdevice?Figure12
如何利用小度音响控制Modbusdevice?Figure13
如何利用小度音响控制Modbusdevice?Figure14
如何利用小度音响控制Modbusdevice?Figure15

现在用小度音响控制modbus设备试试吧!

Put this resource to use in a real project?

Go to the Tool Center for message parsing, CRC 검증 and device debugging, or submit your requirements for selection and integration advice.

Engineer Membership

Turn this article into actionable debugging resources

After activation, you can use advanced message parsing, resource pack downloads, code examples, engineering cases and priority technical support, suitable for real project delivery.

Unlimited Advanced Tools
Resource & Code Packs
Complete Engineering Case Library
Priority Technical Support

《“如何利用小度音响控制Modbusdevice?”》 有 1 条评论

Leave a Reply

Your email 주소 will not be published. Required fields are marked *.